
Good morning
Today I am sharing three cards I made with the beautiful
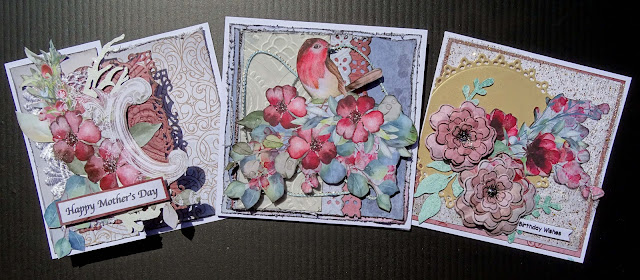
The first card is a Z fold card

I create all of my own card bases using 300gsm smooth white cardstock.
For the first card I cut a piece of cardstock 10 1/2" x 5 1/4"
I scored it at 2 5/8" and 5 1/4"
The card is folded in half on the 5 1/4" score and the fold at the 2 5/8" score is a valley fold.
All of the patterned paper on this card have had the edges distressed
with my distressing tool and inked with a black Versacolor Ink cube.
I cut three pieces of Song Blossom
1 @ 5" square
2 @ 2 3/8" x 5"
These were attached to the three sections you can see when your card is open.
I used my Spellbinders Decorative Labels 8 and Enchanted Florals to cut a panel.
I ran this panel through my Big Shot with Couture Creations
Flamingos & Hedgehogs embossing folder.
I swiped my black ink cube over the front of this panel to help the design stand out a little more.
The panel was then attached to the front for the card so it over hangs the 2 5/8" folded line.
I trimmed a piece of scalloped lace and attached that overlapping the left edge of the rectangular panel.
I have painted a piece of chipboard white and added that on top of the lace.
A layer of clear Wink of Stella added a little sparkle to my chipboard.
I am not sure of the name of this chipboard, it looks like a sea grass. I have cut it in half to use.
to embellish further. These were added on top of the chipboard.
The sentiment is computer generated, it is matted it onto a piece of Enchanted Florals
and attached it to the card front with a piece of cardboard behind it.

The second card is an easel card


The card base is the same size as the previous card and scored at the same measurements.
I have also cut a 5 1/4" square piece of the same cardstock.
Fold your card in half at the 5 1/4" score and a mountain fold at the 2 5/8" score line.
Flatten the front of the card base, and with your card sitting right was up,
apply glue to the right hand half of the the front section.
Lay the 5 1/4" square of cardstock directly on top of the cardbase,
being sure to line up all of the edges.
Now we have our cardbase ready to decorate.
All of the edges of the patterned papers on this card have been distressed
in the same way as the first card.
I cut two 5" squares from Garden Letters and two pieces 2 3/8" x 5" from Natures Romance
One of the 5" squares was attached to the front of the card
and the other was attached to the inside back panel.
The two smaller pieces were attached to the inside folded section of the card.
I also cut another piece of the Garden letters 4 3/4" square.
I used the reverse side of the paper and attached it to the front of the card
I used a Martha Stewart punch to punch along
one of the longer sides of a 3 1/2" x 4 3/4" piece of Enchanted Florals
I cut a piece of the Natures Romance 3" x 4 3/4"
and punched along one of the longer edges with the same punch.
I layered these on top of each other lining the left hand edges up with each other
with the punched edge on the right.
These were then attached to the front of the card.
I used the Couture Creation's Flamingos & Hedgehogs embossing folder
to emboss a 2 1/4" x 4 3/4" piece of velum and attached that on top of the previous layers,
once again lining up the left hand edges.
A piece of blue and gold braid was attached on top of the panel so it curled around the panel randomly
My main embellishment was fussy cut from Song Blossom and attached to the front of the card with cardboard behind it
I added a light coat of Glossy Accents to he flowers in the image to give it a little shine.

The sentiment is from Uniquely Creative and is matted on a piece of the Enchanted Florals paper.
This was attached to the inside back of the card with a piece of cardboard behind it, this is what holds the card open for display
I added a few drops of Nuvo Drops - Morning Dew
randomly on the fussy cut image to finish this card off.
Card 3
This is a 5 1/4" square card
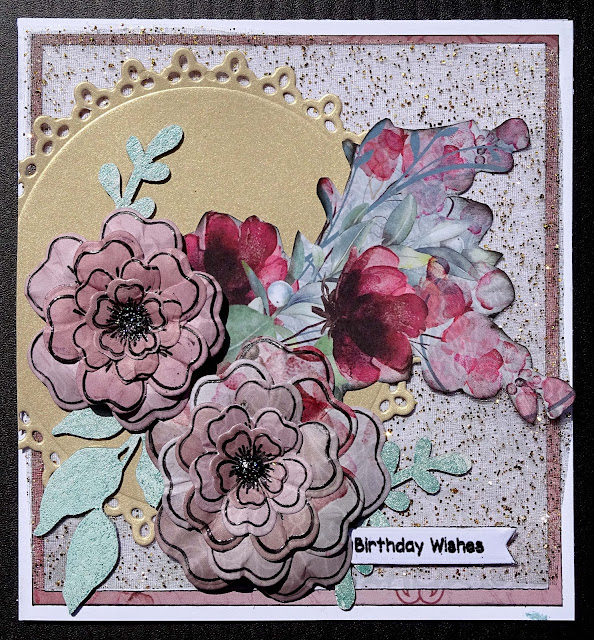
I cut my cardbase 10 1/2" x 5 1/4", scored and folded at 5 1/4" on the long side.
The patterned papers on this card have the edges inked with a black Versa Color ink cube.
The base layer for this card is a 5" piece of Enchanted Florals.
The next layer is a 4 3/4" piece of Natures Romance
I have cut a piece of tulle that has gold particles in it to 5" square and attached that next.
Lifestyles Nesting Doily Circles die and pearlised gold cardstock
were used to create a doily for my next layer.
I have painted some chipboard leaves from Botanicals and Delicate Branch
with pearlescent water colours.
Using Craft Barn Primrose Stamp and Die set, and my stamping platform, I stamped, using Versafine Onyx Black ink,
Before assembling them I used my flower shaping tools to give them some dimension.
I have fussy cut a section from Song Blossom to be the foundation for my embellishment cluster.
The flowers and leaves were added next.
The flowers are mounted on cardboard.
The heat embossed sentiment was added next.
Finally I added Nuvo Glitter Drops - Midnight Sky
to the centre of each of the flowers.
Here is my process video. I hope you enjoy watching it
Thank you for spending part of your day here with me today
Till next time
Stay safe
Hugs
Julie


