My layout today is for the April Cyber Crop over at Mystical Scrapbooks. You will find the crop here.
This month the theme is colour palettes and for this particular challenge you can choose any colour you like but your project has to be monochromatic, meaning you can use any number of shades of your chosen colour with a minimal amount of black and white.
I added Modelling Paste coloured with Starfish Glimmermist through TCW Two Hearts stencil.
This added a lot of pink to the background and minimised the white.
I splattered the background with Artiste Spritzing Ink in Black Night, Glimmermist Cherub Pink and Glimmermist Iridescent Gold
The final addition to the background was random stamping using Versafine Onyx Black Ink and Kazzaz Reason Season Lifetime, Kaisercraft Grid and Kaisercraft Numbers stamps.
I cut two strips of deep pink and two strips of pale pink cardstock to 1/2" x 12, inked the edges with my Versa Color Black Ink cube and attached them to each other with the light pink on top and about 1/4" of the dark pink showing above it.
I added a torn strip of pink washi tape to each of these strips and a pice of pink glitter washi layered on the first washi tape.
These were attached to the top and bottom of my page.
I used double sided tape to attach these to the centre of my layout, layering them on top of each other, widest paper on the bottom working up to the narrowest paper.
I also added two small strips of the glitter washi so they will poke out from
behind the photo when I attach it.
I am using a 6" x 4" photo, I have filed around the edge of the photo with an emery board before attaching it to a 6 1/4" x 4 1/4" piece of the dark pink cardstock.
To give my photo some lift I have added a piece of sticky backed craft foam before attaching it to the layout slightly above centre.
To embellish my layout I have fussy cut a doily from Serendipity - Carefree and selected several items from Uniquely Creative's Gums & Roses Creative Cuts pack.
I have inked the edges and attached them to my layout
The title is a tag from the Creative Cuts pack, I have added some pink ribbon and attached it to the layout with sticky backed craft foam behind it
Here is my process video if you would like to check out
Don't forget to check out the Cyber Crop, they are always fun and there are prizes to be won.
Thank you for spending part of your day here with me today
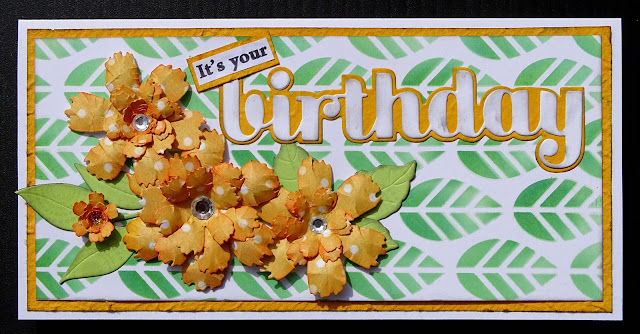
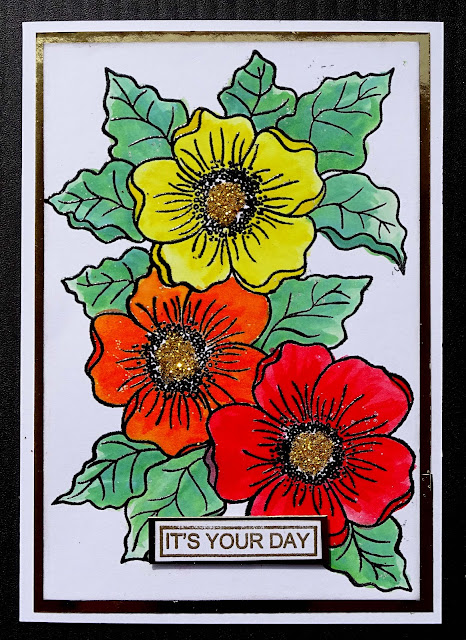
I trimmed a piece of textured yellow cardstock to 3 3/4" x 7 3/4" and attached that to my card front.
Next I trimmed my inked panel to 3 1/2" x 7 1/2" and added that on top of the yellow cardstock.
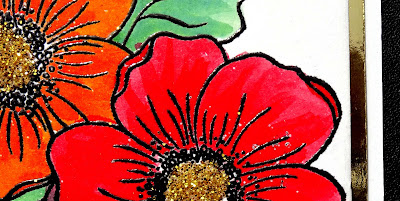
To decorate the card I used some of the flowers I created in this video
I die cut the sentiment from white cardstock and the shadow from the yellow cardstock,
inked the edges and attached it to the front of the card about 2/3rds of the way up.
I printed the rest of the greeting, trimmed it to size, layered it onto a piece of the yellow cardstock and attached it so it was slanted and slightly over lapping the b of "birthday"
I also used the same stencil and some Squeezed Lemonade Distress Ink
A piece of cheese cloth and a black & white Baker's Twine bow
were added under the flower. It was attached using hot glue.
The sentiment is chipboard that has had a coat of white gesso.
I then coloured it with the Cocoa ink, this did not stand out enough
so after I had attached it to the card I swiped over it with my black ink cube.
For the inside I cut a piece of the same patterned paper 3 7/8" x 5 3/4", inked the edges with Cocoa ink and used double sided tape to attach it to the inside right panel of the card.
I trimmed the cardstock down, inked the edges and attached it in the centre of the patterned paper.
I had a flower that was left over from a previous project, it was cut using Cheery Lin's Chrysanthemum Strip die and white cardstock. I attached the flower
All of the papers and cardstock on this card have had their edges inked with a black Versa Color ink cube.
I chose two patterned papers from the pad for this card.
I cut one 3 3/4" x 5 5/8" and the other 2" x 5 5/8"
A piece of white cardstock was cut to 2 1/4" x 5 5/8" to mat the smaller piece of patterned paper.
I added some scrap chipboard to the back of this panel.
After I had attached the large piece of patterned paper to the front of the card base I used some Art Glitter glue to attach half a paper doily so the edge of it lined up with the right hand edge of the card front.
The patterned paper panel was then attached so that it slightly overlapped the edge of the paper doily
A strip of lace was attached to the centre of the panel using double sided tape.
To embellish the front of the card I stamped all of the flowers and leaves in
Heartfelt Creations - Botanical Rose stamp set onto smooth white cardstock
This will be my last post for this year and I want to take this opportunity to wish you all a very merry Christmas and a happy and healthy 2022.
I really appreciate the time you spend here on my blog and look forward
to sharing more of my papercraft projects with you in the coming year.
A new year is always exciting I think, because we don't know what the future will bring for us
and what changes we will make as the year goes by.
Today I want to share a Christmas Art Journal page.
I love Christmas trees and this page features a Christmas tree, although I have to admit that wasn't my original idea.
I had planned on having the baubles hanging from the top of the page and the background was going to look like the tree, so a closeup of the tree if you will.
The proportion of the baubles to the background did not look right to me when I tried this
so I had a re-think and decided to make a Christmas tree shape using the baubles
and I have to admit, I am quite happy with the results.
I coloured each of the baubles with Distress/Distress Oxide inks, and a water brush, using two tones of each colour on each bauble, so they had a little shading.