Showing posts with label die cutting. Show all posts

Wednesday, August 10, 2022

MTCC #61

Good morning

Today I am sharing the card I made for challenge #61 at Make the Card Challenge.

You will find the challenge here.

The challenge this month is a colour challenge.


I have used pastel shades of these colours on my card.


I used a background stamp with Versamark ink and white embossing powder
before blending Dried Marigold Distress Ink and 
Salt Water Taffy Distress Oxide Ink over the top.

My card base is 5 1/4" square

A 5" square piece of green cardstock is the base layer 
for the decorative panel that is 4 3/4" square.

A 1 1/4" x 5" piece of the green cardstock hold the sentiment, which is cut from white cardstock.
I have cut the sentiment 4 times and layered them on top of each other to create
a sentiment with some dimension.

I used Honey Bee - Lovely Layers: Heart Vine die to cut a green leaf spray, 
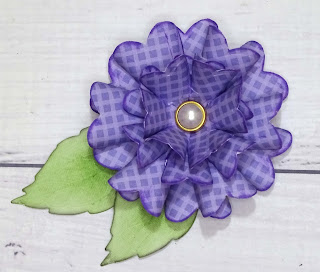
a paper chrysanthemum from PortaCraft and a couple of small white flowers 
from Uniquely Creative to create a cluster on the left hand section of the green panel.

You can watch my process video here
I hope you enjoy it.


As always, thank you for spending part of your day here with me today

Till next time
Stay safe
Hugs
Julie


Saturday, March 5, 2022

Five hand made flowers using dies

Good morning

Today I have a quick post to share with you a video I have posted
 showing how I used five assorted dies to create five flowers. 

This is the second video I have posted showing how to create beautiful flowers using dies.
You can find the first one here.

These are the flowers I created in today's video


I hope you enjoy my video.

If you do I would love it if you would click the like button 
and subscribe to my channel if you have not already


Thank you for spending part of your day here with me today
Until next time
Stay safe
Hugs
Julie


Sunday, February 6, 2022

Denise Boddey DT album flip through

 Good morning

Today I want to share a mini album I created using Denise Boddey Designs Elegance patterned papers.

The album started life as an accordion album.
I altered the album by adding a spine and assorted flaps, pockets and a hand made envelope.

You can see that video here

All of the papers have had the edges distressed using my distressing tool 
and then inked with a VersaColor black ink cube.

Each page has a top opening pocket with a photo mat.

I have also used some velum, made some flowers using Craft Barn Stamp/Die set 
and created the tags for the album using Uniquely Creatives Tags Tops & Tails.

Lace from my stash helps to decorate the front of the album.

Here are some photos

Album Closed

Album Open


Closeup of Front Cover


Front Cover


Page 1


Page 2


Page 3


Page 4


Page 5


Page 6


Page 7


Page 8


Back Cover


The papers I have used are:-

Grace


Style


Chic


After the Rain


Refined


and the chipboard is


Delicate Branch


Here is my process video. I hope you enjoy it.


Thank you for spending part of your day here with me today


Till next time

Stay Safe

Hugs

Julie


Wednesday, January 19, 2022

Ink Blended Cards

Good morning.

I have been wanting to do some ink blending for some time so today is the day. 

I am by no means an expert at this technique, 
as a matter of fact I have probably only done it once or twice at the most.

The theme for the month over at Mystical Scrapbooking is Techniques
so I thought I would do a blog post on ink blending.

I also created a video and I will put that at the end of this post if you would like to check it out.

I made three cards


The first card I created has a heat embossed image as the focal point


I stamped Woodware - Bold Blooms - Ginny with Versamark Embossing Ink onto the front of my card panel after I had wiped it over with my Embossing Buddy

I then used White embossing powder and set it with my heat gun.
This creates a resist for the Distress Inks I will blend on top.

I attached a strip of Mint Tape (Removable Masking type tape) to the areas of the card so the blended ink did not go onto the back of the card base.

 to the front of the card covering about 1/3 of the card front with each colour
 and using the lighter colour to blend over the area where the colours meet.

Once the card front was covered I used a tissue to wipe over the image
to remove any ink that may have been on the embossing.

The sentiment is from 13@rts His & Hers Remastered Sticker Collection.

Card No. 2 is similar in appearance


For this card I blended the Distress Ink onto a White Cardstock panel that measures 3 3/4" x 5 1/2"

The colours I used are Scattered Straw, Peeled Paint and Broken China.

I used a die and my Big Shot to cut the floral bouquet from white cardstock and attached it to the 
inked panel using liquid glue.
Because the Inks are reactivated by liquid I was careful to not get any glue on the inked panel.

I added a piece of scrap chipboard to the back of the panel before attaching it to my card base.

The sentiment came from the same 13 @rts sticker sheet.

The ink blending on the third card is a little different.


I stamped and heat embossed Woodware - Whimsical Flower - Daisy May 
onto a white cardstock panel that measures 3 5/8" x 5 3/8"
I used black embossing powder for this stamp.

I then used my finger daubers to colour the image with Distress Inks.
The colours I used are Mowed Lawn, Mustard Seed and Ripe Persimmon

I did manage to go over the lines a couple of times 
but I used my Mono Sand Eraser to rub the ink away where it bothered me.

To give the black sections in the centre of the flower a little sparkle I added 
dots of Viva Black Pearl Pen

I cut a panel of black cardstock 3 7/8" x 5 5/8",
matted my image panel onto that
and then attached the black panel to the front of the card base.

The sentiment, once again, came from the 13 @rts sticker sheet.

So three very simple cards today but I have to say I really enjoyed making them.
They are quick and easy but quite striking I think.

Have you tried ink blending? Let me know how you found it.

Here is my video


 Thank you for spending part of your day here with me today
Till next time
Stay safe
Hugs
Julie

Friday, December 24, 2021

Merry Art Journal Page

Good morning

This will be my last post for this year and I want to take this opportunity to wish you all a very merry Christmas and a happy and healthy 2022.

I really appreciate the time you spend here on my blog and look forward 
to sharing more of my papercraft projects with you in the coming year.

A new year is always exciting I think, because we don't know what the future will bring for us
 and what changes we will make as the year goes by.

Today I want to share a Christmas Art Journal page.

I love Christmas trees and this page features a Christmas tree, although I have to admit that wasn't my original idea.


I had planned on having the baubles hanging from the top of the page and the background was going to look like the tree, so a closeup of the tree if you will.

The proportion of the baubles to the background did not look right to me when I tried this 
so I had a re-think and decided to make a Christmas tree shape using the baubles
 and I have to admit, I am quite happy with the results.


I coloured each of the baubles with Distress/Distress Oxide inks, and a water brush, using two tones of each colour on each bauble, so they had a little shading.

 These are the colours I used:-

Once all of the baubles were coloured, I fussy cut them and 
inked around the edges, with Archival Jet Black ink

To create the background I used a sponge to pounce acrylic paint to the whole area.
I used Southwest Teal, Seabreeze Turquoise and Jade Green,
 blending them until I was happy with the look.

The texture for the background comes from putting Avocado Acrylic paint
through Kaisercraft's Lattice stencil,
Modelling Paste through TCW Mini Labyrinth 6" stencil
and stamping Uniquely Creative's Wavy Words stamp with Archival Jet Black ink.


I attached the baubles to the page using Gloss Gel, 
I also coated the whole page with the gel being careful 
not to smudge the inks used to colour the baubles. 
This will help the baubles to stay in place and allow me to use my 
black Stabilo All pencil to shade around the baubles.

I cut a base for my tree and a star from some gold cardstock and added them to the page.

To highlife the gold pieces I used a black paint marker
to draw faux stitching around their edges.

My title was die cut from black cardstock using Kaisercraft's DD700 Alphabet Upper Case dies.

To add some shine to my page I gave the larger circles on the baubles a coat of Glossy Accents


The final touch for the page was to use some watered down black acrylic paint
in a Fineliner bottle to draw a scribbly boarder.

Here is my process video


Well that's it for me for this year
Thank you for spending part of your day here with me today
Once again I hope your Christmas and New Year are all that you hope they will be
Till next time
Stay safe
Hugs
Julie


Monday, November 29, 2021

Layout for Mystical Scrapbooks

Good morning, good morning

Today I am sharing a layout I created for Mystical Scrapbooks. 
The theme for November is to scrap lift a favourite layout. 
This is my second layout for this month. 

Here is my layout


and this is the layout I have lifted.
It is by Mandy Melville from November 2016.
I loved the simplicity of the layout
You will find her blog post here.


I turned the layout on its side as my photo was portrait orientation
while the one on Mandy's layout was landscape orientation.

I used Uniquely Creatives Days of December paper collection for this layout.

As the photo is of my Grand-Daughter in one of her theatrical performances
I wanted to have lots of sparkle on this layout.
The photo started life 6" x 6" but I trimmed it down to 3 3/4" x 6"

I used a sheet of American Crafts POW Gold Glitter Paper as my background.
I did not want to waste this beautiful paper so I cut a 1" frame from it. 
This gives me the centre section to use on other parts of the layout. 

I trimmed a piece of white cardstock to 11 1/2" square to use as my background.

To add some interest to my background I used 
Nuvo Glitter Drops- White Blizzard, through TCW Stencil - Two Hearts
The Nuvo Drops do not stand out from the white cardstock very much
but they do add lots of texture and sparkle.

Next I used my Prima Stitched Rectangle stamp and Versafine Onyx Black ink
 to stamp some straight stitched lines randomly on to the background.


I used Hero Arts Infinity Rectangles die with my Big Shot to cut six assorted sized rectangles from the gold glitter card.

I cut "The Season" patterned paper to 6 1/2" x 5" and 3/4" x 2" and
"Good Cheer" patterned paper to 4 1/2" x 4" and 3/4" x 2 1/2"
I cut a fish tail in one of the narrow ends of the two smallest pieces of patterned paper.

I inked the edges of all of the patterned and glitter card.


I filed the edges of my photo with an emery board and matted it onto some black cardstock.
Before adding it to the patterned paper cluster, 
I attached some chipboard to the back of the photo mat.

For my title I used Dusty Attic Picture Perfect chipboard.
I used my VersaMark Embossing Ink to heat embossed the chipboard
 with gold on the top and black on the bottom.
You can see how I did this in the process video below.


Now that I have all of my elements ready I attached them to my layout background

I used my Uniball Mico black pen to draw a double scribbly border around my page

As a final sparkly touch I sprinkled 28 Lilac Lane gold sequins onto the layout and attached them using liquid glue and my Silhouette Pick Me Up tool.

Here is my process video
I hope you enjoy watching it.


Thank you for spending part of your day here with me today.

Till next time
Stay safe
Hugs
Julie


Wednesday, November 24, 2021

Christmas Cards using Tulle from Mum

Hi there

Today I am sharing three cards I made using tulle.

I recently visited my Mum and she was having a clean out of some of her crafting stash.
She gave me about a dozen rolls of assorted tulle and many assorted braids.

When I got home I decided that instead of putting them straight into my storage 
I would use some of them and that is how the idea for using
 the tulle on these cards came about.

As I have not finished my Christmas cards for this year I made three Christmas cards.


To attach the tulle to the cardstock panels for all of these cards I used Art Glitter Glue.
I applied a line of glue around the back edge of the panel and then folded the tulle around the panel and into the glue. I then put an acrylic block on top of the panel while the glue dried.

All of the card bases are cut from 240gsm smooth white cardstock.
I have cut the cardstock 10" x 5", scored (using my Score Board) at 5" on the long side and folded to create a 5" square card.
I always use my teflon bone folder to create beautiful crisp folds on my cards without any shine.

All of the patterned papers are from Kaisercraft's Sparkle 6.5" paper pad.
I also used some of the Sparkle Collectables to decorate my cards.

The edges of each of the patterned papers have been inked using my Versa Color Black ink cube.

Card No. 1


The tulle on this card is bright pink.
The white cardstock panel that is covered with the tulle is 4 3/4" square.

The Rose Gold Foiled patterned paper is 2 1/2" x 4 3/4"

Two pieces of black cardstock that measure 3/4" x 4 3/4" are attached to the top and bottom of the patterned paper panel so approximately 1/4" of the black is showing beyond the panel.

To create the poinsettia I chose a lightly patterned paper from the pad, 
I used my Heartfelt Creations Sparkling Poinsettia stamp, 
This was then set using my heat tool.

I used my spring loaded scissors to fussy cut all four layers of the flower.

To give the flower some shape I used my flower shaping tool 
and a stubbie holder I have cut open to press into the back
 of each of the petals on all four layers.

I used a dob of liquid glue in the centre of each layer and off set the petals as I created the flower.

The sentiment for the card came from the Collectables pack. 
It is attached to the card with a layer of chipboard behind it.

To add a little sparkle to the card I added a few sequins down the left hand edge
 and a circle of Pops of Colour Glitter Champagne to the centre of the flower.

Card No. 2


The tulle I used on this card is gold and it has small gold sequins attached to it
 so I wanted to keep this card quite simple.

The white cardstock panel that is covered with tulle is 4" x 5"

A strip of gold mirror card that is 3/4" x 5" was attached to the top and bottom
 of the tulle panel with about 1/4" of gold showing.

This was then attached to the card front leaving about 1/4" at the top and bottom.

I used my Memory Box Snowflake Ornament Die and my Big Shot to cut two baubles
 from gold mirror card that I had attached double sided adhesive sheet to the back of,
When I cut the baubles I decided to leave all of the pieces together 
as the detail stood out beautifully and the solid gold baubles were more impactful.

I used liquid glue to attach a fine gold thread to the tulle panel.
 The baubles were attached in the same way.

The sentiment is from a sheet of sentiments I printed.
I have matted that on some of the gold mirror card and attached it to the card front
 with a piece of chipboard behind it.

Card No. 3


This card has three patterned papers on it

The light pink paper is 4 3/4" square, 
the dark paper is 4 1/2" square and 
the foiled panel is 1 1/2" x 4 1/2".

The tulle on this card is white with a silver glimmer to it. 
I have covered the small panel with the tulle.

I added a layer of chipboard behind the panel and then wrapped
 a piece of pink and silver braid around it, tying it into a knot.

I used the same tulle to tie a bow and attached that above the braid.

The sentiment for this card also comes from the Collectable pack. 
It is a bauble shape and I have tied a piece of the tulle through the hole at the top
 and attached that to the panel with a piece of chipboard behind it.

Here is my process video


I hope you have time to check my video out.

Thank you for spending part of your day here with me today
Till next time
Stay safe
Hugs
Julie


Friday, November 19, 2021

Three Christmas cards using Uniquely Creative's Holly Jolly papers

Good morning

Today I am sharing three more Christmas card.

These cards are in the more traditional colours and I have used a 6" paper pack of 
Uniquely Creative's Holly Jolly Christmas.

All three cards are 5" square and have been cut from 240gsm smooth white cardstock.
All of the papers on these cards have had their edges inked using a black ink cube.


Let's start with 
Card No. 1


I have cut the red plaid paper to 4 3/4" square and a piece of white cardstock 4 1/2" square

I placed my white cardstock on my Scoreboard and scored every 1/8" 
for about an inch to add some interest and texture to the panel.

The circular tags and the sentiment are from the Creative Cuts pack.

I used my Spellbinders Classic Scalloped Circles Large die
to cut two matts from Core'dinations Rouge cardstock to back the circular tags.

I punched a hole through the cardstock and threaded some white crochet cotton through the tags.

These were then attached to the card front with some scrap chipboard behind them.

I placed a red brad in each of the hole in the sentiment before attaching it to the card. 

The final touch was to add two clusters of 3 Picket Fence Moonshine sequins
 to the sentiment for a little sparkle.

Card No. 2


I cut a piece of the Rouge cardstock 4 3/4" square, 
a piece of Gold mirror card 4 3/8" square 
and a piece of patterned paper 4" square
 and attached these to my card front.

I fussy cut an assortment of poinsettia and holly leaves from one of the patterned papers,
shaped them with my flower shaping tool
and attached them to the bottom curve of the wreath on the patterned paper.

I used my Memory Box Snowflake Ornament die and gold mirror card
 to create a gold ornament to attach at the centre top of the patterned paper. 
Before I attached it though, I added a short length of metallic string in gold
and tucked the end of it behind the patterned paper layer.

The sentiment was cut from one of the patterned papers and matted on some of the Rouge cardstock.
I added a small piece of chipboard to the two end of the sentiment before attaching it to the card front so it would sit level over the metallic string.

The sparkle for this card was created by using 
Scrapbook.com's Pop of Colour in Glittering Champagne
in the centre of each of the fussy cut flowers.

Card No. 3


I had a change of heart during the creation of this card.

I cut the patterned paper to 4 3/4" square, 
distressing the edges using my Distress Tool before inking them.

The 4 1/2" piece of white cardstock received the same treatment to its edges.

I used Kaisercraft's Christmas Tree mini stencil and Mont Marte Modelling Paste
 to add a textured tree to the white cardstock.

While the stencil was still in place I covered it with Spellbinders Sparkle Dust Glitter.
This gave me a beautiful sparkly Christmas tree BUT it got lost on the white cardstock.

The sentiment is a Rub On that I have applied to white cardstock 
and matted on the same patterned paper I used as a layer on the front of my card. 
This was attached to the front panel with craft foam behind it.

I also added craft foam behind the patterned paper of the front panel before I attached it to the card base.

I used a fine black pen to draw a scribbly boarder around the white cardstock panel and the sentiment.

I still felt that the tree was getting lost so I placed the stencil back over it and added a coat of Pops of Colour Glittering Gold. This did the trick and the tree is now a stand out embellishment.

Here is my process video


Thank you once again for spending part of your day here with me today

Till next time
Stay safe
Hugs
Julie


Thursday, October 28, 2021

All that Sparkles Art Journal page

Good morning, good morning

In today's post I would like to show you a very simple art journal page I created.

I haven't used my Gelatos for ages and wanted to get them out.
I love how creamy they are and how easy they are to apply.


I used an 8 3/4" x 8 1/4" sheet of 216gsm watercolour paper. 
I punch four holes down one of the 8 1/4" edges 
and hold my pages together using jump rings.

I only use one side of the paper and on the back I write the products I have used on the page.

I have covered the whole page with Tim Holtz Tissue Wrap - Melange, 
which I have attached using Satin Mod Podge. 
I ran my Brayer over the tissue to ensure it is well stuck and there are no creases.
I usually use mat medium for this type of thing but I have the Mod Podge in my stash
 and want to use it up.

I selected Lavender, Guava, Lemon, Gold Champagne and Metallic Mint gelatos
and scribbled them randomly on top of the tissue.
I used a baby wipe to blend them.
I kept adding colour and blending until I was happy with my page.
As you can see from the colours selected I was going for a pastel background.


I used TCW stencil called Tile Texture to add some Modelling/Texture paste randomly to the page.
This dries white and gives the page a lift.


The focal points for the page are created by cutting stars from white cardstock using my 
Nellie's Multi Frame Star die and my Big Shot. I cut six in total, in an assortment of sizes.

To colour my starts I used Jane Davenport's Brights watercolour palette.
I sprayed the white cardstock stars with water and then used my 
water brush to add the purple watercolour pigment.

Once the watercolour was dry I stamped Kaszazz's Lifes Moments Background stamp,
with Versafine Onyx Black ink, to cover each star

The stars were attached to the page using Mod Podge.

I used my Stabillo All Pencil in black and my water brush to shade around each of the stars.

My quote was cut from black cardstock using Sizzix 662667 Alphabet die
 and attached to the page using Mod Podge.
I gave the quote a coat with my Wink of Stella Clear pen.

To add sparkle to the stars I brushed a coat of Nuvo Clear Drops - Morning Dew over each star.
This did not give the sparkle I was looking for so I added Spellbinders - Sparkle Dust Glitter.
As the Nuvo Drops were dry in some areas the glitter has stuck randomly
 to the stars, a look I am very happy with.

To finish my page off I added a scribbly boarder around the outside using my Fineliner bottle that holds slightly watered down black acrylic paint.

Here is my process video


As always, thank you for spending part of your day here with me today

Till next time
Stay safe
Hugs
Julie