Wednesday, March 27, 2019

Mamma Mia Layout

Good morning

I have been on holidays for the last 2 weeks and my holiday is now coming to an end. Burleigh Heads is one of my favourite places in Australia. Such a relaxed lifestyle and plenty of dancing.

Today I am sharing a layout that showcases a photo of my daughter and I when we went to see Mamma Mia in November last year.

I have videoed the process and you can see the video here.

I have used Kaisercraft's Ooh La La & Mr & Mrs paper ranges.


This is a very "clean" looking layout.  The background patterned paper is from the Mr & Mrs paper range. I have trimmed it down to 12" x 11.25" and added a strip of patterned paper to the top and bottom to make it back up to 12" x 12"

I have fussy cut the flowers, clock and butterflies from the patterned paper.

The layers behind the photo and the photo have all been matted on black cardstock. When I started the layout I had intended to use white cardstock for the background and matting but found I preferred the black, it made the colours pop a little more. You can see the difference in the video.

I have used an assortment of dies to cut some tags and the label that is on the left hand side of the photo using papers from the Ooh La La papers.

The photo and some of the embellishments are attached to the layout using foam tape for added dimension.


Chipboard letters were used for "november". I gave these two coats of black heat embossing so they were very thick and very glossy.

Don't forget to pop over to my YouTube channel and check out the video here.

If you enjoy the video please subscribe to my channel. I would love to reach 1000 subscribers by the end of the year so please share my video with your crafty friends.

Thanks for dropping by
Till next time
Hugs
Julie

Wednesday, March 20, 2019

Two Masculine Cards

Good morning

Todays post is about a two masculine cards I have made.

I have created a video showing the process. You can see it here.

I wanted to use something on these cards that I have had in my stash for quite some time and I always forget to use, so I dug out some velum and some burlap.

I have used Kaisercraft 5.25" square card bases in brown and Kaisercraft 6.5" paper pad from the Attitude! range for both of these cards.


The bottom three  layers of patterned paper on this first card have been torn on the top and bottom edges. The brown stripe and the red spot papers were both attached using foam tape. The next layer is the velum which has also been torn on the top and bottom and then another thin strip of paper that has been treated the same as all the other layers has been added on top of the velum. This layer covers the glue that was used to attache the velum to the card.


To embellish the card I have die cut Die-namics Just the Ticket, Kaisercraft's Film Edge and Kaisercraft's Polaroid Frame from assorted papers and attached them to the card. The greeting was printed on my computer and then cut to size and attached using double sided tape. All of the papers and embellishments on the card have been inked around the edge.

For this second card I have used three patterned papers in decreasing sizes and a layer of burlap that I have frayed the edges of. I cut a double ended fish-tail banner and attached that between the burlap layer and the smallest square layer using foam tape. All of the papers have been distressed and inked.


Using Spellbinders Labels One die, I cut two labels to embellish this card. I then attached a greeting that was computer generated and inked with some Distress ink in Vintage Photo to help it blend in with the rest of the card.

Masculine cards are always a bit trickier to create I think. I am always unsure what to use to embellish them. Hope these cards give you some ideas to help create some cards for the males in your life.

Don't forget to check out my video.

If you enjoy the video please subscribe to my channel and share it with your friends

Thanks for dropping by
Till next time
Hugs
Julie

Wednesday, March 13, 2019

2nd Layout for Scrapping Fun Kits March 2019 Kit

Good morning,

Today I want to share the second DT layout I have created using the March 2019 kit from Scrapping Fun Kits.

I just love these colours together. I hate brown and generally I do not use it in any of my layouts but I am really happy with how these two colours combine. 

I have a video that you can watch here, showing how I created this layout.


I have used some Glass Bead Gel and a Crafters Workshop stencil called Two Hearts to add some texture to the background. While the stencil was still in place I gave it a light spray with some Dylusions Ink Spray in Vibrant Tourquise.  I also lightly sprayed the test tag that was in the kit with the same spray.


I also lightly sprayed the text tag that was in the kit with the same spray.


I cut the patterned papers into "L" shapes to layer my photo.

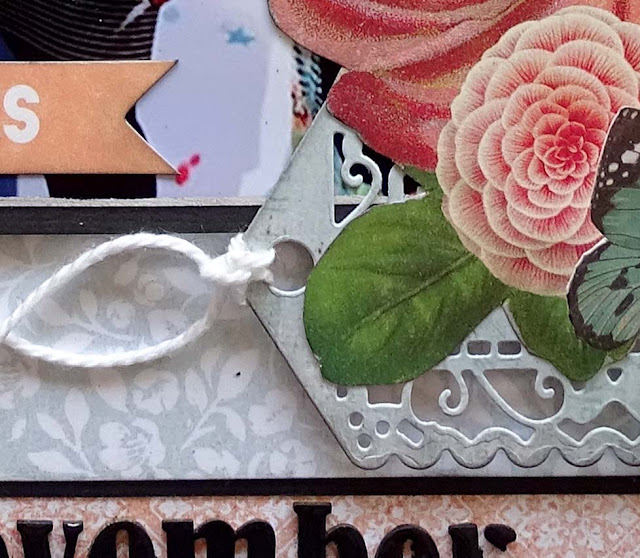
I cut a piece of the lace from the kit and added it to the lower left section of the layout and what was left I threaded through the hole in the tag to give that a little more dimension.

I created the flowers by cutting the left over papers into varying sized circles and then cut the mesh from the kit into circles to layer on top of the papers. The centres are made with the tiny metal flowers that were also in the kit.

The beautiful little turquoise tassel was attached using a brad to complete the cluster on the bottom right of the photo

The "Beautiful Smile" chipboard was heat embossed with black embossing powder for some added shine.

The journalling and the border around the page & tag were done using Dylusions Paint Pen in Campso Teal.

I hope you enjoyed my layout. You can subscribe to the kits here

Don't forget to check out my video here. If you enjoy the video please subscribe to my channel and share the video with your friends

Thanks for dropping by
Till next time
Hugs


Julie
Wednesday, March 6, 2019

Two birthday cards

Good morning.

Well the weather here in Adelaide has gone completely mad. Boiling hot for the last week and today it is cold and wet.....

I spent the day yesterday making a couple of cards.

You can see the video here.

I have used Kaisercraft's Curiosity 6.5" paper pad for both of these cards.

The card bases are white cardstock and they measure 5 1/4" square.


I chose 4 patterned papers and cut them to 5",  4 3/4" and 4 1/2" square and the last piece is 4 1/2" x 2".

All of the edges have been distressed and then inked with black ink.

Foam tape was used to attache the 4 3/4" piece to the 5" piece.
The 4 1/2" piece was attached on top of them with double sided tape.

I attached a piece of lace to the bottom of the small piece and then attached that to the middle of the  panel with foam tape.

I used my hot glue gun to attach the chipboard piece and the resin heart. I have had the resin piece in my stash for a few years. I made it when resin was popular. There are quite a few other pieces waiting to be used.

To complete the card I printed a sheet of greetings in various sizes and fonts using my computer, selected one and cut it to size and attached it to a strip of patterned paper. I distressed and inked the edges of the patterned paper before attaching it to the centre top of the card.

 A little closeup photo for a bit of detail


This card has a nice little surprise inside.

I chose 3 patterned papers and the tag from the paper pad.

The base piece of patterned paper measures 5" square

The vertical strips of patterned paper measure 1 1/4" x 4 1/2" and the white cardstock that mat these pieces measure 1 1/2" x 4 3/4".

The horizontal strip of patterned paper measures 4 3/4" x 1 1/2" and the mat that this sits on is 5" x 1 3/4".

I have used a Magnolia die and some white cardstock to cut the little picket decoration to go on the bottom of the horizontal piece.

The edges of all of the papers and cardstock were inked with black ink before the patterned papers were attached to their mat's.

The base patterned paper was attached to the card base using double sided tape then the vertical panels were added using foam tape. I attached the die cut to the horizontal panel the attached the panel using double sided tape. The tag was attached with foam tape after I had added a gold eyelet and some ribbon.


I selected 2 sheets of patterned paper for the inside and cut them to 5" square.  Before I attached them to the card I used some double sided tape and attached some ribbon to the edges of the card to use as a closure when the card is finished as it will be quite bulky and may not close well on its own.

I cut a piece of white cardstock 1" x 10 3/4", folded it in half and then in half again to create 4 sections. I applied double sided tape to for the complete length of the two outside sections.

I then cut 4 squares of white cardstock 1 1/2" and 4 squares of patterned paper 1 1/4" square. The edges were inked and then the patterned paper was attached to the cardstock with double sided tape.

The assembled squares were then attached to the centre of each of the 4 sections on the 1" strip of cardstock.

This was then attached to the inside of the card about 1" up from the bottom.

One of the sentiments that I printed earlier was attached to one of the square embellishments inside the card.

Both of these cards were very easy to make so I encourage you to have a go at making them.

You will see exactly how I made them in this video so check it out.

If you enjoy the video I would love it if you would share it with your friends, leave me a comment  and subscribe to my channel.

Thanks for dropping by
Till next time
Hugs
Julie 

Hot X Buns Layout

Good morning.

I am dragging the chain a bit with this post, I should have done it on the 2nd which is when I shared it on Scrapping Fun Kits blog.

I am on their Design Team now and this is the first layout I have created using the March kit.

There is an unboxing video here if you want to see what is in the kit, and you can subscribe to the kit here.

I have created a video showing how I created this layout, you can see it here.


I found an svg file on the internet for the easter egg and then re-sized it and used it 4 times down the 2 sides of the page.

The background cardstock was then cut to 11.5" x 12" and the 2 purple strips added. One to the top and one to the bottom.

I used 2 of the patterned papers that came in the kit to back each of the Easter eggs

There were 2 strips left so I tore one edge of them and used them as layers on the left hand edge of the photo.

The eggs and the bunny were fussy cut from the sheet of pictures in the kit and attached with the other embellishments and some of the Washi tape that was also in the kit

The Happy Easter die cut was attached on the right hand of the layout and the title was cut on my Scan N Cut using the same purple cardstock that is used for the top and bottom strips.

This layout came together very easily because everything on the layout apart from the white & purple cardstock was in the kit.

Here is a closeup that shows you a little more detail.


Don't forget to check out the video here and if you enjoy it please share it with your friends.

I would love it if you would subscribe to my channel while you are over there.

Thanks for dropping by
Till next time
Hugs
Julie

Monday, March 4, 2019

Assortment of layouts

Good morning

Today I want to share with you a couple of layouts I have done for Charli's 2018 album

I am working through them at a rate of knots.

Both of these layouts are about her performances with "Theatre Bugs" a group that run workshops through the school holidays and put on a performance at the end of the worship.

I have not recorded videos for these layouts but if you have any questions I am more than happy to answer them for you.

The first page is "Songbird"

I have used some strips of patterned paper of varying depths across this page, a couple of which have been punched or die cut.

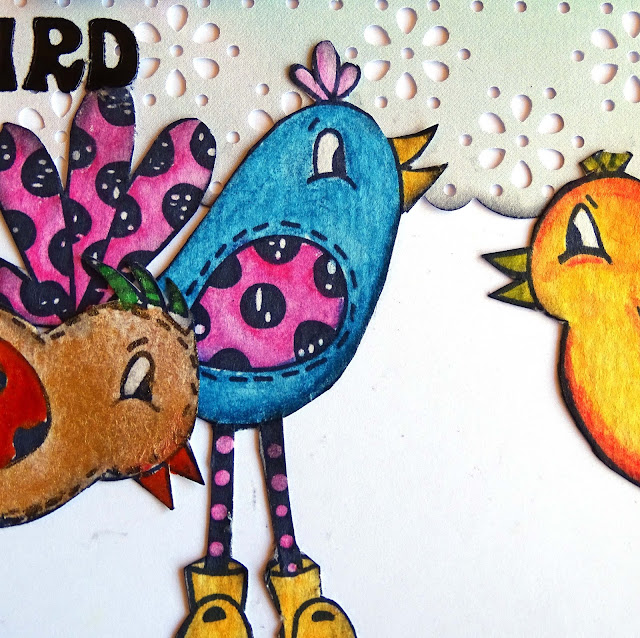
The birds have been stamped onto watercolour paper and coloured using an assortment of watercolour pencils and Smooch in gold. The title uses stickers I bought from my LSS.


A closeup of the birds. I love this stamp and am always looking for ways to use it.


This second page, Pinocchio, is very simple. Each performance they do they produce a program that lists all of the actors and what parts they played. I try to get one for each performance she does but I did not get one for the layout above but I did get one for Pinocchio.

I crated a pocket behind the photos to hold the program which also acts as a title.

The pocket has a strip of punched pattern paper on the top of it which I have backed with some black cardstock to make it stand out more.

White stickers were used to attach the date to the bottom of one of the photos


Thank you for dropping by
Till next time
Hugs
Julie