Wednesday, August 28, 2019

Three Assorted Cards

Good morning papercrafting friends,

Today's post is about the three cards I made this week. I have used three different background dies and used different techniques for each card.

I have recorded the process and you can see the video here.


I have used a no brand set of dies for this first card. I cut the die three time using white cardstock. I layered these on top of each other and attached them to the handmade card base.

The card base is 11 3/4" x 4 5/8" and scored at 3 3/8" and 9 1/4". I have used white cardstock as I was going for a classic elegant look but you could use a colour for your card base.

I have attached a piece of patterned paper to the centre inside of the card. This is where I put my sentiment. The sentiment is a stamped image saying "Thinking of You" that was a giveaway with a magazine I purchased a while ago. I stamped on white card stock and then heat embossed it with silver embossing powder.

The flower on the front of the card is hand made using velum and Couture Creations CO724161 die


The second card also uses a no brand background die. I have cut it in white and attached it to a 5" square mauve card base.

To embellish the card front I have used some gauze, pearl stems, flowers and leaves. I have attached these with my hot glue gun.

The sentiment was also heat embossed using another stamp from a purchased magazine and some very old glitter embossing powder. This was matted on some of the same cardstock that the card base was made from, and then attached to the card with foam tape.


Once again a no brand die was used to cut the background with white cardstock.

I also cut the die from three other patterned papers.

I cut the black card base to create a 4 1/4" x 6 1/4" card. I used glue to attach the die cut to the card base, then using the pieces from the other die cuts I have filled in the butterfly and the flowers.

This was a very time-consuming process but the more I did the easier it got.

I chose two flowers from my stash and attached them to the front of the card and to make the butterfly stand out a little more I attached a coloured butterfly outline.

The sentiment is computer generated and mounted on black cardstock. This is attached to the card using foam tape.

Because the card base is black I have attache a 6" x 4" pale pink patterned paper to the inside where a hand written message can be written.

You can see the full process video here If you would like to subscribe to my channel I would appreciate it

Thank you for visiting my blog today and spending your time with me.

Till next time
Hugs
Julie

Wednesday, August 21, 2019

Live Beautifully Art Journal Page

Good morning friends

I am happy that you have come to spend some time here with me today.

I have created an art journal page today. The inspiration for this page came from Pinterest.

I have a process video for this page and you can view it here.


I am using a page from my 8 1/2" ring bound journal. I love this journal because I can remove the page to work on it and then return it to my journal.

The page has been given a coat of Gesso.

A TCW261s Mini Art Is stencil was used with some Mont Marte Modelling Paste to add some texture to the background.

I hunted through my stash and found a chipboard frame, some wooden Kaisercraft flowers and leaves and an assortment of other flowers.

Once I had attached all of my embellishments to the page using my hot glue gun, I gave it a light coat of Gesso using a dry stiff brush. This had the effect of bringing everything down to a similar colour and made it easier to apply the new colour.

I used Lemon Zest and Rose Quartz Dylusions Ink sprays and Cut Grass Dylusions Shimmer spray to colour the page. I sprayed the colour where I wanted it and then sprayed it liberally with water. When I wanted a stronger colour in a particular area I used a brush to add more of the spray.

Using a Kaszazz 4795Q Lifes Moments Background stamp and Victorian Velvet Distress Ink, I stamped randomly on the background.

To add some sparkle to the page I used some clear glue on the centre of the largest flower and inside the bottom right corner of the frame before sprinkling some Aussie Stamper & Crafts Opal Blend Glitter on to it.

A Kaisercraft black ink cube was used to run around the edge of the page to give it a very fine border.

The verse is a Kaisercraft clear stamp and comes in the Confidence set. I used an ink pad that worked well with the colours on the page to stamp the verse. I then lightly outlined the LIVE and DREAM words in the verse with a fine black pen.

I really enjoyed making this page and I hope you have enjoyed looking at it.

It came together very easily and I encourage you to check out the video and perhaps give this technique a try

Thanks for dropping by
Till next time
Hugs
Julie

Thursday, August 15, 2019

Special Day Layout


Good morning.

Today's layout was created for Off The Rails Scrapbooking using the August Moodboard.

I have posted a video on YouTube that shows how this page came together. You can see it here.

Here is my layout


and here is the moodboard.
Image may contain: 1 person


I have used two patterned papers from Imaginisce's Black Tie Optional range and one from Teresa Collins called Damask.

The embellishments came in a paper kit that I purchased a few years ago and I no longer have the packaging so I cannot share that  information with you.

Everything on the page is matted on white cardstock and the background is an embossed black cardstock.

The photo was taken when we went out for lunch to celebrate our 41st Wedding Anniversary in 2014.

A thin strip of white cardstock that has been punched along one edge using a Martha Stewart border punch, again I have thrown the packaging away so I can't tell you the name of the punch, has been attached at the top of the page and some white outline hearts cut from white cardstock with my Kaisercraft Heart Borders die has been attached under the photo to the right.

The photo and the embellishments have been attached to the page with a layer of craft foam behind them so they are risen off the page.

This is a very simple page and, once I had decided on a design, came together quite quickly.

Don't forget to check out the video

Thanks for spending some time here with me today

Till next time
Hugs
Julie

Wednesday, August 14, 2019

Second project using Scrapping Fun Kits August kit - Julie Layout

Good morning to you all.

Today's layout is the second layout I have created using the August kit from Scrapping Fun Kits.
The kit is glactic themed with reds blacks and whites.
You can find out more about the kits and subscribe here.

I have created a process video showing how this layout came together. You can see the video here.


This photo was taken on a ship when we were on a cruise in 2014. It is one of my favourite photos of me. I am like most people and do not think I take a good photo generally but this one seems OK to me. I chose it because of the amount of red that is in the photo.

I have used what was left of my kit after creating this layout and a few items from my stash.

I have made a 1" frame with the black cardstock and trimmed the blue down to 11.5" square and attached that on top of the black frame.

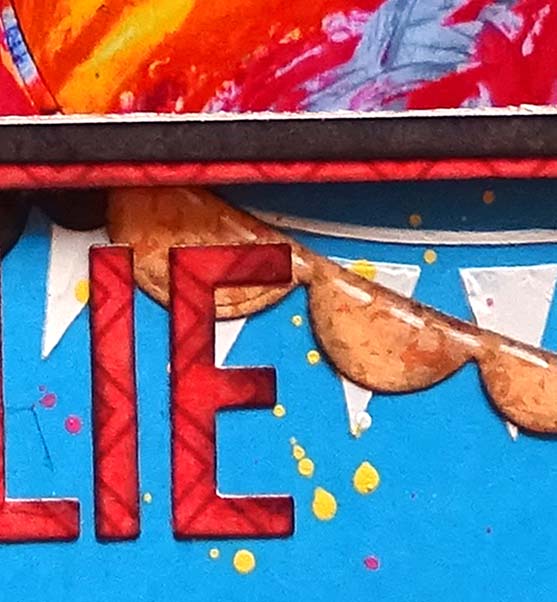
Using a Crafters Workshop stencil called Mini Circus Banners and some Mont Marte Modelling Paste I added some banners across the top left hand corner of the page and across the page about 1/3rd of the way up from the bottom.

I have used SpellBinders Nested Lacy Pennants, Die-Namics Mix and Match Banners and an unbranded die to cut an assortment of banners using both papers from the kit and my stash.

I also cut a pink and a yellow SpellBinders Label 8 die. This will hold some of the journalling.

I used the same pink and yellow paper to cut a couple of strips, I punched one of the long edges of the pink to add some interest. These will be layered on top of each other and used to create a horizontal element through the layout.

Before I attached the elements to the page I watered down some acrylic paint in pink, yellow, black and white and created a light covering of splatters to the blue cardstock.

Using glue I attached all of the elements to the page. The photo was mounted on some craft foam before being attached.


I used Couture Creations CO724161 flower die and the velum from the kit to create the flower in the cluster on the left hand side of the photo. I actually made two of these flowers so I have a spare to use in another project.

The rest of the cluster was made up with a red paper rose and a black flair, also from the kit.

Using my Uniball White Gel pen I added faux stitching to the pennants and the edge of the blue cardstock


The title was cut using Kaisercraft's DD700 Alphabet Upper Case dies and some of the red cardstock from the kit. I inked the edges of the letters and attached them to the layout below the photo.

I originally hand wrote the date on the label to the left of the photo but I did not like it so I cut another label and used my computer to print the date on it.

I hope you have enjoyed reading about the process of creating this layout.

The kits are available here and you can see what other members of the Design team have created with the kit here.

Don't forget to check out the video. If you enjoy the video there are some links to other videos I have created in the description box below the video.

Thank you for spending your time here with me today

Till next time
Hugs
Julie

Wednesday, August 7, 2019

Three Shabby Chic Cards

Today I am sharing three cards I have made. I made these in the Shabby Chic style.

I recently bought a 6.5" paper pad from Kaisercraft's Rose Avenue collection and thought that would be ideal for this type of card.

All of the cards are 5.25" square. The card bases are cut from 12" x 12" sheets of white cardstock.

I have videoed the process and you can see the video here.


All of the papers have been distressed and inked with black Kaisercraft ink.

The inside of each card has been decorated with some of the paper off cuts.

There is two sheets of "Cut apart" in the pad, I have cut one of these up to use as embellishments on my cards.


I decided to go with a pink colour scheme for this first card. I chose 3 patterned papers from the pad. The background piece is very lightly patterned and was cut to 5" square.

The second piece had a floral pattern running down two edges of the page so I cut this in half and used that for my second layer.

The third piece which was more heavily patterned was cut to a fishtail banner shape and attached to the card using craft foam to add some height.

I painted the piece of chipboard first with Gesso then with a pale pink acrylic paint.
When the paint was dry I cut the chipboard in half and attached it to the card with some cheesecloth under it.

The sentiment was attached also using craft foam and then three gems were attached randomly.


I chose blue colourings for this second card.

Once again I chose three patterned papers and instead of distressing the edges I decided to tear them before inking them

The background layer was sized so that it mostly covered the card base and then a couple of patterned paper strips were torn so they could be layered on each other to run horizontally across the card.

Cheese cloth was placed on top of the card before the sentiments from the cut apart sheet were added using craft foam to raise them from the card.

The flower cluster was created using a couple of purchased flowers and a handmade rolled flower from my stash

Three pearls completed this card.


I have used some gold mesh as the background layer for the final card today.

An off cut from one of the patterned papers from the first card made the next layer.

A piece of white cardstock that has been embossed with a rose embossing folder was used next.

Two  cut apart pieces created the sentiment and a layer behind the sentiment.

I used the Tim Holtz's Ornate die to cut a piece of paper to go between the netting and the floral paper layer on the right hand edge of the card. The point of this die cut is protruding over the edge of the card.

The pink flower was cut on my Scan N Cut, the layers then attached on top of each other using glue.

A Kaisercraft wooden flower was added peeking out from the large flower and three pink gems completed the card.

Thank you for visiting my blog today. I appreciate the time you have spent here with me.

Don't forget to check out the video here and see just how these cards came together.

Till next time
Hugs
Julie

Saturday, August 3, 2019

Masquerade layout for Scrapping Fun Kits

Good morning to you all.

I am very happy that you have chosen to spend some of your time with me today.

The layout that I am sharing with you today is one I created using the August kit from Scrapping Fun Kits.
You can subscribe to the kits here.

I have created a process video that shows how this layout came together.
You can see the video here.


The background paper for this layout is from Kaisercraft's On the Dot range. It has been trimmed to 11.5" x 11.5" and matted on a piece of black cardstock that I have cut the middle out of.

I chose a piece of red paper and the black and white floral paper from my stash, tore one long edge of each and layered the floral on top of the red so that the floral had a red definition along the top and the bottom.

The photo is matted on a red and a black paper from the kit and white cardstock giving it a triple mat. I wish I had of  cut the centres out of the mats so I could of had more of this great paper to play with but I did not think of it at the time.

I used a Crafters Workshop stencil called Mini Peacock Feathers and some Mont Marte Modelling paste to add the feathers to the bottom central area of the background. I have chosen feathers as the main embellishments on this page to go with the feathers in the mask I am wearing.

The photo was taken at my niece's engagement party in 2011. The theme was Masquerade.


While I was waiting for the Modelling Paste to dry I found a few of pieces of chipboard in my stash and painted them with 2 coats of acrylic paint. I have had the chipboard for some time and no longer have the packaging.  The black square cluster, red bracket and white scalloped piece are all chipboard.


The transparencies are from Kaisercraft's Check In Acetate Shapes pack. (Very old)
The white flower and the feathers are from my stash and I cannot remember what brand they are either.

All of the embellish have been attached to the layout using double sided tape or wet glue for the bulkier items.

The title uses stickers from the kit. They match the papers and embellishments from the kit so well. I had trouble deciding where to put the title but finally decided to place it in the bottom right of the layout. I have underlined the title with a black fine tip pen, to help it stand out a little more.

My final step was to splatter some black acrylic paint here and there.

Don't forget you can buy the kits here and see the video here.

Thanks again for visiting me here today

Till next time
Hugs
Julie