Sunday, April 28, 2019

Three 8" x 8" layouts

Good evening.

It has been a busy day today but I wanted to pop in and share these three layouts.

These three layouts complete the 8" x 8" album I have been working on.

Once again all of the papers are from the Kaisercraft Party paper range


The patterned paper that goes horizontally behind the photos has been embossed with an embossing folder that I have thrown the packaging away and I cannot remember the brand

A strip of patterned paper has been punched with a Martha Stewart edge punch and added to the bottom of the embossed strip.

I have cut a fishtail banner to add vertically to the layout and then added a strip of patterned paper to the left hand edge of that for a bit of added interest.

A row of red/white verigated Rik Rac was added horizontally before the photos were placed on top.

I used a black pen and a ruler to draw the double lined border around the page and then hand wrote my journalling


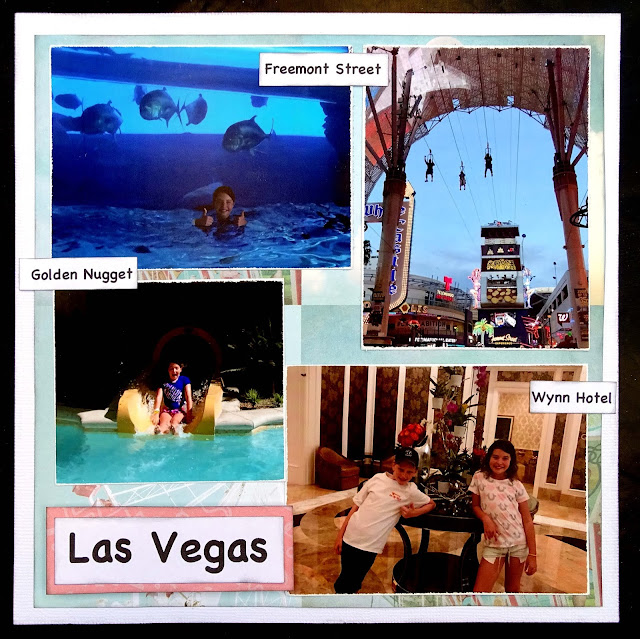
There is not really a lot to the page above. Because I had so many photos to go on the page I used 4 squares of patterned paper and attached them to the white cardstock background so they butted up to each other to add some colour to the background. I then filed around the edge of the photos and attached them to the page. I used my computer and printer to create the labels and attached them to the appropriate photo. The title was prepared in the same way, matted on some patterned paper and then attached to the layout


This page was also a very quick one. I had the background already prepared. It was a piece of cardstock that already had the glossy floral pattern on it. I just added the spray to give it colour. The design resisted the colour and shows out quite nicely.

I used a Couture Creations CO724161 die to cut the flowers from white cardstock. I inked the edges with yellow and rolled the edges of each petal to give the flower dimension before sticking them together with glue at the centre point. A clear gem in the centre finished the flowers off.

I did not have enough n's in the alphas I used for the title so I turned some u's upside down.

Thank you for dropping by to check out my post. I really appreciate it.

Till next time
Hugs
Julie

Wednesday, April 24, 2019

Dare to Fly Art Journal page

Good morning

Today I am sharing an art journal page. I have not done a page for sooo long and wanted to get back into it.

I created a video while I was making this page. You can see it here

This page is in my 11.5" x 8" Ranger journal so is quite a large page.

I have used Pan Pastels for all of the colour on this page. I have had them for a very long time and have not used them. I have to say they are my new favourites as the colour is so bright and intense.


I started by giving the page a coat of gesso. I am very glad I did, the colour went on so smoothly. 
I used Dairylide Yellow, Orange and Permanent Red for the background and applied it with a sponge.

I sprayed it with water to seal it but I was to later find that it still moves when wet medium is applied on top of it.

Some stamping was then added to the background using Kazazz - Life's Moments Background stamp and Ranger's Anatomy of A Page stamp and Stayzon black ink.

Next I  used some Modelling Paste, which dries white, and a 13@rts stencil randomly for a bit of a lift.

Final step was to water down some black, white and gold acrylic paint and splatter that on the page using my fan brush.


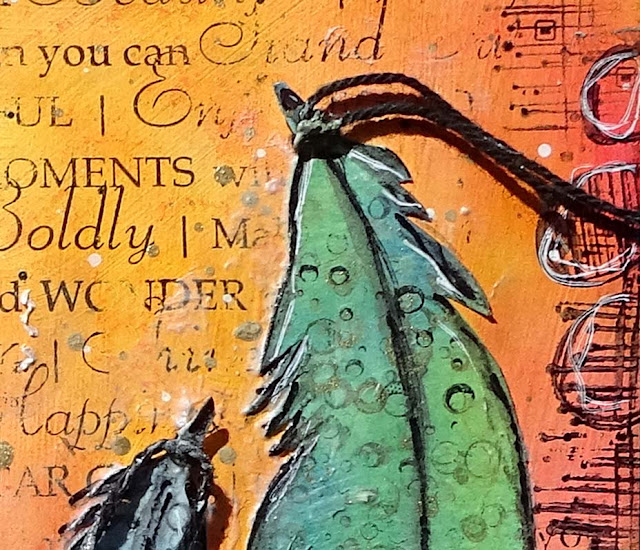
To make the feathers I used some watercolour paper and Pan Pastels. This is where I realised how well the Pan Pastels went over Gesso because I did not Gesso the water colour paper and it took more colour to get coverage and it was harder to blend the colours together.

The colours I used for the feathers are, Violet, Phthalo Blue Tint, Turquoise, Phthalo Blue, Hansa Yellow, Permanent Green Tint, and Permanent Green

I had a cardboard template of the feathers, I cannot remember where I got these from, so I drew around them with a pencil and then cut them out by hand.

Using Deep Red's Water Droplets Background stamp and some black Stayzon and gold inks I stamped onto the feathers

I then used my Stabilo All pencil in black and a water brush to give the feathers some detail

For a bit of added dimension I tied some black crochet cotton around the top of each feather.


The feathers were attached to the page using Matt Gel Medium, this was a big mistake. I had to be very careful as I found that the Pan Pastels moved when the gel medium was applied. 

I also was too heavy handed with the gel medium when I applied it to the top of the feathers and it dulled the colour. This meant I had to recolour and restamp the feathers being careful not to get anything on the background. I believe you can seal the PanPastels using hairspray. I am going to try that before I get into another mess with them.

I wanted to add a border to the page but not one that was too heavy. I used a Ranger stamp and Stayzon ink and stamped around the page.

I found the quote on the internet. It is by Cass Van Krah and I thought it was fitting for this page.
I printed it onto some normal printer paper and then I coloured the paper using the same Pan Pastels that I used on the background of the page because I did not want the white background of the text to stand out. I attached the quote to the page using glue....lesson learned.

To finish off I used an Artline permanent marker, a Micron fine line pen and my white gel pen to add some detail here and there to the feathers and the quote.


For more detail and to watch the creative process pop over to my YouTube channel and watch the video. Here is a link.

Please don't forget to subscribe if you haven't already and I would love it if you would share the video with your friends.

Thanks for dropping by
Till next time
Hugs
Julie
Sunday, April 21, 2019

8" x 8" Layouts

Good afternoon

Today I would love to share a few layouts from the 8" x 8" album I have been making.

There are no videos for these layouts as the are very simple.

Both layouts use Kaisercraft's Party patterned paper


This page is made up of lots of strips of paper, some have a punched edge. I have used an American Crafts paper punch to do that.

The Mickey Mouse head was bought back by my grand-daughter from her trip so I thought I would incorporate it into the layout. I have used a permanent marker to add some faux stitching to it. The photos have had the edges filed with an emery board and then matted onto black cardstock.

The title is printed from my computer and attached using glue


To start this layout I used a stencil and some Glass Bead Gel to create the dots in the background. I then used Glimmermist to colour the entire background

A strip pf torn patterned paper down the middle of the page completed the background.

The photos once again have been sanded with an emery board and then matted onto black cardstock.

The Disney stickers and Mickey Mouse heads were added and a doodled boarder completes the page

I hope you enjoyed checking out my post
Thanks for dropping by
Till next time
Hugs
Julie

Wednesday, April 17, 2019

Scrapping Fun Kits 2nd April Layout

Good morning to you

Today I am sharing the second layout I have created using the Scrapping Fun Kit's April kit.

The first one I created was We Remember. You can see that video here

Today's layout features a photo of me taken on my 60th birthday. I have to admit, it is very rare that I scrap a photo of myself.

You can watch the process video for this layout here.


I have used a Doodlebug Design flocked cardstock for the red background. I have cut the centre out of this cardstock leaving just a 1" frame as it seemed such a shame to waste it.

The black cardstock was cut to 11" square and the white cardstock is 10.75" square.

I used some black acrylic paint to colour some clear texture paste. I then put this through Kaisercraft's Lattice stencil down the middle of the page and to the left. I also added a small amount to the right hand edge of the cardstock.

I used the ribbon from the kit and a strip of black cardstock and some of the red to add some stripes behind the photo. I also added some of the ribbon on top of the texture paste on the right hand edge.


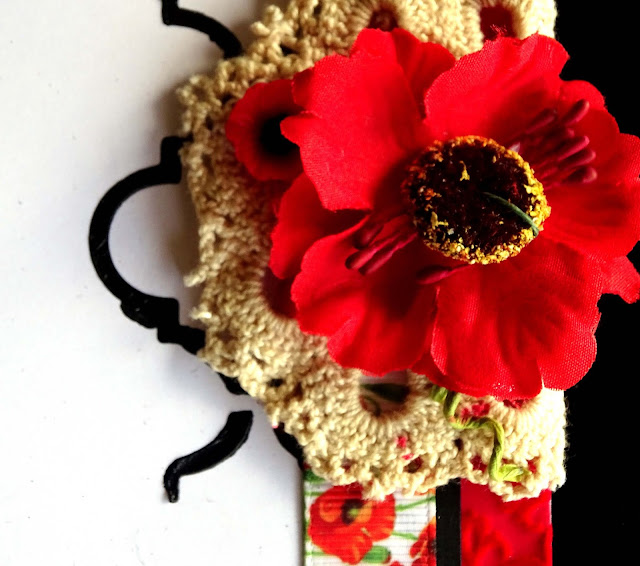
The two doilies, also from the kit, were added to the layout using my hot glue gun.

I used some of the patterned papers that I had left from the kit to make a couple of light coloured flowers to add to the red poppies, from the kit, to create a flower cluster on the bottom right of the photo. I also included the resin poppies and the green foliage, from the kit, to the cluster.


To complete the cluster on the right hand side I added one of the fabric poppies and one of the resin poppies to the doily


I cut my title using Die-Namics High Rise Numbers die and black cardstock and wrote the date by hand.

Lastly I added some splashed using Tattered Angles Chalkboard spray in Tomato Cerise.

Pop over to my YouTube channel and watch the video for all of the details.

If you enjoy the video please share it with your friends. I would love to reach 1000 subscribers by the end of the year.

If you would like to subscribe to Scrapping Fun Kits monthly kits you can do that here.

Thanks for dropping by
Till next time
Hugs
Julie

Saturday, April 13, 2019

We Remember Layout

Good morning

Today I want to share with you my first layout using Scrapping Fun Kits April kit.

The kit has an Anzac theme so I have created a layout showcasing my fathers National Service. He was in the first National Service call up.

There is a video showing the process for creating this layout on my YouTube channel. You can see it here.

Anzac layouts are the one time I feel comfortable putting flowers on a male layout because of the association poppies have with Anzac.


My background incorporates three layers of cardstock. The deep red, the kraft and the khaki.

I have used some brass acrylic paint to paint the chipboard emblem from the kit and also to colour the  paste I have used through a Kaisercraft stencil to add some dimension to the background.

When the texture paste was dry, I distressed all of the edges then I have used my sewing machine to attach the top two layers to the base layer with both straight stitching and zig zag.


I have used Stampendous Pretty Poppies stamp and die set to create the poppies. I have stamped the flowers onto red cardstock and then heat embossed them with fine black embossing powder. I did the same for the leaves using some of the same paper I used as the top layer of the background.

I love the Stampendous stamps and dies because when you cut the stamp out using the die, it does not leave a border around the stamped image. I am not a fan of the borders I'm afraid.


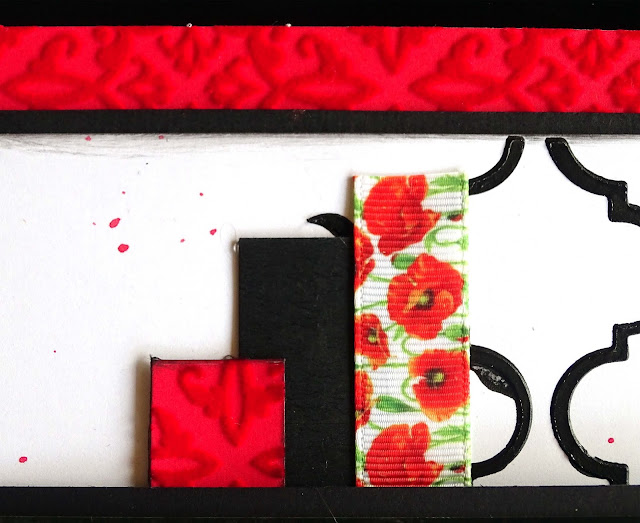
I used the patterned papers in the kit to cut some fishtail pieces of various widths and lengths to layer behind my photo. I also used a piece of red velum that I embossed using a Cuttlebug embossing folder as another layer.

I had my father's badge, so I cleaned it up and attached that using my hot glue gun so it would stay in place. The slouch hat and clock metal embellishments that were in the kit, have been attached with some black crochet cotton so they hang just below below the photo


The journalling was printed onto some of the patterned paper from the kit and attached with double sided tape.

Once I had matted the photo on the same paper as the top layer on the background I used foam tape to attach it to the layout


Don't forget, you can watch the video showing the creation of this page on my YouTube channel here

If you would like to subscribe to Scrapping Fun Kits you can do that here.

If you enjoy the video please subscribe to my channel and help me reach my target of 1000 subscribers by the end of the year

Thanks for dropping by
Till next time
Hugs
Julie

Wednesday, April 10, 2019

2 Cards, same design, different looks

Good morning

The inspiration for this post came from the fact that I needed a birthday card for my husband and a Mother's Day card for my Mum and I wanted to show that even if you did exactly the same thing on 2 cards they always look different depending on the papers you choose and the embellishments you add.

I will sometimes do this for layouts as well.

These are the 2 cards I made.

There is a video showing my process an my YouTube channel. You can see it here.


I have used a pink pearl card base for the Mother's Day card and trimmed it down to 5.5" square as I will be posting this card.

The papers I used are from Kaisercraft's Fiesta paper collection. This is a fairly old collection but I have the 6.5" paper pad and love the colours.

I tore 2 edges of the base layer patterned paper so it was slightly smaller that the card base.

I have then added a layer of pink burlap that I have frayed on two of the edges.

The third layer is some more patterned paper that was torn on two edges and the top layer of patterned paper has straight edges all round and sized so that the third layer just show at the top and bottom of it.

All of the patterned papers were inked on the edges with black ink.

The flower comes from a paper pad I bought many years ago by K&Co called Cardstock Flowers. There are 578 flowers that can be assembled from this pad. They are all pre-cut, so you have to mould and assemble each layer. I took the pad with me when I visited my Mum one time and we made some of the flowers together. This flower was one of them.

The greeting was generated on my computer and printed on standard printer paper. I have cut it to size, inked around the edge of it and used foam squares to attach it to the card.

I added a few dots of Clear Nuvo Drops randomly on the card for a bit of glimmer.


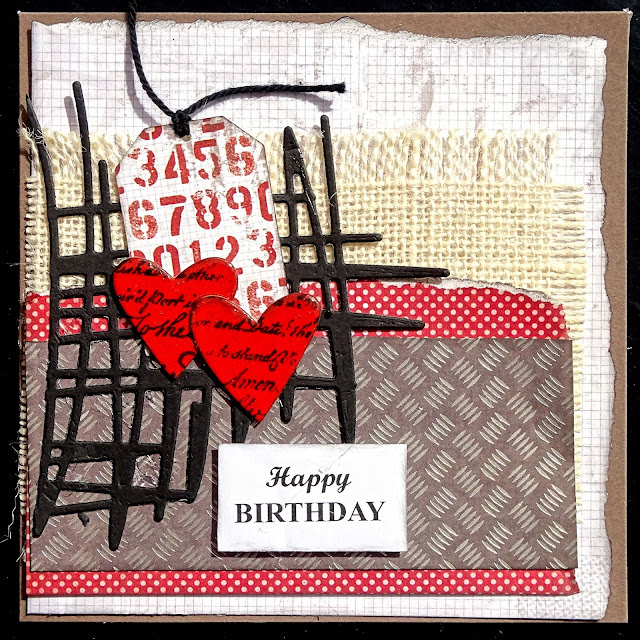
This masculine card was assembled in exactly the same way.

I used Kaisercraft Attitude patterned papers and cream burlap.

The black die cut was cut using Kaisercraft's Scribble die and the tag was cut using Kaisercraft's Tag Shapes die.

The chipboard hearts were that colour from a previous project so I stamped some text ao them using black StayzOn ink. When the card was complete I gave them a coat of glossy accents to add some shine.


I always find it amazing that two card that use the same design can look so different.

Why not give it a try with your cards or your layouts.

Don't forget to check out the video here, and if you enjoy it please share it with your friends.

If you are not already a subscriber to my YouTube channel I would love it if you would subscribe. I am trying to get to 1,000 subscribers by the end of the year and any help you would like to give me would be appreciated.

Thanks for dropping by
Till next time
Hugs
Julie

Wednesday, April 3, 2019

8' x 8" Holiday Fun Layout

Good morning

Today's layout is one for my grand-daughter's 2018 album so you can see I am definitely behind with this project. I have still got about 3 more pages to do so I had best get into it. I have not even started her 2019 album.

I have videoed the creation of this layout and you can see it here.

I have used Kaisercraft's Party paper range on this layout and all of the other layouts in her album.


I cut 3 patterned papers to 2" x 8" and then tore one of the long edges. The edges were then inked and the papers attached to the page so they stepped back from each other by about 1/2". The thin piece that I tore off the top layered patterned paper was attached to the right hand edge of the layout.

The photos were then matted on some of the patterned paper that I had used in the strips, the edges were distressed and inked and the photos and matts were attached to the layout using cardboard to give them some added height.

I utilised the thin pieces that I had torn off of the papers to create a little embellishment cluster at the top right of the layout.

I cut some circles and attached them to the layout using foam tape.


To make the title I used some very old stickers from my stash. I had taken them out of the packet so I do not know what brand they are but I have had them for a very long time. I did not have an "L" so I altered a "T".

Don't forget that you can see the whole process on video here.

If you enjoy my video please subscribe to my channel and share it with your crafty friends. I would love your help in reaching my goal of 1000 subscribers by the end of this year.

Thanks for dropping by
Till next time
Hugs
Julie