Thursday, November 29, 2018

More Christmas Cards

Hi there.

Well look at me go, another process video for these 5 Christmas cards.

You can see the video here

This first card has no middles section to the front of the card. The Christmas trees hold the front of the card together.
I made a standard 6" x 4" card and then cut the front section at 1 1/2" and then 2" up from the new bottom. I matted the top and bottom sections with 2 patterned papers and then used the Christmas trees that I had fussy cut from another patterned paper to join the 2 sections back together. The greeting was printed on my computer then matted before being attached with foam tape.


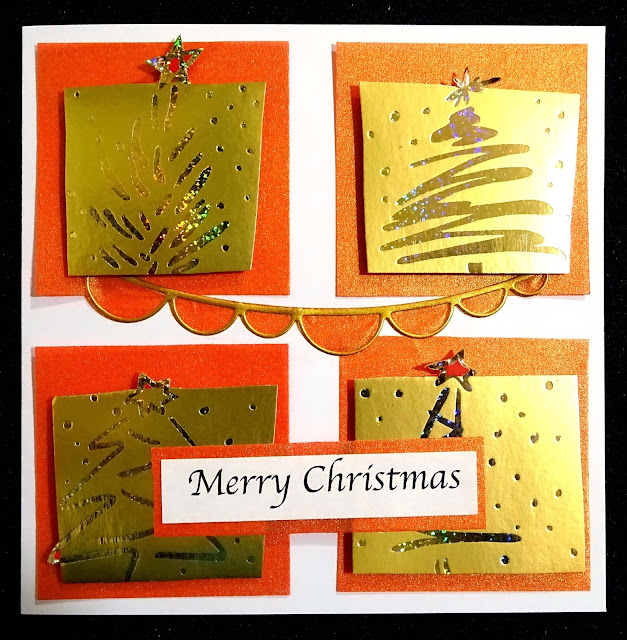
This square card is 5 1/4" in size because I found some envelopes in my stash that this size will fit into and I wanted to start using them up.

The red 2 1/4" squares were cut from a metallic glimmer velum. The gold squares were cut from a Christmas card I received last year.

The banner was cut using a no-name die, there are 2 pieces to it the frame and the background. I have cut the frame in gold cardstock and the background in the same velum.
I have matted the computer printed greeting on some of the velum and attached it to the card.


This 6" x 4" card is a top opening landscape card. I have cut 2 pieces of patterned paper 2 1/2" x 5 3/4". I have distressed and inked the edges and then attached them to each other so the top cardstock overlaps the bottom one. I then tied a piece of ribbon around this panel before attaching it to the card base. I cut a piece of white cardstock 3 3/4" x 1 1/2" and used foam tape to attach that to the card to hold the matted greeting and the Christmas tree embellishment.


This card is very simple. The 6" x 4" portrait card base has been matted with a piece of kraft cardstock that I cut to 3 3/4" x 5 3/4" then put through my big shot with a music notes embossing folder. I inked the edges and lightly wiped the ink pad over the embossed surface to highlight the pattern. I used a no name die to cut the baubles from white cardstock. After I attached that to the front of the card I applied some Stickles randomly on the baubles and I have coated my greeting with Glossy Accents


This square card measures 5 1/2" x 5 1/2". I have cut a background patterned paper 5 1/4" x 5 1/4" then patterned paper No. 2 to 4 1/2" x 5 1/4" which I have punched the two longer edges with a border punch. Another piece of the background patterned paper 3 3/4" x 5 1/4" was layered on top of that so that the punched edges poked through. Pattern paper no. 3 was cut to 3 1/4" x 5 1/4" and attached on top of the other papers using foam tape. I cut the greeting with Sizzix 662667 alphabet die and the background patterned paper and attached it to a piece of white cardstock that measures 3 3/4" x 2", this was attached to the front of the card toward the right hand edge of patterned paper no. 3. A purchased tag embellishment was add to complete the card.


I hope you pop over to my Youtube Chanel and check out the video. You will find 3 other card making videos linked in the description of this video that you might like to check out too.


Thanks for dropping by
Till next time
Hugs
Julie


Thursday, November 15, 2018

Christmas Cards Group 3

Good afternoon

Today I am sharing another video I have created showing the process to create these cards.


You can watch the video here. In the description of this video you will find a link to the other two videos I have posted on creating Christmas Cards. The 3 videos show you have to make 20 cards in total

My goal is to use as much of my Christmas stash as I can.

This first card has a stepped front which is not easy to see in the photo. The front of the card has been cut back to 4" x 4" and then all of the layers have been added to that so that they step out until the top layer is level with the right hand edge of the card base. All of the papers have been distressed and inked around the edges.
I have added a purchased bauble sticker that I have threaded some ribbon through and a computer generated Christmas greeting to finish the card


I have used some corrugated cardstock as the bottom layer on this next card. I cannot even guess how long I have had that. A layer of patterned paper and then some white cardstock. The edges of all the papers has been inked with black Versa Color ink.

I have die cut the bauble decoration from gold cardstock, green/blue cardstock and red cardstock then layered them in the appropriate places to create the embellishment.
I attached it to the card and then covered the bow with red stickles for some shimmer.

The greeting has been printed from my computer and then matted on some red cardstock. It has been attached to the card using foam tape


This next card is a shaker card. I die cut the baubles from a piece of white cardstock that I had trimmed to 3 3/4" x 5 3/4" so I would have a 1/8" border all the way around my 6" x 4" card

I also cut the tops of the bauble from gold cardstock.

I attached a piece of acetate to the back of the panel and then used glue to put the bauble detail back into the cut out shape.

I created a border all of the way around each bauble on the back of the panel using foam tape, I tipped the ultra fine red glitter into the well that this created and then covered it with a piece of white paper. Make sure you have a complete row of tape surrounding your glitter or you will end up with glitter everywhere and none left in your card.

I then attached the red ribbon from the top of the bauble and carried it over the top of the panel. The gold bauble tops were then glued into position.

The greeting was cut using a die and attached with glue


The bauble on this last card is made using Washi tape. I covered a piece of white cardstock with an assortment of glitter washi tapes then used a circle die to cut out a circle in a size to suit my panel.

The card has 3 background panels made from patterned paper, the top layer is white cardstock that I have embossed using a Cuttlebug embossing folder.

The top of the bauble is a small rectangle I have cut from the leftover washi covered cardstock

The white layer and the bauble are attached using foam tape.

For the greeting I have cut it once from patterned paper and twice from white cardstock and stuck them on top of each other to create a slightly raised greeting.


Hope you enjoy my videos if you check them out.

Thanks for dropping by
Till next time
Hugs
Julie

Wednesday, November 7, 2018

Katy Perry Layout

Hi there

Tonight I want to share with you a YouTube clip that shows the process I used to create this layout.

You will find the video here


My first step was to give the background a coat of clear Gesso then some Modelling Paste through a Kaisercraft stencil called Lattice.

I used some Pearlescent watercolours and some Dylusions Ink Spray to add some colour over the top of the texture paste.  The same ink spray and some Black Magic Glimmermist were then splattered randomly over the page.

Lots of border stamps were used with Stayzon Ink to stamp vertically over the page to give it more texture and interest.

I chose 7 co-ordinating patterned papers from my stash and cut some 3/4" strips in various lengths to use behind my photo.

The photo was double matted and attached using foam tape to make it stand out from the background.

I die cut a journalling block from one of the patterned papers and attached it to the layout under the photo and used some glittery black alpha stickers to finish the journalling off and create the title

Hope you can check out the video.

Thanks for dropping by
Till next time
Hugs
Julie
Sunday, November 4, 2018

Christmas Cards 2018 Group 2

Good morning

I have made some more Christmas cards and a process video to share with you today

You can see the video here

These are the cards I have made this week. My aim is to use as much as possible of the huge "Christmas" stash I have been saving for that special card.


All of the card bases are cut from white cardstock and are 6" x 4". I get 3 cards from each 12" x 12" sheet.

This card features some Creative Imaginations stickers. They are beautiful stickers that have a high gloss finish. I have attached them to the card with some ribbon. The two round baubles are attached with foam tape. The paper I used on this card  is from SEI and is a glitter paper. For the greeting I have printed a whole sheet of greetings in various fonts and sizes and I cut them up and use them as they are required. I have mounted it on a patterned paper mat and then attached it to the card with foam tape.


The front panel of this card was created using the Kaisercraft Mini die "Christmas Tree" and some Modelling Paste. A ribbon tied around the panel before it is attached to the card using foam tape gives the card some extra texture. The tree is on gold cardstock and the red cardstock behind the panel is red mirror board


This card took me quite a while because I have threaded micro beads onto gold wire to create the tree then used the same wire to outline the tree. I have layered gold embossed paper, pink and white cardstock for the background layers


The inspiration for this card came from Pinterest, a post by Split Coast Stampers. The combination of the white and kraft cardstocks are just so "clean". I have used a Cuttlebug embossing folder to create the background for the kraft trees. The decoration on the trees was created using Scribbles which is very similar to Stickles and Kindy Glitz. I tossed up weather to go with white or gold ribbon but decided to go with white.


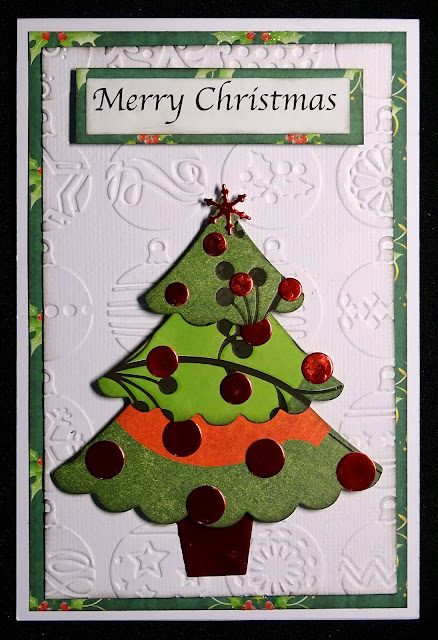
The Christmas tree on this card is cut using an unbranded die I bought on the internet. There is another bigger piece to this tree but I thought it was too big for the card so left it off.
The patterned paper used for the first layer is by Best Creations Ink and is very old. I can't remember what the brand of paper is that I used for the tree. The tree decorations and base are cut from red mirror board. I have used the same method for the greeting as I did on the first card.


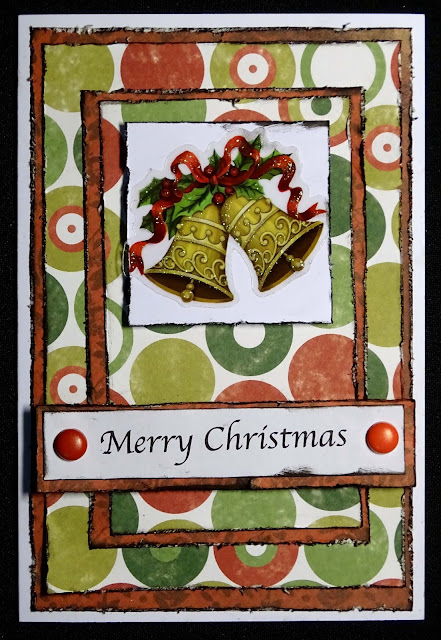
This card is several layers of patterned paper from Kaisercraft's Countdown and Christmas collections from several years ago. The edges of all of the layers have been distressed and inked. The bells are a clear sticker from Clover, once again very old.
The greeting has been matted on some patterned paper then I added a brad put to each end and attached it to the card using foam tape. The white square of cardstock has also been attached to the card with foam tape.


So don't forget to check out the video here for full instructions on how to make these cards. Hope you enjoy it and subscribe to my channel.

Thanks for dropping by
Till next time
Hugs
Julie