Good morning.
Today I want to show you three cards I created using gold and white.
Let's start with this card.
The card is 5 1/4" square.
I have cut the pearlised gold cardstock 5" x 5" and 5" x 1 3/8"
and white cardstock 4 3/4" x 4 3/4" and 5" x 1 1/8"
I used an embossing folder (Spellbinders I think)
to emboss roses into the 4 3/4" piece of white cardstock
I layered the 1 1/8" white cardstock onto the 1 3/8" strip of gold cardstock
then attached chipboard to the back of that panel.
The embossed piece of white cardstock was attached to the
5" piece of gold cardstock and the panel was then attached to the cardbase.
I wrapped a piece of gold organza ribbon around the layered strip
before attaching it approximately centre of the front of the card.
A white flower from my stash and some gold leaves
cut with Uniquely Creatives Little Leaves die along with
a die cut gold bow embellish the front of the card.
The greeting was also die cut. The shadow is the same pearlised gold cardstock
and the "hello" is white cardstock.
To finish the card off I added some splatters with a mixture of Gold Glimmermist
and Gold Spritzing Ink by Artiste.
The second card is a shaker.
The card base is 6 1/4" x 10", scored at 5" on the 10" side to make a 6 1/4" x 5" card
I also cut two pieces of white cardstock 5 3/4" x 4 1/2", these will become my shaker element.
There is one piece of the pearlised gold cardstock that measures 6" x 4 3/4".
This is the background layer between the card front and the shaker panel.
from one of the 5 3/4" x 4 1/2" pieces of white cardstock
I trimmed around the die cut negative so there was only about 1/2" of the
pattern left of the die cut.
I cut a piece of acetate to 5 1/2" x 4 1/4" and attached that to the back
of the negative of the die cut.
I then used glue to attach the die cut panel to the outside of the acetate
so it inlayed neatly into the edges of the die cut negative.
Foam tape was attached to the back of this panel making sure not to allow any
of the foam tape to show through to the front.
With the back of the shaker panel facing up I added the course gold glitter
and sealed it in place by attaching the other piece
of 5 3/4" x 4 1/2" white cardstock.
The gold cardstock was added to the card front then the shaker panel
was attached to that.
To embellish the card I stamped Woodware's Mini Garden Spray stamp
twice onto the gold cardstock.
Once I had fussy cut them I shaped the petals using my flower shaping tool
and then layered one on top of the other using foam squares
to give the flower added dimension.
I used the same Leaf die to cut three leaves from the gold cardstock
and added these to the card front, tucked under the flower.
The greeting was stamped using Woodware's Word Fragments stamp set then
heat embossed using myAntistatic Powder Tool,
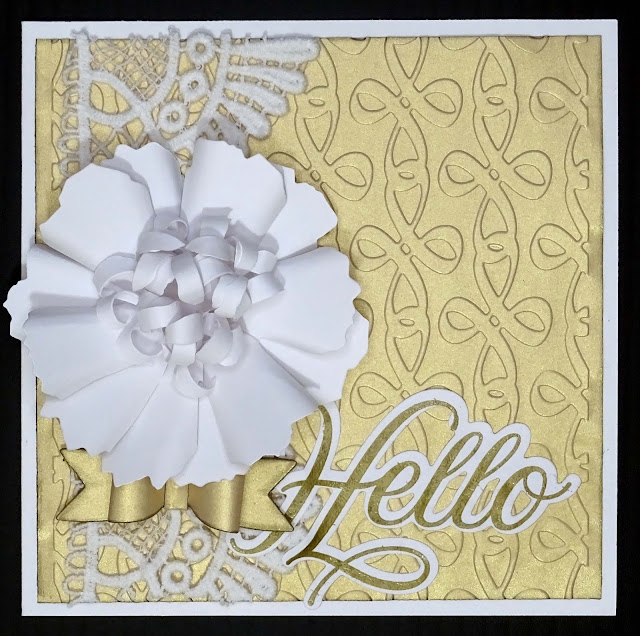
The third card is once again 5 1/4" square
This is probably the simplest of today's cards.
The cardstock for the card base is 5 1/4" x 10 1/2" scored and folded at 5 1/4" on the 10 1/2" edge.
The gold cardstock is 5" square and has been embossed with
Couture Creations Washed Away embossing folder.
A pretty lace from KS4U was added near the left hand edge of the card front
I used Tim Holtz Tattered Floral die and white cardstock
to make the flower for the front of this card
The greeting is a stamp and die set from Kaszazz called "Hello"
I have used gold embossing powder.
I also added a die cut bow to finish this card off.
Here is my process video
I hope you will try making one or more of these cards. They are all quite easy.
If you would like a tutorial on how to make the flower on the last card
let me know in the comments and I will make a "how to" video for you.
I learned how to make this flower from a YouTube video about 10 years ago
and I use it quite often. It is a very handy flower to use when you want
a nice sized focal point for a card or an embellishment for a scrapbooking layout.
Thank you for spending part of your day here with me today
Till next time
Stay safe
Hugs
Julie


No comments:
Post a Comment
Thank you for your comment