Showing posts with label domed blending tool. Show all posts

Wednesday, March 16, 2022

Three inking techniques

Good morning.

Before I start my post today I would like to ask you to do something for me.
I spend a lot of time writing these posts and I wonder if anyone reads them. 

If you have visited my blog today could you please leave me a comment, even if it is just "Hi Julie"
Depending on the number of comments I receive to this post 
I will decide whether I will continue posting on my blog.

So please, if you visit my blog and enjoy reading what I post please leave me a short comment.

Now on to today's post.

I recently bought some new Distress Inks and realised I didn't use my inks often enough,
so today I am sharing three techniques using Distress/Oxide Inks.
I have mainly Distress Inks with a few Distress Oxides thrown in.

I made three cards
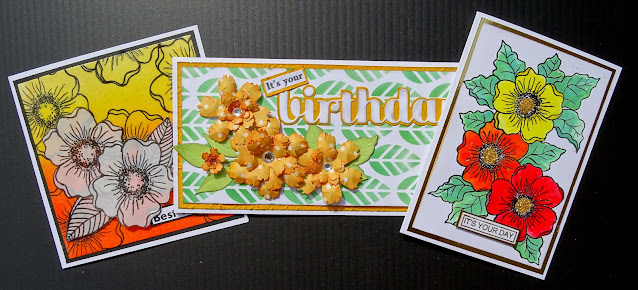

Each of the cards are a different size.

Card No. 1

This is a slimline card measuring 8" x 4" and fits into a standard DL envelope
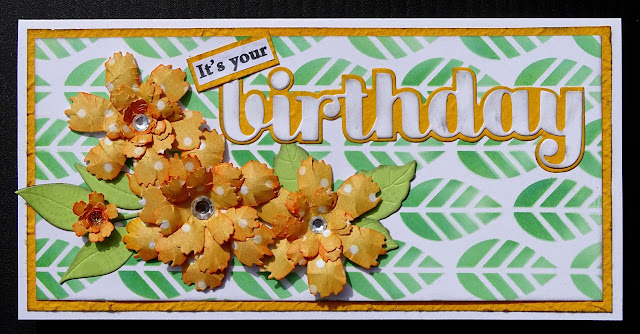

I have cut 300gsm white cardstock to 8" x 8" and folded it in half. 

I used Cracked Pistachio Distress Oxide and Mowed Lawn Distress ink, 
 with a Hero Arts Blending brush, to apply colour through A Little Birdie leaf stencil.

I trimmed a piece of textured yellow cardstock to 3 3/4" x 7 3/4" and attached that to my card front.

Next I trimmed my inked panel to 3 1/2" x 7 1/2" and added that on top of the yellow cardstock.

To decorate the card I used some of the flowers I created in this video

I die cut the sentiment from white cardstock and the shadow from the yellow cardstock,
inked the edges and attached it to the front of the card about 2/3rds of the way up.


I printed the rest of the greeting, trimmed it to size, layered it onto a piece of the yellow cardstock and attached it so it was slanted and slightly over lapping the b of "birthday"

I also used the same stencil and some Squeezed Lemonade Distress Ink 
on the inside of the card.

Card No. 2
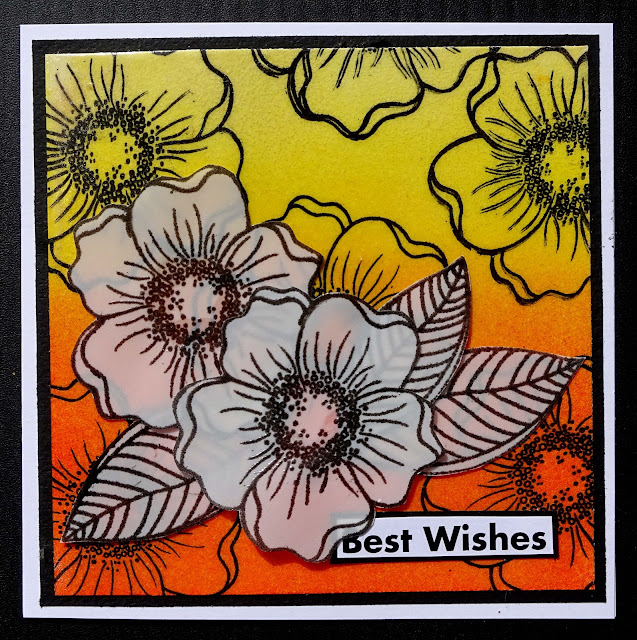

This card is 5 1/4" square

I started with a piece of smooth white cardstock 5" square and blended Squeezed Lemonade, Mustard Seed, Spiced Marmalade and Ripe Persimmon Distress inks, starting with the lightest colour and 
working my way down to the darkest. I used a domed foam blending tool for this.

 to stamp all over the background using Versafine Onyx Black ink.

I added clear embossing powder and as the Distress Inks were still wet 
the embossing powder clung to the whole background. 
I had not planned on doing this but I have to say I am pretty happy with the results.
I gave it 3 or 4 coats of the clear embossing powder to get a nice high gloss.

I trimmed a piece of black cardstock to 5" square and 
the stamped panel to 4 3/4" square and layered them onto the card front.

I did not want to completely cover the pretty background so I stamped a 
couple of the same flowers and three leaves from a Paper Artsy stamp
onto some Hero Arts velum. I stamped with Versafine Onyx Black Ink


I fussy cut the flowers out and used Art Glitter glue to attach the velum, 
applying the glue behind the embossing.

The sentiment came from a little pot of sentiments I keep on my desk. 
They are leftovers from kits, paper packs or excess stamping/heat embossing.
I matted the sentiment onto some black cardstock and added it to the bottom right of the card.

Card No. 3
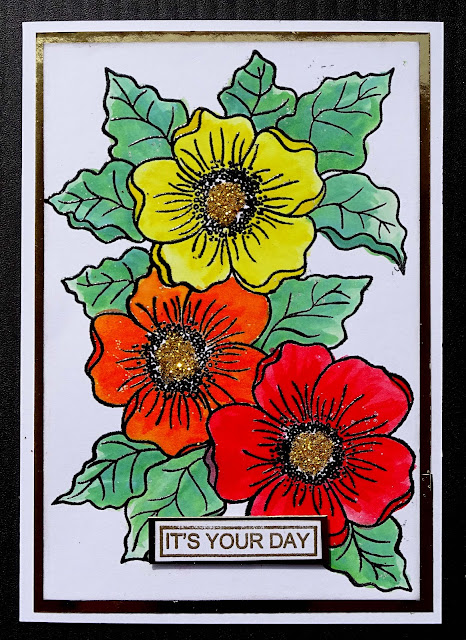

Our final card for today is 4 1/4" x 6"

I am going to use my inks as watercolours for this card.


I used my water brush to apply the colour but you could use a normal brush if you don't have one.

I used two colours on each area.

For the leaves I used Cracked Pistachio Distress Oxide and Mowed Lawn Distress Ink

For the yellow flower I used Squeezed Lemonade and Mustard Seed

The orange flower is Spiced Marmalade and Ripe Persimmon

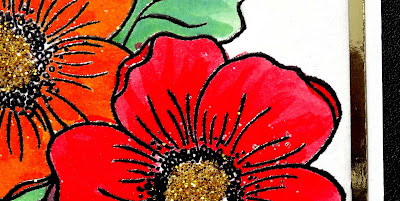
And the red flower is Candied Apple and Festive Berries.

You can see how I applied the ink and shading in the video below


I cut some Gold Mirri Card to 4' x 5 3/4" and trimmed my flower panel to 3 3/4" x 5 1/2" 
and layered them onto the front of the card base

The sentiment is from the same place as the previous one and is gold heat embossed.
I matted it onto a piece of the gold mirri card and attached it to the card front 
with a piece of scrap cardboard behind it.

A final touch to this card was to add some gold fine glitter to the centres of the flowers.

So there we have my three cards for today.
I hope you have enjoyed reading about them and I hope you will leave me a comment.

Here is the process vide.
Have fun watching it


Thank you for spending part of your day here with me today
Till next time
Stay safe
Hugs
Julie

Sunday, March 13, 2022

DT layout for Off the Rails Scrapbooking

Good morning

My layout today was created for the Moodboard over at Off the Rails Scrapbooking

This is the Moodboard


This is my layout


I have used Kaisercraft's Now Boarding and After Five patterned papers.
They are very old and I don't think they are still available.

I have trimmed the mustard coloured cardstock for the background to 11 1/2" square.

I trimmed the bottom of the mustard cardstock on an angle from the bottom left corner up about 1" on the right hand edge and backed that with a piece of Now Boarding - Terminal patterned paper.

The mustard background was attached to black cardstock.

I used TCW Chevron Tiles stencil and Ripe Persimmon Distress Ink, applied with my domed blending tool, to create a pattern on the mustard cardstock.

I also ran around the edge of each of the squares on the stencil with a fine black pen to outline each shape.

Now Boarding - Cabin Crew was trimmed to 6 1/2" x 8"
After Five - Corsage was trimmed to 3" x 10 1/2" A fishtail was cut in each end
Now Boarding - Boarding Pass was cut to 2 1/4" x 9 1/2" A fishtail was cut in each end

All of these were then matted onto black cardstock that was cut a 1/4" larger, 
giving a 1/8" boarder all around.

The photos were also matted on black in the same manner.


These were attached to the layout. The largest piece of patterned paper and the photos were 
attached with cardboard behind them.

To embellish the page I used a tab from the collectables pack and several items that I had stamped, heat embossed and fussy cut using a Kaisercraft stamp set. 
I can't remember the name of the stamp set but I could look it up if anyone would like to know its name.


The title was printed on Now Boarding - Boarding Pass and attached between the two photos.

Here is my process video
I hope you enjoy watching it.


Thank you for spending part of your day here with me today

Till next time
Stay safe
Hugs
Julie


Wednesday, January 19, 2022

Ink Blended Cards

Good morning.

I have been wanting to do some ink blending for some time so today is the day. 

I am by no means an expert at this technique, 
as a matter of fact I have probably only done it once or twice at the most.

The theme for the month over at Mystical Scrapbooking is Techniques
so I thought I would do a blog post on ink blending.

I also created a video and I will put that at the end of this post if you would like to check it out.

I made three cards


The first card I created has a heat embossed image as the focal point


I stamped Woodware - Bold Blooms - Ginny with Versamark Embossing Ink onto the front of my card panel after I had wiped it over with my Embossing Buddy

I then used White embossing powder and set it with my heat gun.
This creates a resist for the Distress Inks I will blend on top.

I attached a strip of Mint Tape (Removable Masking type tape) to the areas of the card so the blended ink did not go onto the back of the card base.

 to the front of the card covering about 1/3 of the card front with each colour
 and using the lighter colour to blend over the area where the colours meet.

Once the card front was covered I used a tissue to wipe over the image
to remove any ink that may have been on the embossing.

The sentiment is from 13@rts His & Hers Remastered Sticker Collection.

Card No. 2 is similar in appearance


For this card I blended the Distress Ink onto a White Cardstock panel that measures 3 3/4" x 5 1/2"

The colours I used are Scattered Straw, Peeled Paint and Broken China.

I used a die and my Big Shot to cut the floral bouquet from white cardstock and attached it to the 
inked panel using liquid glue.
Because the Inks are reactivated by liquid I was careful to not get any glue on the inked panel.

I added a piece of scrap chipboard to the back of the panel before attaching it to my card base.

The sentiment came from the same 13 @rts sticker sheet.

The ink blending on the third card is a little different.


I stamped and heat embossed Woodware - Whimsical Flower - Daisy May 
onto a white cardstock panel that measures 3 5/8" x 5 3/8"
I used black embossing powder for this stamp.

I then used my finger daubers to colour the image with Distress Inks.
The colours I used are Mowed Lawn, Mustard Seed and Ripe Persimmon

I did manage to go over the lines a couple of times 
but I used my Mono Sand Eraser to rub the ink away where it bothered me.

To give the black sections in the centre of the flower a little sparkle I added 
dots of Viva Black Pearl Pen

I cut a panel of black cardstock 3 7/8" x 5 5/8",
matted my image panel onto that
and then attached the black panel to the front of the card base.

The sentiment, once again, came from the 13 @rts sticker sheet.

So three very simple cards today but I have to say I really enjoyed making them.
They are quick and easy but quite striking I think.

Have you tried ink blending? Let me know how you found it.

Here is my video


 Thank you for spending part of your day here with me today
Till next time
Stay safe
Hugs
Julie

Saturday, September 11, 2021

Whimsical Work Art Journal Page

Hello hello

Today I have got a quick post to share an Art Journal page I created.

I have not done any art journalling for a while and I was just in the mood for a bit of painty stuff.

I wanted to create something that had a bold contrast between the background 
and the focal point and this is what happened.


The background is acrylic paint. 
I worked on my silicon mat so I would have an easy clean up

I used Creative PL Cobalt Blue and Mont Marte Purple for the first layer. 
These were applied using a damp brush

Once that layer was dry I applied Creative Pl Ultramarine Deep and Purple Lake acrylic paints. 
I used a sponge to apply this layer giving me a lovely bumpy texture.

I used a scribbly circle stamp and the Cobalt Blue acrylic paint to stamp randomly over the page.


The focal point was created using a stencil from Anco and Viva Inca-Gold.
I have had the Inca-Gold for a very long time and it is very thick
but I was still able to push it through the stencil using my palette knife.

I added the motif to the top right and bottom left of the page.


To add a little lightness to the page I splattered some watered down 
white acrylic paint through the centre of the page, 
trying to avoid the gold sections as best as possible.

I used my domed blending tool to apply Archival Jet Black ink around the outside of the page.

The quote for the page came from Art by Marlene's Artsy Arabia black & white sticky quotes.
I attached the quote to the page with glue and drew a border around 
the quote and the page using my white Posca paint pen 0.7mm

Here is my process video


Thank you for spending part of your day here with me today.

Till next time
Stay safe
Hugs
Julie