Showing posts with label distress oxide inks. Show all posts

Wednesday, March 16, 2022

Three inking techniques

Good morning.

Before I start my post today I would like to ask you to do something for me.
I spend a lot of time writing these posts and I wonder if anyone reads them. 

If you have visited my blog today could you please leave me a comment, even if it is just "Hi Julie"
Depending on the number of comments I receive to this post 
I will decide whether I will continue posting on my blog.

So please, if you visit my blog and enjoy reading what I post please leave me a short comment.

Now on to today's post.

I recently bought some new Distress Inks and realised I didn't use my inks often enough,
so today I am sharing three techniques using Distress/Oxide Inks.
I have mainly Distress Inks with a few Distress Oxides thrown in.

I made three cards
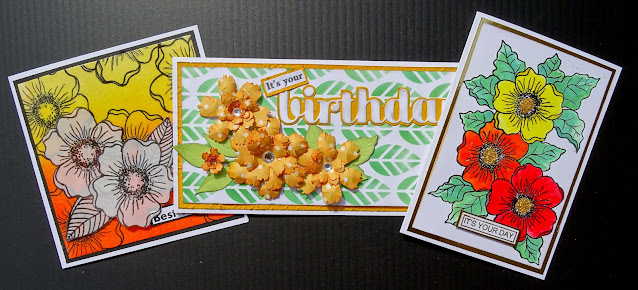

Each of the cards are a different size.

Card No. 1

This is a slimline card measuring 8" x 4" and fits into a standard DL envelope
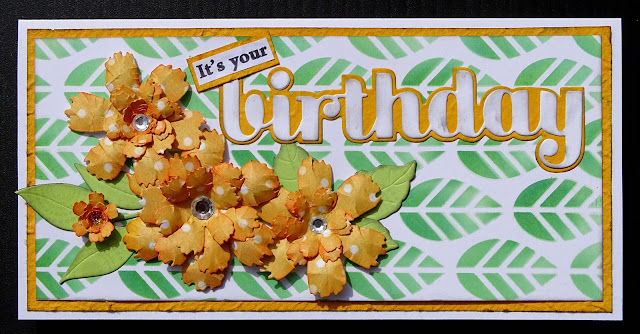

I have cut 300gsm white cardstock to 8" x 8" and folded it in half. 

I used Cracked Pistachio Distress Oxide and Mowed Lawn Distress ink, 
 with a Hero Arts Blending brush, to apply colour through A Little Birdie leaf stencil.

I trimmed a piece of textured yellow cardstock to 3 3/4" x 7 3/4" and attached that to my card front.

Next I trimmed my inked panel to 3 1/2" x 7 1/2" and added that on top of the yellow cardstock.

To decorate the card I used some of the flowers I created in this video

I die cut the sentiment from white cardstock and the shadow from the yellow cardstock,
inked the edges and attached it to the front of the card about 2/3rds of the way up.


I printed the rest of the greeting, trimmed it to size, layered it onto a piece of the yellow cardstock and attached it so it was slanted and slightly over lapping the b of "birthday"

I also used the same stencil and some Squeezed Lemonade Distress Ink 
on the inside of the card.

Card No. 2
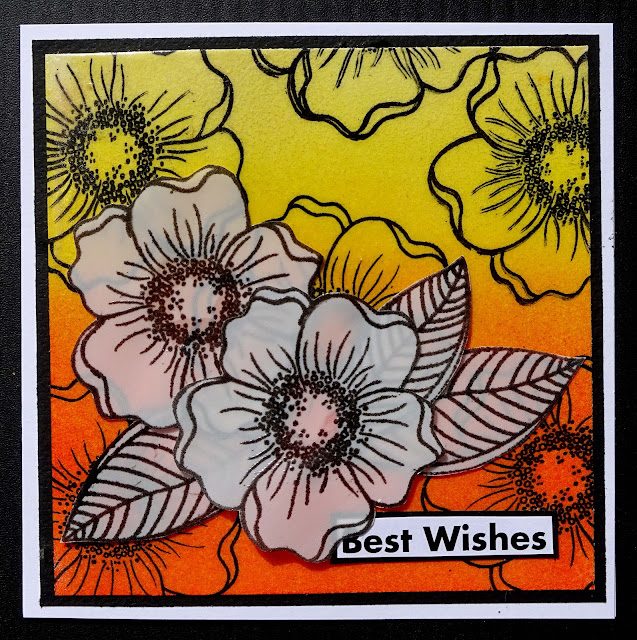

This card is 5 1/4" square

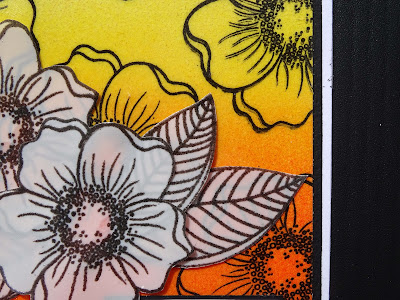
I started with a piece of smooth white cardstock 5" square and blended Squeezed Lemonade, Mustard Seed, Spiced Marmalade and Ripe Persimmon Distress inks, starting with the lightest colour and 
working my way down to the darkest. I used a domed foam blending tool for this.

 to stamp all over the background using Versafine Onyx Black ink.

I added clear embossing powder and as the Distress Inks were still wet 
the embossing powder clung to the whole background. 
I had not planned on doing this but I have to say I am pretty happy with the results.
I gave it 3 or 4 coats of the clear embossing powder to get a nice high gloss.

I trimmed a piece of black cardstock to 5" square and 
the stamped panel to 4 3/4" square and layered them onto the card front.

I did not want to completely cover the pretty background so I stamped a 
couple of the same flowers and three leaves from a Paper Artsy stamp
onto some Hero Arts velum. I stamped with Versafine Onyx Black Ink


I fussy cut the flowers out and used Art Glitter glue to attach the velum, 
applying the glue behind the embossing.

The sentiment came from a little pot of sentiments I keep on my desk. 
They are leftovers from kits, paper packs or excess stamping/heat embossing.
I matted the sentiment onto some black cardstock and added it to the bottom right of the card.

Card No. 3
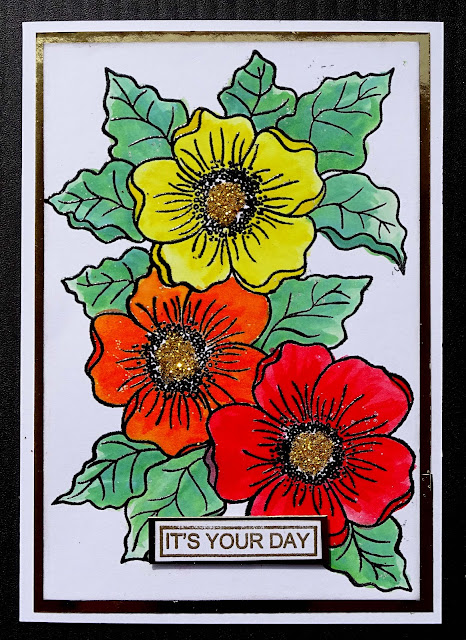

Our final card for today is 4 1/4" x 6"

I am going to use my inks as watercolours for this card.


I used my water brush to apply the colour but you could use a normal brush if you don't have one.

I used two colours on each area.

For the leaves I used Cracked Pistachio Distress Oxide and Mowed Lawn Distress Ink

For the yellow flower I used Squeezed Lemonade and Mustard Seed

The orange flower is Spiced Marmalade and Ripe Persimmon

And the red flower is Candied Apple and Festive Berries.

You can see how I applied the ink and shading in the video below


I cut some Gold Mirri Card to 4' x 5 3/4" and trimmed my flower panel to 3 3/4" x 5 1/2" 
and layered them onto the front of the card base

The sentiment is from the same place as the previous one and is gold heat embossed.
I matted it onto a piece of the gold mirri card and attached it to the card front 
with a piece of scrap cardboard behind it.

A final touch to this card was to add some gold fine glitter to the centres of the flowers.

So there we have my three cards for today.
I hope you have enjoyed reading about them and I hope you will leave me a comment.

Here is the process vide.
Have fun watching it


Thank you for spending part of your day here with me today
Till next time
Stay safe
Hugs
Julie

Friday, January 7, 2022

Cards using Prima's Nature Garden 6" paper pad

Good morning

Today I am sharing a couple of cards I made using Prima's Nature Garden paper collection.
This is a very old collection and I don't think it is still available.

My aim with these cards is to use items from my stash

Both of the cards are 4" x 5 7/8" and cut from 240 gsm smooth white cardstock


Let's start with the first card


I have used two sheets of the same patterned paper for this card.
I have cut a piece 3 7/8" x 5 3/4" for the background,
a piece 2" x 4" and a piece 1" x 3" to make the fishtail pennants.

I also cut white cardstock to mat the pennants.
These measure 2 1/8" x 4 1/8" and 1 1/8" x 3 1/8"

I have inked around the edges of all of the patterned paper and cardstock 
with a Versa Color Cocoa ink cube.

The background patterned paper is attached to the card-base using double sided tape.
A layer of craft foam was attached to the back of the pennants 
before they were attached to the card front. The thinner pennant overlaps the wider one.

A strip of white lace was attached under the thinner pennant at the same time 
it was attached to the card front. I used Art Glitter glue to do this.

I used my Tim Holtz Tattered Florals die to create the flower on this card.
Here is the showing how I created this flower.


A piece of cheese cloth and a black & white Baker's Twine bow 
were added under the flower. It was attached using hot glue.

The sentiment is chipboard that has had a coat of white gesso.
I then coloured it with the Cocoa ink, this did not stand out enough 
so after I had attached it to the card I swiped over it with my black ink cube.


For the inside I cut a piece of the same patterned paper 3 7/8" x 5 3/4", inked the edges with Cocoa ink and used double sided tape to attach it to the inside right panel of the card.

I stamped happy birthday using Scrapbook.com's Happy birthday to You stamp
with Versafine's Onyx Black Ink onto white cardstock. 
I then used my heat tool and Clear Embossing powder to heat emboss the sentiment

I trimmed the cardstock down, inked the edges and attached it in the centre of the patterned paper.

I had a flower that was left over from a previous project, it was cut using Cheery Lin's Chrysanthemum Strip die and white cardstock. I attached the flower
 and added a little Nuvo Vintage Drops in Peachy Keen to the centre just to finish it off

The second card


All of the papers and cardstock on this card have had their edges inked with a black Versa Color ink cube.

I chose two patterned papers from the pad for this card.
I cut one 3 3/4" x 5 5/8" and the other 2" x 5 5/8"

A piece of white cardstock was cut to 2 1/4" x 5 5/8" to mat the smaller piece of patterned paper.

I added some scrap chipboard to the back of this panel.

After I had attached the large piece of patterned paper to the front of the card base I used some Art Glitter glue to attach half a paper doily so the edge of it lined up with the right hand edge of the card front.

The patterned paper panel was then attached so that it slightly overlapped the edge of the paper doily

A strip of lace was attached to the centre of the panel using double sided tape.

To embellish the front of the card I stamped all of the flowers and leaves in 
Heartfelt Creations - Botanical Rose stamp set onto smooth white cardstock

To colour the flowers I used Distress Inks in Victorian Velvet and Bundled Sage and 
Distress Oxide inks in Speckled Egg and Tattered Rose

I smudged my inks onto an acrylic block and then used my water brush to 
add the colour to the stamped images.

I then fussy cut them using my spring assisted scissors

I added Nuvo Jewel Drops in Sea Breeze to the centre of each flower

I had an oval chipboard frame from Imaginarium Chipboard.
I gave it a coat of gesso and them coloured it with the 

These were all attached to the card front using hot glue

The sentiment is from Uniquely Creative's Ocean Breeze Mini Cut a Part sheet.


For the inside I cut two strips of the same patterned paper I used
 as the background panel on the card front to 1" x 5 5/8", 
I attache one strip to each side of the back inside panel.

You will find my process video below


Thank you for spending part of your day here with me today

Till next time
Stay safe
Hugs
Julie


Saturday, January 1, 2022

January Challenge at Mystical Scrapbooks

Good morning and Happy New Year to you.

My post today is to share my Design Team layout for January's challenge at Mystical Scrapbooks

The theme for the month is Techniques and the highlighted product is ribbon & twine.
The ribbons and twine will be on sale for the month so don't forget to check them out.

The challenge that I have set is to use the "Smooshing" technique on your layout and to incorporate a ribbon or twine bow.

Here is my layout


There are eight photos and they are each 3" square.

I have used Distress and Distress Oxide inks for my smooching.
The paper I have used for my background is Bee Arty - Love & Grace - Adele

The inks I have used are 
Distress Oxides Speckled Egg & Salty Ocean

If you are unsure of how to do the "Smooshing" technique check out my process video below.
It is very simple and lots of fun.

I also added random stamping on my background using Versafine Onyx Black ink

I have used Bee Arty Love & Grace - Portia patterned paper and white cardstock
to die cut an assortment of flowers.

The dies I used are
Uniquely Creatives Little Leaves
Couture Creations CO724161
Cheery Lyn B311 Chrysanthimum Strip
and one other die that I do not know the name of.


I inked the edges of the flower layers, shaped them with my flower shaping tools 
and assembled them using my Art Glitter Glue.

I filed around each of the photos with an emery board before attaching them to my background.

Next the flower embellishments were attached

A Bakers Twine bow sits amongst the left hand floral cluster


The title was cut from black cardstock using Kaisercraft's DD700 Alphabet Upper Case Die,
attached to the right hand side of the layout and given a coat of Glossy Accents

To finish the layout off I added a scribbly boarder of slightly 
watered down black acrylic paint in my 

Here is my process video so you can see how I created this layout, including the "smooshing" on the background


Thank you for spending part of your day here with me today

Till next time
Stay safe
Hugs
Julie