Wednesday, May 13, 2020

All of Us Scrapbooking Layout

Good morning.

Today I am sharing with you the Design Team layout I created for Off The Rails Scrapbooking using their May mood board. You can see their Facebook page here. Why not enter their challenge, you could win a great prize.

I have created a process video showing how this page was made, you can see the video here


This is the mood board.
The inspiration I took from this is the colours, blue, green, red and orange and sewing/stitching.

To start the layout I used my Scan N Cut to cut a free cut file from Gwen Ruck over at Cut To You. Here is a link to her Facebook page. I cut the file out of Bazzill Admiral cardstock. I attached this in the centre of my white cardstock background using Aleene's Original Tacky Glue.

I also used the same cardstock to mat my photo. The photo is 7" x 3.25". I had previously matted this on a white/grey patterned paper because I had planned on using it on another layout but changed my mind. The light photo mat is 7.25" x 3.5" and the blue mat is 7.5" x 3.5".

The patterned papers were then cut to size, had the edges inked with Versa Colour black ink and attached to the layout using double sided tape.

The paper sizes are:-
               Kaisercraft - Sweet Nothing (Green Spot) - 10" x 5.5" and 7/8" x 2". 
                    This smaller piece has a fishtail cut out of one of the narrow ends.
               Kaisercraft - Wandering Ivy (Floral) - 12" x 4.5"
               Maja Designs - Fika (Dark Blue) - 8" x 4"
               Maja Designs - Fika (White with hearts) - 11" x 2.5" and 1" x 2.5". 
                    These both have fishtails cut in one of the narrower ends.

Using two strands of embroidery thread I hand stitches a + inside of each of the cut file diamonds.

My Scan N Cut was then used to cut the scalloped hearts, arrows, title and stamped flowers to embellish my page.

The flowers were stamped, using Close To My Heart Daisy Patch Flower stamp, onto white cardstock with black StaZon ink and coloured using Tattered Angels Chalkboard sprays in Tomate Cerise and Valencia. I applied his colour with a brush and then shaped the petals using the round section of my poke tool. I then layered three flowers to make the larger flower and two for the smaller one. A clear gem was added to the centre of each flower.

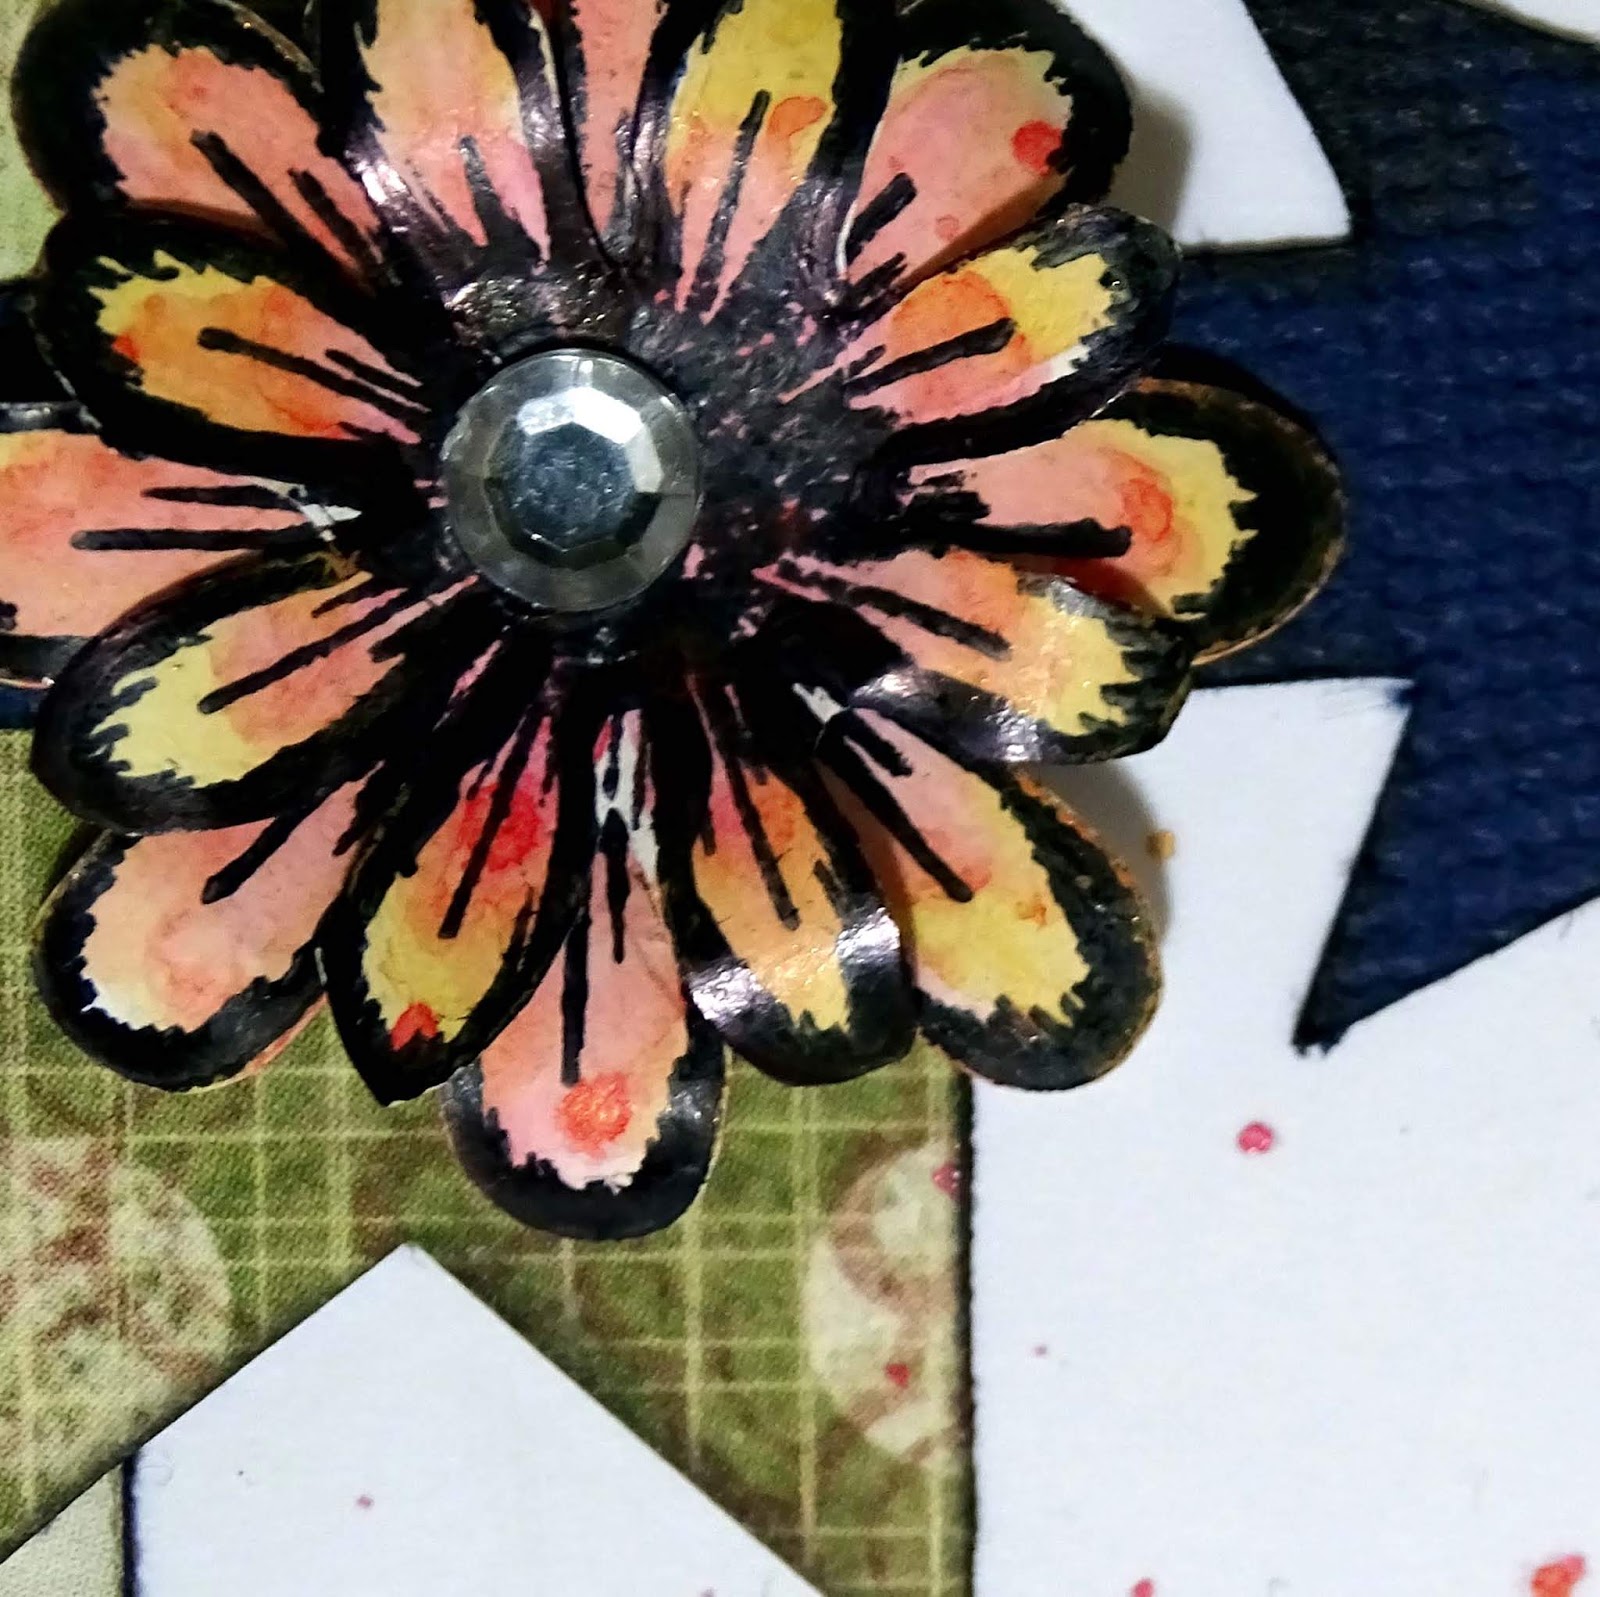


Three hearts of slightly descending sizes, were cut from the same patterned papers as I had already used on the page. I inked around the edge and layered them on top of each other with a piece of double sided tape just down the middle of the heart. This allows the edges to be lifted for added texture.

All of these embellishments were then added to the page using glue.

I used the same Chalkboard sprays to create a light covering of splatters to the background.

A Mitsubishi Uniball eye micro pen in black was used to draw a squiggly boarder around the page, I did not think this stood out enough so I used my sewing machine to add a row of straight stitching in navy blue and a row of zig zag stitching in olive green

That completed this layout. Don't forget you can watch the video, and see exactly how this page came together.

Thanks for dropping by
Till next time
Stay safe
Hugs
Julie

Wednesday, May 6, 2020

Three Masculine Cards - Garage Days

Good morning,

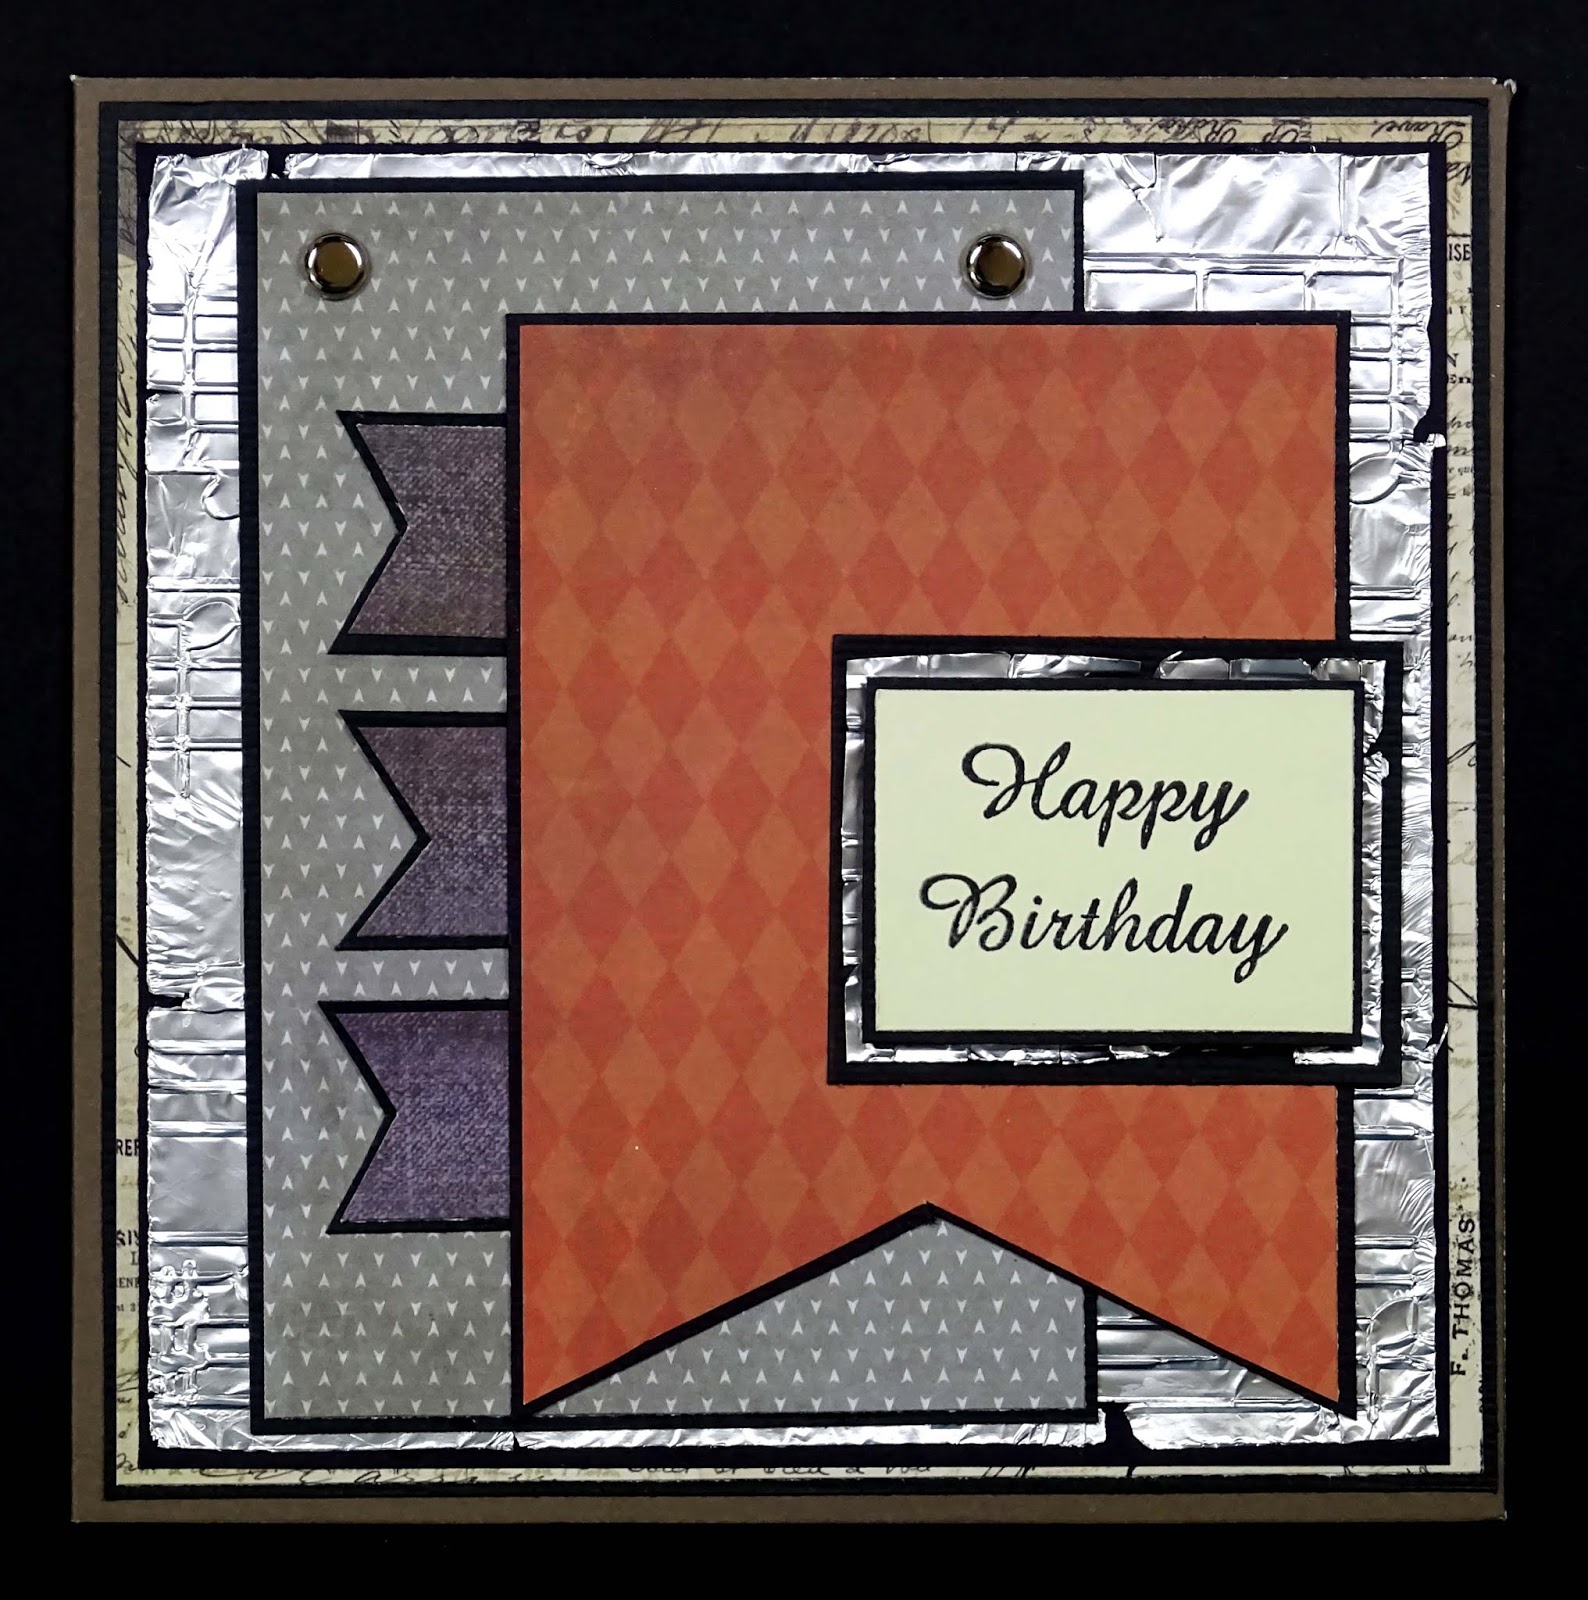
Today I am sharing a set of three masculine cards using Kaisercraft's Garage Days patterned papers.

It is my husbands birthday in April so I thought that while I was making a card for him I would make a couple of others.

You can see the video here


Lets start with this card:-


I was recently reminded of the Alfoil through an embossing folder technique so I decided to use that on a couple of the cards today.

This card base is a brown one from Kaisercraft and is 140mm square.

I cut black cardstock to layer under each of the patterned papers so I would get a nice definition between the papers. The black is cut to:-
                5 1/8" x 5 1/8"
                4 7/8" x 4 7/8"
                3 1/8" x 4 5/8"
                3 1/8" x 4 1/8", cut a fishtail in one narrow end
                2 1/8" x 1 5/8"
                1 3/8" x 1 7/8"
                3 @ 7/8" x 1 3/8", cut a fishtail in one narrow end of each piece

The patterned paper is cut to:-
                Cream     5" x 5"
                Alfoil      4 3/4" x 4 3/4" & 1 1/2" x 2"
                Grey       3" x 4 1/2"
                Red/Orange     3" x 4", cut a fishtail in one of the narrow ends
                Denim    3 @ 3/4" x 1 1/4", cut a fishtail in one of the narrow ends of each piece

The greeting is stamped on a piece of plain cream cardstock that measures 1 3/4" x 1 1/4" The stamp is from Annaleey Crafts and the ink is StazOn Jet Black

Ink the edges of each piece of patterned paper.

Each piece of patterned paper and alfoil is attached to the corresponding piece of black cardstock using double sided tape or glue.

Attach two silver brads to the top corners of the matted Grey patterned paper.

These are then layered on top of each other on the card base. The greeting is attached using foam tape.

Card number two is the one I actually made for my husband


These next two cards use a white card base that I cut from a 12" x 12" piece of 240gsm cardstock.
I cut them 10 1/2" x 5 1/4" them scored and folded at 5 1/4" along the long edge.

All of the papers (excluding the Alfoil) and embellishments on this card have been distressed using my Prima distress tool and a black ink pad

The papers were cut to:-
               Yellow     5" x 5"
               Blue         4 3/4" x 4 3/4"  2" x 1 3/8"
               Alfoil       4 3/8" x 4 3/8"
               Orange     2" x 5"
               White cardstock for the sentiment 1 3/4" x 1 1/8"

The two hearts were punched from the blue patterned paper using punches from EK Success.

The greeting was stamped using a wood mounted stamp that I have had for many years, I do not know the brand, and Jet Black StazOn ink.

The circle and rectangles used to embellish the card came from the paper pad.

When all of the papers had been prepared they were attached to the card base using double sided tape or glue. The circle and hearts were attached using foam tape.

Our last card for today


This is a very simple card and uses a piece of foiled card from the paper pad along with one other patterned paper.

I have cut the denim coloured paper to:-
               5 1/8" x 5 1/8"
               2 3/4" x 5 1/8"
               1 3/8" x 1 7/8"

the foiled cardstock is cut to:-
               4 7/8" x 4 7/8"
               2 1/2" x 5 1/8"

and a piece of white cardstock for the greeting is cut to:-
               1 1/8" x 1 5/8"

I selected two tags and a couple of square embellishments from the pad to decorate this card.

I used my Crop O Dile to add a brass eyelet to each of the tags and then treaded some white crochet cotton through the eyelet

The greeting is stamped using the same Annaleey Crafts stamp I used on the top card and StazOn Jet Black ink

Now that all of my elements for the card are ready they are attached to the white card base using double sided tape or glue. The greeting and the square embellishments are attached using foam tape

You can pop over to my YouTube channel and see these cards being made here or leave me any question you may have in the comments below.

Thanks for dropping by today
Till next time
Stay safe
Hugs
Julie

Wednesday, April 29, 2020

Aldinga Beach Album

Good morning friends

Today I want to point you in the direction of a video showing a flip through of an album I have made

You can see the video here

I followed a tutorial by Scrapqueen for this album. She has heaps of interactive albums on her YouTube channel. You can see her channel here:- Scrapqueen
My album is not exactly the same as her's, I have made a few changes.

I have called this my "Aldinga Beach Album" because I made it while were doing a house-sit in Aldinga Beach, not because it holds photo's of Aldinga Beach.

I have used approx 50 sheets of 240gsm white A4 cardstock and a 12" x 12" Crafters Choice paper pad called "Pale Garden" to make this album. I could use more the white if I wanted to make more tags, photo mats and photo booklets.
I have 13 full sheets of patterned paper and some scraps from the 48 page pad left.


As you can see it has 4 pages and lots of interactivity.


The front cover is decorated with some large filagree leaves I cut on my Scan N Cut, some purchased flowers and two flowers that I hand made. One was using the Tim Holts Tattered Florals die and the other was using a nested circles die.


It is so hard to show an album in photos so I would really recommend that you pop over to my YouTube channel and check out this album if you have the time.

Thanks for dropping by today
Till next time
Hugs and stay safe
Julie

Wednesday, April 22, 2020

Mother's Day card 2020

Good morning

Mother's Day is approaching here in Australia and so I am making a card for my Mum today

It is a multi layered card and I have used Kaisercraft's Secret Garden papers and collectables on this card

You can watch the video here.


To make the card bases I have cut three pieces of white cardstock 4" x 9 1/2" and two tags 1 @
3 1/2" x 6" and one 3 1/2" x 5"

The three 9 1/2" pieces of cardstock need to be scored on the long side, one at 1 3/4" from each end, one at 2" from each end and the last one at 2 1/4" from each end

The patterned papers need to be cut at:-
Patterned paper No. 1 - 4 pieces at 1 5/8" x 3 7/8" and 2 pieces at 3/4" x 3 7/8"
Patterned paper No. 2 - 4 pieces at 1 7/8" x 3 7/8" and 2 pieces at 3/4" x 3 7/8"
Patterned paper No. 3 - 4 pieces at 2 1/8" x 3 7/8" and 1 piece 4 7/8" x 3 7/8"
Patterned paper No. 4 - 1 piece 5 7/8" x 3 7/8", this piece goes on the back of the card to hide and protect the ribbon that is used to tie the card closed.

I have inked the edges of all of the patterned papers before attaching them to the card base.

Starting from the inside of the card (the piece that has the score makes at 2 1/4") attach patterned paper No. 3, then patterned paper no 2 to the middle layer and patterned paper no. 1 to the bottom layer.

On the back of the top and middle layers, place double sided tape on the edges and bottom of the middle section (between the score marks). Layer them on top of each other and the bottom layer, making two pockets that will hold the tags.

Cut a piece of ribbon long enough to go around the card and tie a bow (mine is 32" long) attach it to the back centre section of the card using double sided tape. Attach patterned paper No. 4 on top of this.

Add patterned paper to both sides of the tags, you will need two pieces of patterned paper 3 3/8" x 5 7/8" and two 3 3/8" x 4 7/8".
Add an eyelet to each tag and thread some ribbon through it

Now it is time to add your embellishments. I have used some items from the collectables pack, some die cuts that I cut using Spellbinders Labels 8 die, Kaisercraft Polaroid Frame die, a butterfly die, and a stitched tags die.

The photos below show how I have embellished each layer.


I will use the white die cut pieces to write my greeting.


I hope I have encouraged you to give this card a try. I saw the card on Pinterest and thought it would be ideal for what I had in mind. I wanted to include a family photo in my card because, with things as they are at the moment we will not get to see Mum on Mother's Day.

Thank you for taking the time to read my blog today.

Till next time
Stay safe
Hugs
Julie
Wednesday, April 15, 2020

The Pyramids Layout

Good morning,

Today I am sharing a layout. During the creation of this layout I changed my mind several times.

You can view the video on my YouTube channel if you would like to see more detail and exactly how this page came together

To create this layout I have used a Craft Concepts paper pad called Vintage Grunge.


I chose five papers from the pad.

I created a 1" frame using one of the papers (the striped one) for the background.

The next paper was trimmed to 11 1/2" square and torn along one edge.
I used TCW stencil "Two Hearts" and Mont Marte Modelling Paste to add some dimension and white to this paper.

Next I trimmed three patterned papers down to 7" x 12", 6" x 12" and 5" x 12" and tore the 12" edges on them all.

All of these layers were then attached on top of each other using double sided tape.

Using an American Crafts punch I punched along the edge of a piece of patterned paper, I tucked a 6" piece of this behind the bottom layer of the torn papers, at the top right and the bottom left of the layered stack.

The photo I had originally wanted to use on this layout did not suit these papers, in my opinion the whole layout looked too dark for it, so I changed the photos these holiday photos. I matted the photos on a light coloured paper from the pad so they would stand out from the background

The other change of mind was the title. I used my Scan N Cut to cut the title in white cardstock but when I attached it to the layout I felt that it got lost so I cut the same thing in black cardstock and glued that directly on top of the white one.

To embellish the layout I used my stitched diamonds dies to cut three sizes of diamonds from the striped patterned paper, cut them in half so they resembled a pyramid and tucked them into the torn layered papers. With a black pen I drew faux stitching lines on them.

I still wanted to lighten the colour and feel of the page so I tore the edges of some white cardstock and tucked that in at the back of the torn layer stack, both top and bottom and at the top of the page where the background paper was attached to the background frame.

I know that that may sound a little confusing so I would encourage you to check out the video, if you are anything like me it is much easier to follow instructions if you can see it being done instead of just reading them.

Thank you for spending part of your day here with me today.

Till next time
Stay safe
Hugs
Julie

Wednesday, April 8, 2020

Flightless Art Journal Page

Good morning,

Today's share is an art journal page featuring an Emu head. I have chosen the emu because it is a flightless bird, a bit like all at the moment with the Covid-19 virus and the way it is affecting our lives.

I did want to make it colourful though.

You can watch the video on my YouTube channel

I am using watercolour paper for this page which is going to go in my ring bound journal. The page is 8.75" x 8.25".

The background is black gesso.

The image of the emu came from a website called Vector Stock. I printed it onto normal copier paper and then fussy cut it and attached it to the page using Atelier Regular Gel (Gloss).

Once this was dry I used a couple of clear stamps and Encore gold ink and stamped over the whole area, wiping any off that got onto the emu. In hind sight I could have left it on there because the acrylic paint would have probably covered it.

Some splatters with Solid Gold and Titanium White watered down acrylic paints completed the background.

I started colouring the emu by watering down some Sunshine Yellow acrylic paint and giving the feather area of the emu a coat.

I gave the beak and eye rims a coat of watered down Elephant Grey acrylic paint.

Once this was dry I used Sunshine Yellow, Red Carnation and Sunrise Orange acrylic paints and a liner brush to draw the spikey feathers onto the emu.

I also added some lines to the feather area with my Zig Opaque Writer 0.5mm Pure Black pen and my White Gel Pen.


I watered down some of the yellow and gave the beak a light coat.

To colour the eyes I mixed some of the red and orange acrylic paint together.

Details and shading was added to the emu's face with black acrylic paint and white gel pen

The double squiggly line around the edge of the page was added using my fineline bottle that hold watered down white acrylic paint.

The title was cut on my ScanN Cut. I cut it in both white and gold cardstock as I wasn't sure which way I wanted to go but decided to go with the white because the gold blended in to the background too much. I have added a squiggly line to the edges of the letters so that it blends into the background a little and looked like it belonged there and not just plonked on for the sake of it.

I hope you have enjoyed looking at my page, don't forget to check out the video

Thank you for spending your time here with me today.
Till next time
Hugs
Julie

Wednesday, April 1, 2020

Flower Box Card

Good morning to you

Today I am going to share how I constructed this pretty box card. I will give you the measurements for constructing the actual box part but the decoration of the card can be quite varied. I have used flowers but I have seen boxes with hearts, Easter eggs, stars, presents and all sorts of items depending on the occasion the card is for.

I have made a video of the process, so if you want to see exactly how I made these flowers you can see the process here.


OK so let's get started.
I started with an A4 sized piece of 240gsm white card. I cut a piece 5 1/2" x 10"

The cutting guide and measurements are shown in the diagram below. Cut two of the 3 3/8" x 3/4" pieces


Once you have your cardstock ready this diagram shows where to cut and where to fold.
Only three of the four top (where the cut is down to the centre fold) sections are folded down. The end section (opposite the 1/2" fold) becomes the back of the box and stays at full height.

Use glue to attach the 1/2" tab to the inside of the box back. Then attach the two strips to the inside of the box about 1/2" down from the top and about 3/4" apart.


To create the flowers I have stamped four Heartfelt Creations stamp sets not white cardstock. The stamp sets I used are Delicate Asters, Daisy Patch, Tattered Blossoms and Sparkling Poinsettia.


I then scanned these into my Scan N Cut and cut several of each of them from four assorted patterned papers. I also cut the leaves in green cardstock.

I inked the edges of all of the flower layers and leaves then shaped each layer before assembling the flowers using glue. A gem was added to the centre of each flower.


Next step was to decorate the box itself. I chose pink for this. The white with pink spots is a paper from Creative Imaginations that I have had in my stash for many year. It was printed in 2008.
I am not sure what brand the bright pink is as it was a scrap that had no branding strip on it. The green for the leaves was also from my scrap box but I know it was a Kaisercraft paper just not sure what range. All of the papers have had their edges inked with black ink before being attached to the card.

From the pink spot I cut 3 pieces 2 1/4" square and 4 pieces 2 1/4" x 3". Attach 3 of each size to the outside front and side panels of the box. The last piece is attached to the top outside back of the box.

From the bright pink I cut 3 pieces 2 1/4" square which were attached to the top of the folded down sections. Then cut a piece 2 1/4" x 5 3/8" and attach it to the inside of the back panel

I decided to add some height to the two strips that ran across the inside of the box so I could get a layered effect to my flowers. I cut two pieces of white cardstock 2" square and attached them to the strips that run through the card so their heights were staggered. I then covered them with the bright pink patterned paper.


Using my hot glue gun I attached the flowers to the three panels.

I cut a tag from white cardstock using Kaisercraft's DD521 Die Cut Shapes die. I stamped Happy Birthday on the tag, using Hero Arts Small Greetings stamp and black ink. I then inked around the edge of it and attached it to the bottom right section of the front flap. I also added another flower and leaf to this panel.

My final step was to add a 2 1/4" x 3" piece of white cardstock to the bottom back of the card where I can write my personal greeting.


So there we have it a pretty box card that fits into a 7 1/4" x 5 1/4" envelope when flattened.

I hope you have enjoyed reading this post and if you want to try this for yourself but get a little lost with my directions pop over to my YouTube channel and check out the video. I am sure that will clear up any questions you have. Alternatively you can leave your questions in the comments below and I will get back to you as soon as I can.

Thanks for dropping by today

Till next time
Hugs
Julie

Wednesday, March 25, 2020

Birthday Celebrations 2020 Layout

Good morning.

I am very happy that you are spending some of your day here with me today.

I have created a layout showcasing a photo of my grand-daughter, my husband and I at a milkshake/ice-cream cafe here in Adelaide. We took her there as part of her 12th birthday celebrations.

You can see the process video on my YouTube channel here.


I started by using Mont Marte Modelling Paste and Kaisercraft's Love Quarters stencil to add some hearts to the white cardstock background.

Next step was to use my blending brushes and some pigment inks to apply a light colouring to the left and right hand edges of the page. I am not sure what brand the apricot ink pad is but the Turquoise is VersaColor.

Using Kaisercraft's Child's Play clear stamp set and StaZon Jet Black ink I stamped randomly down the left hand edge of the layout and a couple of smaller circles in the top right area.
It was a little tricky getting a good stamped image because of the thickness of the texture paste but I was able to get a reasonable image by taking the stamp off of the block and using my fingers to push the stamp down between the modelling paste layers.


For a little more interest in the background I used Tattered Angels Glimmermist Black Magic to splatter lightly

The patterned paper I have used on this layout is from Kaisercraft's Lush collection.
From the turquoise paper I cut a piece 3" x 6" and a 1/2" strip that is 3" long
From the spot paper I cut a piece 6 1/2" x 5 1/2", a strip that is 1/2" x 4 1/4" long and a piece 1 1/2" x 3 3/4". This last piece has a fishtail cut in one end.
From the apricot paper I cut a piece 2" x 9"  (this could be shorter as most of it is under the photo and other papers, it would need to be at least 3 1/2" long), a strip 1/2" x4" long and a piece 2 3/4" x 7/8". The last piece has a fishtail cut in one end.
From black cardstock I cut a piece 3 1/8" x 1 1/8" with a fishtail cut in one end. I also matted my photo with this cardstock.
All of the 1/2" strips also had a fishtail cut in one end.

Once these were attached to the page I used an assortment of Washi tapes to add some extra interest.

I also added some more stamping using a row of small hearts and StaZon Jet Black ink here and there.

The final touch was to add a few sequins randomly to the background.

Thank you for visiting me here today. I hope you pop over to my YouTube channel and check out the video.

I would love it if you subscribed to my YouTube channel if you like watch my videos.

Till next time
Hugs
Julie

Wednesday, March 18, 2020

Eyes Open Art Journal page

Good morning to you.

Today I am talking about an art journal page that I have been thinking about creating for some time.

I have seen several versions of this page over the last 5 - 6 years and always thought I would like to have a go at it, so today is the day.

I have created a video showing how I created this page and you can see it here if you would like to see how the page come together.

I used a page of watercolour paper that I had cut to 8.75" x 8.25", gave it a coat of Gesso, which was unnecessary as I ended up covering it all up but I do the Gesso in advance and I never know what I am going to end up doing with the page. I also punched 4 holes in it to add it to my ring bound album.


I used some gold book paper that had black text on it for the background which I attached to the page with Gloss Gel.

While this was drying I used my alcohol markers to colour some flowers that I had stamped with StayZon ink and cut out with my Scan N Cut.  I used a simple colouring technique using two shades of each colour for each flower.

The face came from an Adelaide Cabaret Festival program book. I loved the face the first time I saw it so I have kept it in my stash for a couple of years. I cut the face out and attached it to the page, once again using Gloss Gel

I attached the flowers and leaves around the face.

I used my black Stabillo All pencil and my water brush to shade around all of the elements.

Next step was to use my Uniball Eye black fine-line pen and my Uniball Signo white pen to add details and highlights to the page.

The page's scribbly border was added using my black FudeBall pen.

The title was on the same page of the program as the face so I trimmed around it, attached it to the page and shaded around it with my Stabillo All pencil and water brush

To add a little sparkle to the page I used Nuvo Glitter Drops in the centre's of some of the flowers.

To finish the page off I cut off any overhang, re-punched the holes for the rings and splattered some watered down white Gesso onto the page.

I hope you have enjoyed you visit to my blog today

Don't forget to check out the video here.

Thanks for dropping by
Till next time
Hugs
Julie

Friday, March 13, 2020

Cinderella Layout


Good morning

Today I have created a layout as part of my Design Team work for Off The Rails Scrapbooking. I have used the March mood board.

You can see the challenge here. Why not pop over and have a look and perhaps enter. There is a great prize up for grabs.

The photo is of my Grand-Daughter when she was playing Cinderella in a production during the January school holidays and I felt that the "dreamy/boho" feel of the mood board was ideal for this photo.

I have created a video showing the process of creating this layout. You can watch the video here.

This is the mood board
Image may contain: one or more people

and this is the layout I have created.


Here is a close up so you can see a little more of the detail.


To start the layout I used Mont Marte Modelling Paste through Kaisercraft's Doily stencil, using just a part of the design at the top of the page.

Once this had dried I used Dylusions Ink Spray in Vibrant Turquoise, which I watered down to apply colour from the top of the page letting it run through the stencilled design and down to the bottom of the page

Kaisercraft's DD100 Feather die was used to cut about 13 feathers from a pale blue patterned paper and white cardstock. These were then coloured using the same ink as I had used on the background. I did not cover the feathers completely with the colour as I wanted to vary the depth of colour and the placement of colour on each one. When they had dried I inked around the cut edges with black ink.

My Uniball Eye Micro black pen was used to outline the doily design.

The feathers were attached to the layout using Aileen's Original Tacky Glue, then the black pen was used to draw in the strings that attached the feathers to the dream catcher and to give the feathers a scribbly outline.

The Craft Shop Enamel stickers were added to look like the beads that always seem to be in dream catchers and to add another element and texture to the page.

I used an emery board to file around the edges of the photo, which I had trimmed to 4.5" x 5". This was then mounted on a piece of black cardstock that was slightly bigger than the photo. I used some cardboard from an old carton to lift the photo up from the layout.

A scribbly boarder was added to the edge of the white cardstock using the same Uniball pen.

The title was cut from black cardstock using Sizzix's 662667 Alphabet die and attached under the photo. The date the photo was taken was hand written under that.

I hope you have enjoyed reading about this layout. Don't forget you can see the process video here. If you have not subscribed to my YouTube channel yet I would love it if you would. Why not pop over to Off TheRails Scrapbooking and have a go at their challenge. You could win a prize.

Thanks for spending your time here with me today
Till next time
Hugs
Julie