
Hi there
Today I am sharing a tutorial on how to make my favourite flower over on Off The Rails Scrapbooking Blog.
This is the flower.

I found the instructions for this flower on YouTube some years ago and I am unable to recalled who posted the video. All I can say is I am very happy to have found it as I use this flower quite often.
To make this flower you will need
Tim Holts Tattered florals Die or dies that will give you a 6 petaled broad flower and a spiky flower
Scissors
Ink Pad
Metal hole poker or bamboo skewer
Half a sheet of patterned paper
Glue or Hot Glue Gun

Cut 3 of the broad petaled flower and 2 of the spiky one

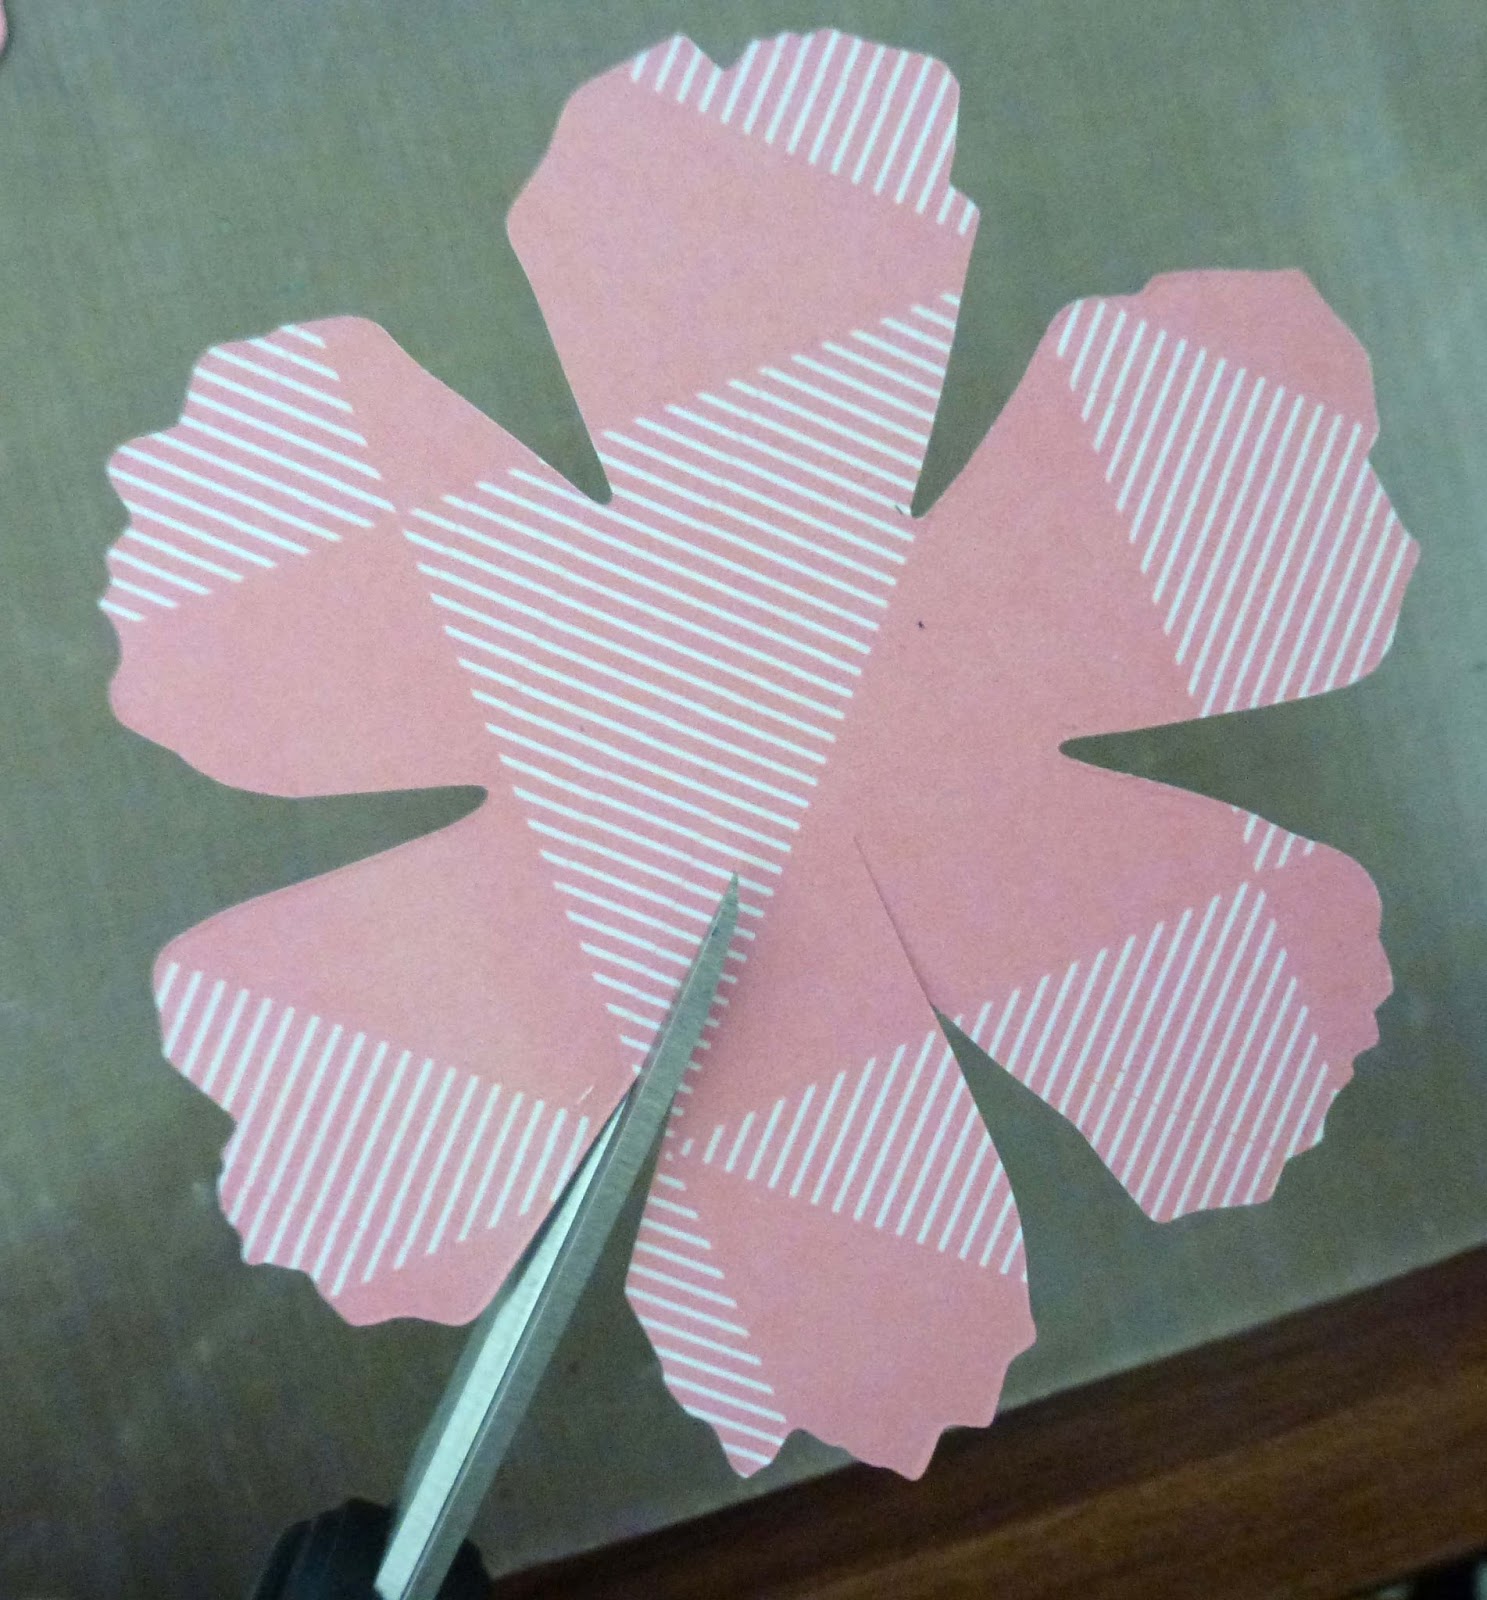
With your scissors cut down the edge of each of the petals on the broad petaled flower without cutting any of the petals off

Ink the edges of all of the petals

Using the hole poker or bamboo skewer roll the edges of the large petaled flowers under

Fold the petals of the spiky flower in halves with the patterned side of the paper showing.

Using the same tool as before curl the petals around the tool. wind each petal in alternate directions

This is what you should have now.

Attach one of the larger flowers on top of another staggering the petals

Repeat for the 3rd large flower


Glue one of the spiky flowers on top of the other then attach to the centre of your other layers

You can add gems in the centre of the flower if you like. They are not clearly visible so sometimes I do and sometimes I don't add them.
With the flower below I have used a different paper for the flower centre.

For this flower I have used 2 different patterned papers, both of which were double sided.

Hope you like this tutorial and give it a go. These flowers are so versatile and can be made with perfectly co-ordinating papers for any of your layouts.
Love to see what you make.
Thanks for dropping by
Till next time
Hugs
Julie
Today I am sharing a tutorial on how to make my favourite flower over on Off The Rails Scrapbooking Blog.
This is the flower.

I found the instructions for this flower on YouTube some years ago and I am unable to recalled who posted the video. All I can say is I am very happy to have found it as I use this flower quite often.
To make this flower you will need
Tim Holts Tattered florals Die or dies that will give you a 6 petaled broad flower and a spiky flower
Scissors
Ink Pad
Metal hole poker or bamboo skewer
Half a sheet of patterned paper
Glue or Hot Glue Gun

Cut 3 of the broad petaled flower and 2 of the spiky one

With your scissors cut down the edge of each of the petals on the broad petaled flower without cutting any of the petals off
Ink the edges of all of the petals

Using the hole poker or bamboo skewer roll the edges of the large petaled flowers under

Fold the petals of the spiky flower in halves with the patterned side of the paper showing.

Using the same tool as before curl the petals around the tool. wind each petal in alternate directions

This is what you should have now.

Attach one of the larger flowers on top of another staggering the petals

Repeat for the 3rd large flower

Press the centre of the flower down as you glue the layers together so you get a nice dimension to your flower.

Glue one of the spiky flowers on top of the other then attach to the centre of your other layers

You can add gems in the centre of the flower if you like. They are not clearly visible so sometimes I do and sometimes I don't add them.
With the flower below I have used a different paper for the flower centre.

For this flower I have used 2 different patterned papers, both of which were double sided.

Hope you like this tutorial and give it a go. These flowers are so versatile and can be made with perfectly co-ordinating papers for any of your layouts.
Love to see what you make.
Thanks for dropping by
Till next time
Hugs
Julie
No comments:
Post a Comment
Thank you for your comment