Sunday, August 28, 2022

Flip out page with envelope using Denis Boddey papers

Hi there

Today I am sharing a flip out page I created for my Grand-daughters 2022 album.

I am using a Uniquely Creative 8" x 10" ring bound album for this.

All of the papers I am using in this album are from Denise Boddey Designs.

The papers are double sided and a nice solid weight.

The three ranges I am using are 

Day Dream Story Book

Elegance Collection

Le Jardine Romantique


To create the flip out page I cut two pieces of 300gsm white cardstock to 7" x 9 1/2"

I scored folded one of these at 1/2" on the 7" edge.

Using liquid glue I attached the folded edge to the right hand edge of the unfolded piece, 
being sure to line the edges up.

Next I trimmed another 1/2" off of the narrower page to be sure it cleared the rings in the binder.

I cut patterned papers to cover the three top areas of the pages.

All of the papers on this page have been distressed and inked.

To create a pocket on the back of the page I used an off cut that covered the top area of the page and another off cut that was 4" high to make the pocket.
These papers received the same treatment as all of the others.

To decorate the front of the pocket I used fussy cut items from the papers and some gauze/cheese cloth.
The fussy cut items are mounted on foam squares to add extra dimension.

Using my envelope punch board and a 9 1/2" square of 
I created an envelope to go into the pocket.


I have a process video for you, at the end of the video I show you
the pages I have created so for for this album.
I hope you enjoy watching it.


Thank you for spending part of your day here with me today
Till next time
Stay safe
Hugs
Julie


Wednesday, August 24, 2022

MTCC #62

 Good morning

In this post I will be share a link to the card I created for 

The challenge is to create a teacher/school card.

I have created a 5 1/4" square card with a white base.

The papers I have used for this card are
2 Cool 4 School by Kaisercraft.


You will find my process video below.
I hope you enjoy watching it.


Thanks for spending part of your day here with me today

Till next time
Stay safe
Hugs
Julie


Thursday, August 18, 2022

Using Scraps to create paper

Good morning.

Today's post is a quick post to point you towards my YouTube video that shows how I created 
some pretty patterned paper using an assortment of paper scraps.


I also show you how to make some envelopes, pockets and ruffles with the paper.


Why not pop over and watch it all come together


If you enjoy the video please give me a thumbs up 
and perhaps you would like to subscribe if you are not already a subscriber.

Till next time
Stay safe
Hugs
Julie


Friday, August 12, 2022

Mystical Scrapbooks August Cyber Crop

Good morning

Today I want to share the layout I created for the August Cyber Crop at Mystical Scrapbooks.

The theme for this month is sketches with a pop of sparkle.
There are three sketches for you to choose from or you might like to try all three.

The challenge this layout is for uses this sketch by Heather Waldron (2012)


and this is my layout.


I have used papers from the Bee Arty - Bee the Sunshine paper collection for this layout

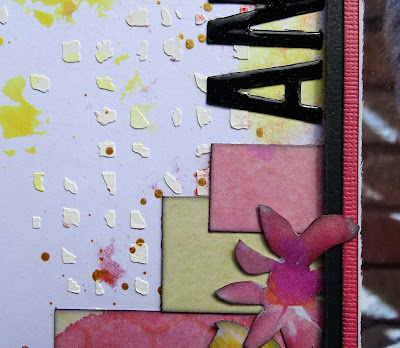
To create the background I added Modelling Paste through a 
TCW - Tile Texture stencil using my palette knife.

I used the "smooshing" technique to add the colour to the background. 
I added some water and mica powders to a piece of plastic and dabbed it onto the white cardstock.
I did add a little extra water using my spray bottle once the colour was applied
but not very much because I did not want the colours to run together.
The colours I used are Colour Blast - Colour Mica Powder - Peach Nectar
and Color Crush - Pineapple

I also watered down some Vicki Boutin Gold Glaze and splattered that 
onto the background using my fan brush.

Once the background was dry I trimmed it to 11.5" square 
and matted it onto a 12" x 12" piece of black cardstock

I fussy cut lots of flowers and the honeycomb from the Sunny Days paper.

I also cut strips of paper from the Sunny Days paper and the Gracious paper.
The strips are 7.5" x 1.75", 9" x 1.25", 8" x 1", 2.5" x 1" and 2" x 0.75".

I filed the edges of my 4" x 6" photo and matted it onto a piece of 
pink cardstock measuring 6.25" x 4.25", then onto a piece of 
black cardstock measuring 6.5" x 4.5".
I added a piece of scrap chipboard to the back of the matted photo.

Time now to assemble my layout. I have used Art Glitter glue to attach all of my pieces.
I added Wink of Stella - Clear to all of the pink flowers for my pop of sparkle

I have followed the sketch fairly closely, variations being more flowers in my embellishment cluster,
the honeycomb paper is not the same size/shape as the sketch and I have substituted a little cluster for the butterfly/dragon fly in the top right area.

I have cut my title from black cardstock using my Kaisercraft DD700 Alphabet Upper Case die.
I also added a coat of Glossy Accents to finish the title off.


You can see my process video below
I hope you enjoy watching it and you might like to leave me a thumbs up 
and subscribe to my channel if you don't already.


Thank you for spending part of your day here with me today
Till next time
Stay safe
Hugs
Julie


Wednesday, August 10, 2022

MTCC #61

Good morning

Today I am sharing the card I made for challenge #61 at Make the Card Challenge.

You will find the challenge here.

The challenge this month is a colour challenge.


I have used pastel shades of these colours on my card.


I used a background stamp with Versamark ink and white embossing powder
before blending Dried Marigold Distress Ink and 
Salt Water Taffy Distress Oxide Ink over the top.

My card base is 5 1/4" square

A 5" square piece of green cardstock is the base layer 
for the decorative panel that is 4 3/4" square.

A 1 1/4" x 5" piece of the green cardstock hold the sentiment, which is cut from white cardstock.
I have cut the sentiment 4 times and layered them on top of each other to create
a sentiment with some dimension.

I used Honey Bee - Lovely Layers: Heart Vine die to cut a green leaf spray, 
a paper chrysanthemum from PortaCraft and a couple of small white flowers 
from Uniquely Creative to create a cluster on the left hand section of the green panel.

You can watch my process video here
I hope you enjoy it.


As always, thank you for spending part of your day here with me today

Till next time
Stay safe
Hugs
Julie


Friday, August 5, 2022

Cinderella Journal Embellishment No. 2

Good morning

Today I am sharing a video showing how I created a windowed tag
to embellish my Cinderella Little Golden Book Journal


You will find full details in this video


Thanks for spending part of your day here with me today

Till next time
Stay safe
Hugs
Julie


Monday, August 1, 2022

Mystical Scrapbooks August Challenge

Hi there

Today's layout is for the August challenge at Mystical Scrapbooks.

The theme for this month is Sketches and the featured product is "all things sparkle".

You will find the challenge here
and all of the sparkle products are on sale here.

This is the sketch I have used for this layout.
It is from PageMaps


and this is my layout


I have made a couple of slight changes. 
I have used one photo instead of two.
My embellishments are on a diagonal from top right to bottom left, 
the sketch has the embellishments on the right hand side of the layout.
My title is under the photo, the sketch has the title above the photo.

I have used a paper from the Bee Arty - Bee The Sunshine range
this paper is Painted Honeycomb.

I have used an assortment of Washi Tapes to create the strips across the layout 
and the small cluster in the bottom left of the page.

 I have covered the "all things sparkle" by having lots of sparkle in the washis.

I added a row of lace to the strips for a little added texture.

These were scattered diagonally across my layout.
A little more bling with some tiny pink gems amongst the scatter.


were painted white and added to the layout.

I die cut the title from black cardstock using Uniquely Creative's 
Small Lower Case Alpha dies
and Die-Namics Little Numbers die.

A double scribbly border using my fountain pen finishes this layout off.

Here is my process video
I hope you enjoy watching it.


As always, thank you for spend part of your day here with me today.

Till next time
Stay safe
Hugs
Julie