Saturday, September 23, 2017

3 Flower Art Journal Page

Hello.

It has been a long time between posts as I have been very busy with Design Team work. I have also been busy packing and arranging a trip to China. I leave on Monday and won't be back till the 11th October so I will be missing in action for a short time.

I am really looking forward to this holiday as it is the first time I have been on an organised tour and I am interested to know if I like this type of holiday or not. If I do like it I imagine I will do a couple each year as Ray is not really interested in going on holidays and the tour type of holidays enables me to go without being on my own.

My good friend Wendy is coming with me on this trip so it should be fun.

Anyway back to the art journal page I have got to share with you today.


I did this background so long ago I have forgotten what I used but I can see that I have used acrylic paint, some small burlap flowers that I got from Cheap As Chips, stencil, texture paste, stamping, gesso and a black marker to draw the circles.I coloured some of the circles with white gesso and rubbed some Viva Inka Gold here and there to complete it.

For the focal points I decided to go with some flowers. This is always the hardest part for me, deciding on the focal point.

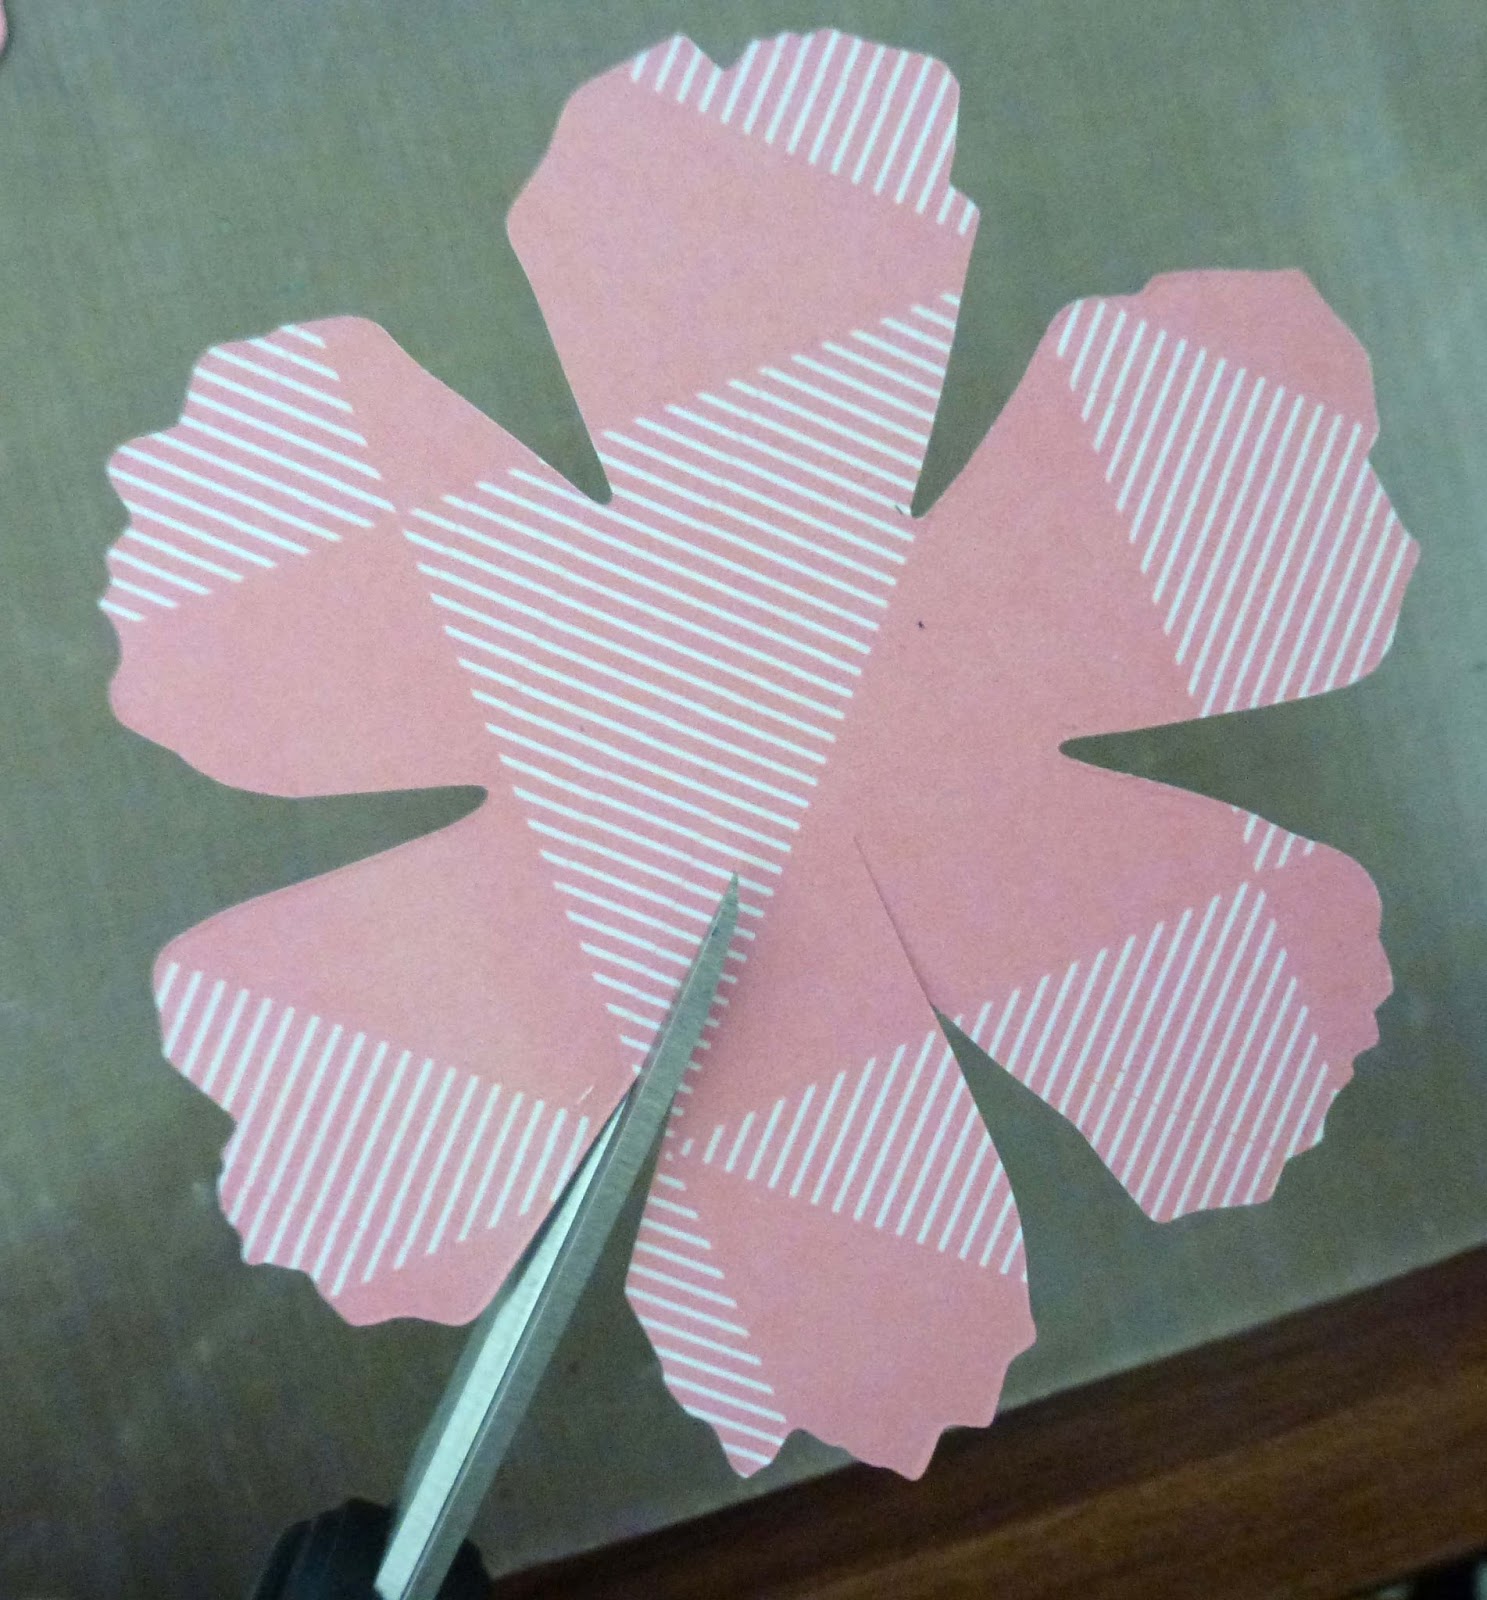
I cut the flowers and leaves from some paper I had created using Magicals, then stamped over them with Archival inks and random stamps

I did some shading around the flowers with my Faber-Castelle Big Brush markers and some detail work using a black fine point pen and a white gel pen.

The centre of the flowers are Art Ingredient Glass beads and the pearlescent dots on the internal petals are made with Scribbles which are very similar to the Viva Pearl Pens.

Thanks for dropping by
See you in about 3 weeks
Till next time
Hugs
Julie

Wednesday, September 13, 2017

Flower Tutorial

Hi there

Today I am sharing a tutorial on how to make my favourite flower over on Off The Rails Scrapbooking Blog.

This is the flower.

I found the instructions for this flower on YouTube some years ago and I am unable to recalled who posted the video. All I can say is I am very happy to have found it as I use this flower quite often.


To make this flower you will need
Tim Holts Tattered florals Die or dies that will give you a 6 petaled broad flower and a spiky flower
Scissors
Ink Pad
Metal hole poker or bamboo skewer
Half a sheet of patterned paper
Glue or Hot Glue Gun


Cut 3 of the broad petaled flower and 2 of the spiky one


With your scissors cut down the edge of each of the petals on the broad petaled flower without cutting any of the petals off


Ink the edges of all of the petals


Using the hole poker or bamboo skewer roll the edges of the large petaled flowers under


Fold the petals of the spiky flower in halves with the patterned side of the paper showing.


Using the same tool as before curl the petals around the tool. wind each petal in alternate directions


This is what you should have now.


Attach one of the larger flowers on top of another staggering the petals


Repeat for the 3rd large flower


Press the centre of the flower down as you glue the layers together so you get a nice dimension to your flower.


Glue one of the spiky flowers on top of the other then attach to the centre of your other layers


You can add gems in the centre of the flower if you like. They are not clearly visible so sometimes I do and sometimes I don't add them.

With the flower below I have used a different paper for the flower centre.


For this flower I have used 2 different patterned papers, both of which were double sided.


Hope you like this tutorial and give it a go. These flowers are so versatile and can be made with perfectly co-ordinating papers for any of your layouts.

Love to see what you make.

Thanks for dropping by
Till next time
Hugs
Julie

Wednesday, September 6, 2017

Cindy 1985 Layout

Well look at this, two posts in one day.

I forgot to share my DT layout for Creative Inspiration's September sketch challenge

Here is my layout


with a little bit of a close up on some of the detail


and this is the sketch

                       18157475_10155292967986133_9149791611684

I used Glimmermist and plastic wrap to create the background then applied Mont Marte Modelling Paste through Kaisercraft's Bubbly stencil. The patterned paper is Juliette by SEI.
I have coloured some gauze with some Glimmermist and added some white sewing thread and a hand made flower using Tim Holz Tattered Florals die to create a small cluster for the left of the photo.

The white circle is a cut file I used with my Scan N Cut. I also used the Scan N Cut to cut the titles then applied a coat of Glossy Accents to the letters.

I have used the heart off cuts from punching the patterned paper to tumble down the side of the layout.

Don't forget to check out the challenge and have a go.
Would love to see what you create.

Thanks for dropping by
Till next time
Hugs
Julie

Shaker Wedding Card

Hi there.

Today I am sharing a shaker card I made for my nephew's wedding.

It is very plain but I think it is elegant. I will hand write a message inside.


I have cut the heart out using Ultimate Crafts "Of Hearts & Doves" die set then heat embossed the multi lined heart with silver embossing powder.

Next I embossed the front cardstock with Couture Creations "Washed Away" embossing folder.

I created the shaker part using a transparency, some foam tape, silver heart confetti and some white cardstock to back it.

The heat embossed hearts then fitted into the cutout and I adhered a few of the silver heart on either side of the heart.

This is then mounted on a 5.25" square white card base.

Thanks for dropping by
Till next time
Hugs
Julie

Saturday, September 2, 2017

Design Team Layout for Off The Rails Scrapbooking - Steam Punk

Today I am having my first reveal as a member of the Design Team over at Off The Rails Scrapbooking. You can check it out here

This is my layout


and this is the Mood Board

I have used Kaisercraft "Check In" range of papers for this layout along with Ranger Distress Inks, Archival Inks, Kaisercraft "Checker Plate" stencil and TCW "Mini Labyrinth" stencil. Chipboard is from Imaginarium Designs which is heat embossed. A shipping tag, some brads and a few staples finish the layout off.

Don't forget to go over to Off The Rails Scrapbooking blog to see what the other DT members have created and join in the challenge. Can't wait to see what you create

Thanks for dropping by
Till next time
Hugs
Julie

Friday, September 1, 2017

Shaker Card

Over on Creative Inspirations today they are celebrating their 1st birthday by having a huge card challenge. There are many different categories of cards you can make to enter. Check it out here.

As part of the DT I have created a shaker card


I used a die to cut the balloons out then a boarder punch to cut out the hearts in assorted colours. I have backed the balloons with the same colour art the shaker fillings and I think it may have looked better if I had of used white so the hearts stood out better.......still unsure about this.

The number 10 was die cut from pink card and then covered with Kindy Glitz to give it some sparkle. The sentiment is a clear sticker from Kaisercraft.

Why not head over to Creative Imagination and check out what other cards the DT have made to challenge you.

Thanks for dropping by
Till next time
Hugs
Julie