
Hi friends
I have been busy making a few more Christmas cards. I think this is going to be all the cards I make for this year. Next year I might get a bit more organised and make some Christmas cards in September and then teach them in one of my classes so my students get to make some too.
They are all very simple and apart from the Christmas tree one are not very bulky so can be posted for the flat fee.
I generally use 12" x 12" cardstock and cut my own card bases. I find that they are straighter and line up nicely when they are closed. It also makes it easier to match the cardstock if you want to matt anything on your cards.

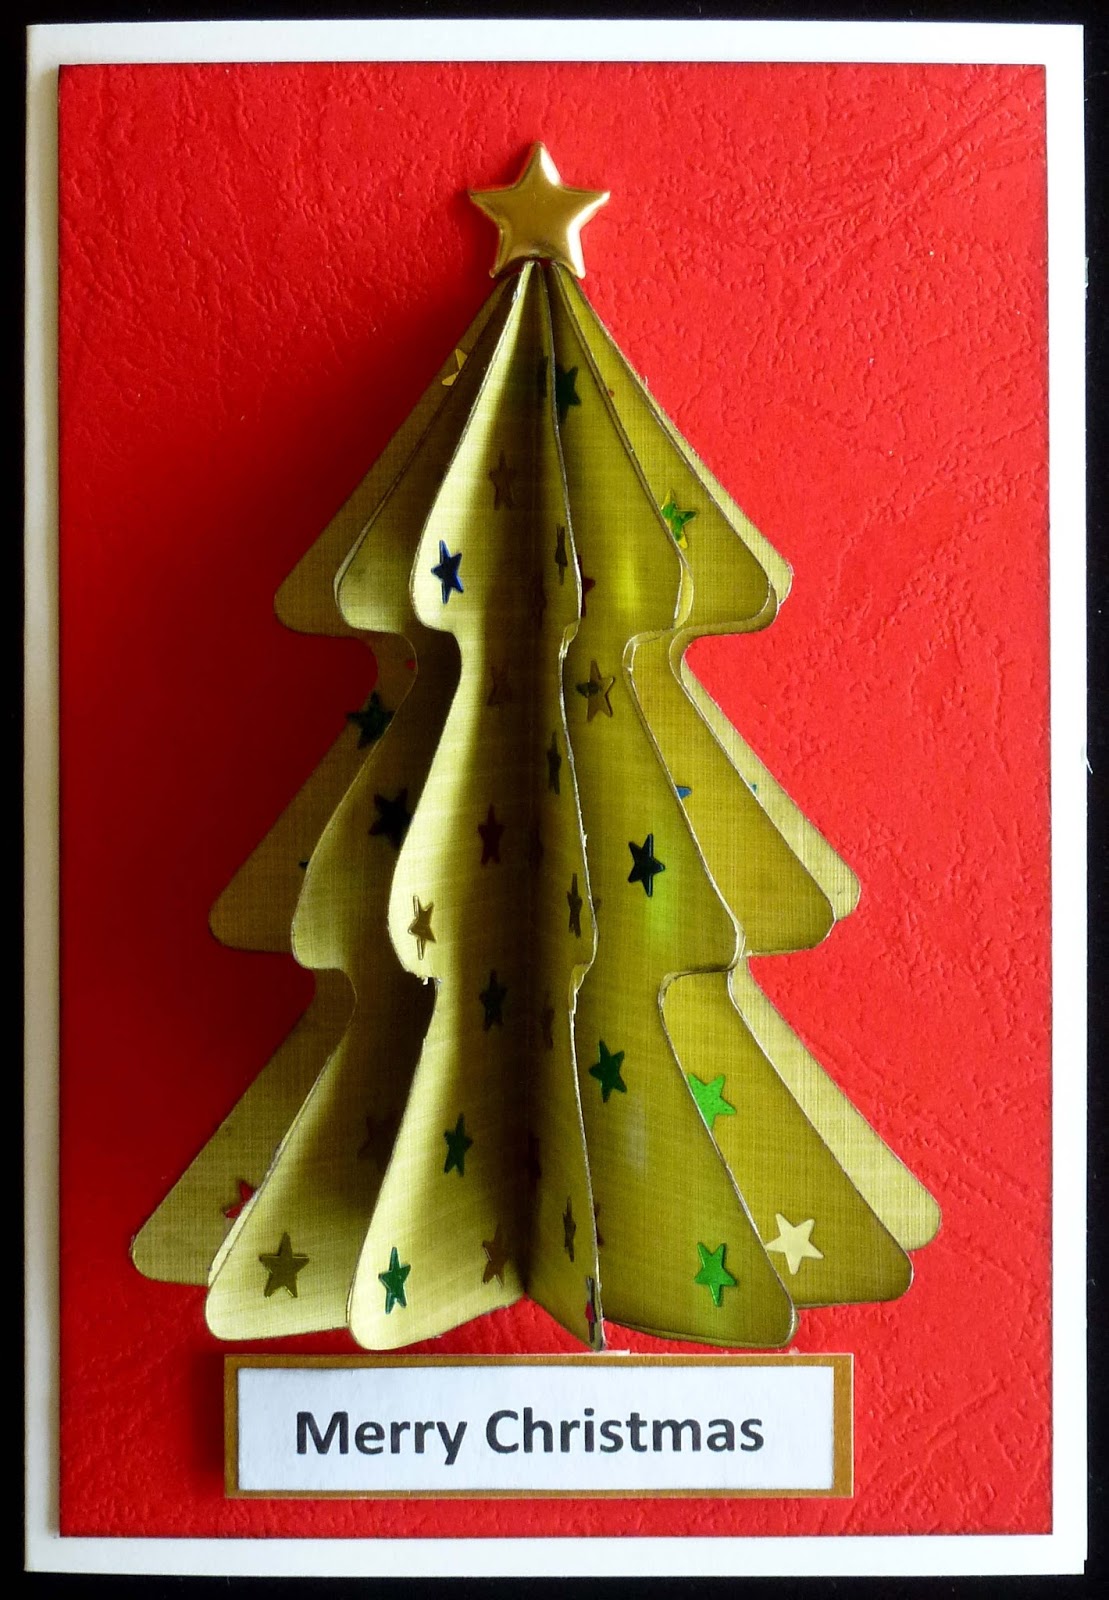
I saw this technique on a Jennifer McGuire youtube clip and thought I would give it a go.
You need a symmetric shape for this technique, mine was not quite symmetric but I got away with it. I used a cut file on my Scan N Cut to cut 6 trees but you could die cut the shape you want to use. Fold each one in half then stick them back to back to create the fan effect. I have then glued tiny glitter stars onto the tree before I attached it to the card panel. Add the star brad at the top of the tree and the greeting at the bottom of the panel then attach that with foam tape to the card base.

For this card I Have used a metallic black card base. I embossed a white cardstock panel cut to 1/4" smaller than the card. Cut 3 assorted sized fish-tail pennants and mat them on to the same cardstock that the card base is made from. Attach these to the panel. Mount a greeting onto the same cardstock and attach it to the card using foam tape
The middle panel looks crooked so I am going to have to go back and straighten that up. It is all I see when I look at this picture.

This card is the simplest of them all. Cut a few steps of patterned paper about 1/2" wide and in decreasing lengths and create a tree shape on an embossed panel. Attach your star at the top of the tree then attach the panel to the card base using foam tape.

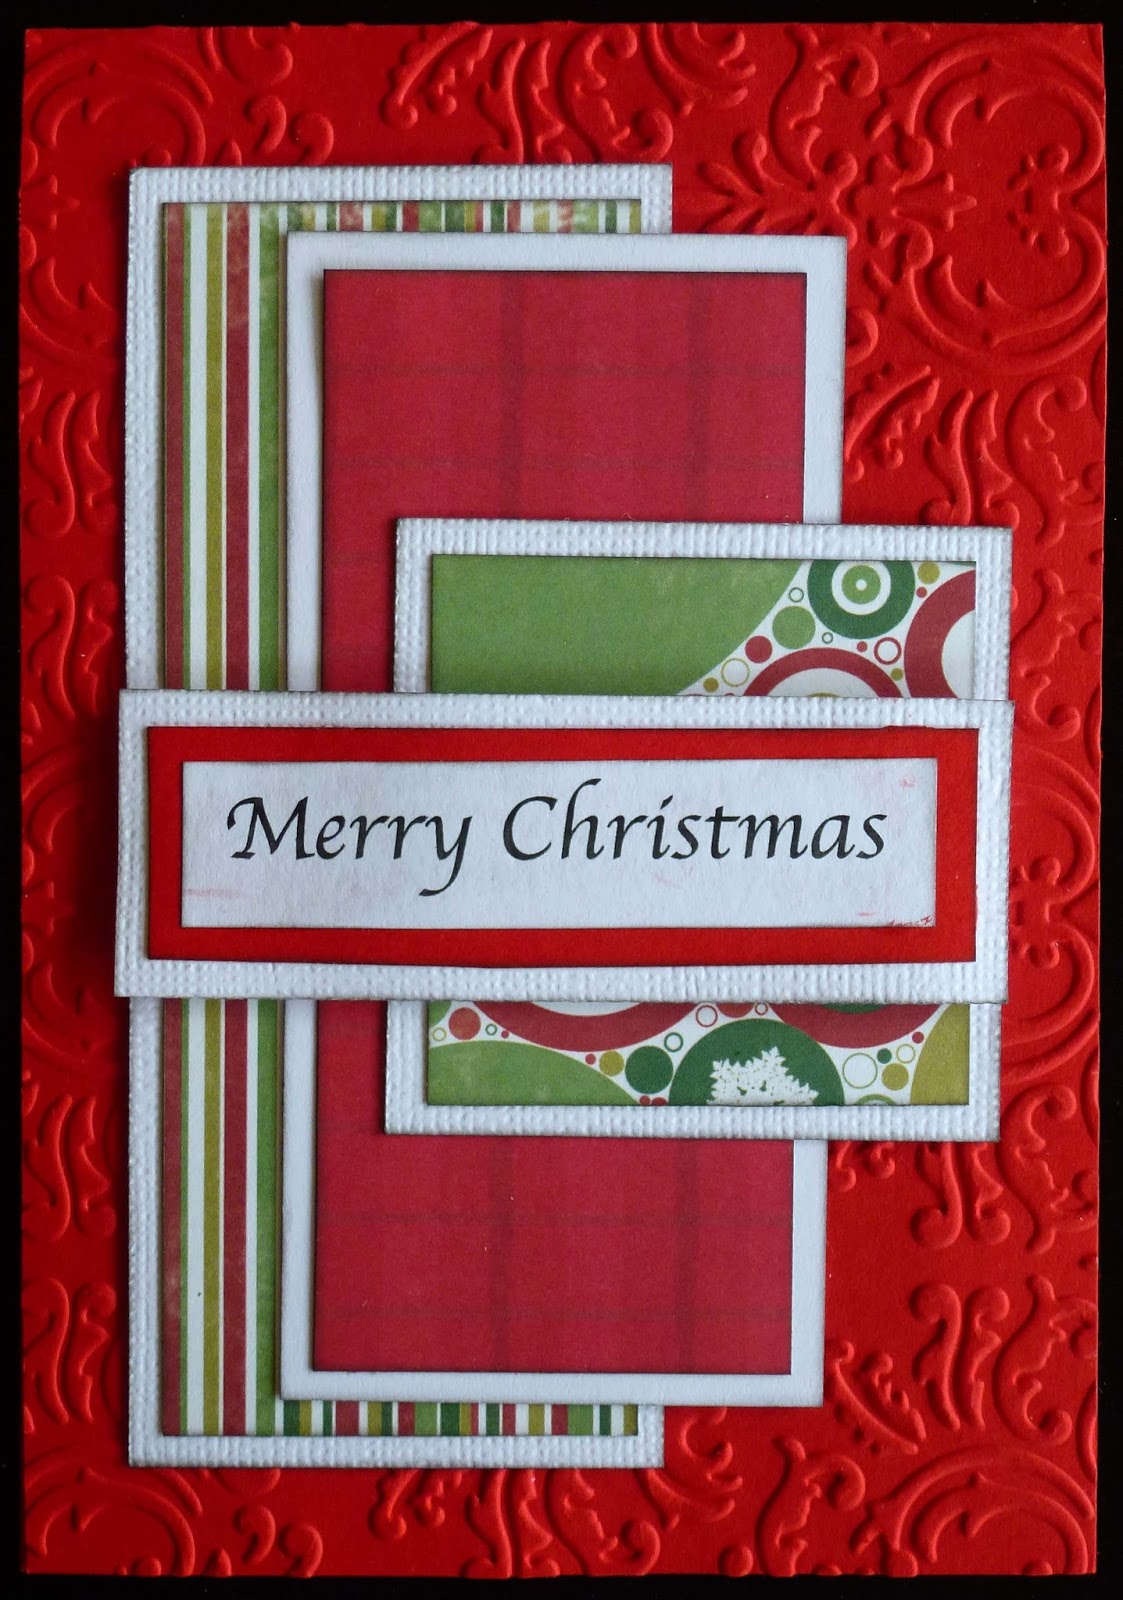
I have embossed the actual card base on this card instead of using a panel. Three pieces of patterned paper have been matted on white cardstock and attached to the card base and then I have double matted the greeting and attached it with foam tape.

The card panel on this card is a pearlised cardstock. I have cut the baubles out using gold patterned paper and Memory Box's Snowflake ornament die. I have used glue to attach the ribbon and the baubles. The greeting is a stamp from Sullivan's Paper Xtra and is not very good quality. I have heat embossed it with gold embossing powder then mounted it on some gold cardstock and attached it to the card with foam tape. Love these baubles they are so delicate.

My Scan N Cut was used to cut these baubles. The top layer was cut from red cardstock and the bottom layer and tie piece from gold.
I have used a white cardstock panel which has been embossed, then a strip of patterned paper to set the baubles on. Some red ribbon threaded through the baubles and the tied in a knot add a bit more colour.
The greeting has been matted in the same cardstock that the card base is made from.

A dark green card base hold a piece of white cardstock that has been embossed on the top area and punched along the bottom edge. A piece of corrugated card with a ribbon tied around it has then been attached between the two. The bauble is the same as the ones I used on a previous card. (See it here)
A greeting finishes this card off.

I have been busy making a few more Christmas cards. I think this is going to be all the cards I make for this year. Next year I might get a bit more organised and make some Christmas cards in September and then teach them in one of my classes so my students get to make some too.
They are all very simple and apart from the Christmas tree one are not very bulky so can be posted for the flat fee.
I generally use 12" x 12" cardstock and cut my own card bases. I find that they are straighter and line up nicely when they are closed. It also makes it easier to match the cardstock if you want to matt anything on your cards.

I saw this technique on a Jennifer McGuire youtube clip and thought I would give it a go.
You need a symmetric shape for this technique, mine was not quite symmetric but I got away with it. I used a cut file on my Scan N Cut to cut 6 trees but you could die cut the shape you want to use. Fold each one in half then stick them back to back to create the fan effect. I have then glued tiny glitter stars onto the tree before I attached it to the card panel. Add the star brad at the top of the tree and the greeting at the bottom of the panel then attach that with foam tape to the card base.
For this card I Have used a metallic black card base. I embossed a white cardstock panel cut to 1/4" smaller than the card. Cut 3 assorted sized fish-tail pennants and mat them on to the same cardstock that the card base is made from. Attach these to the panel. Mount a greeting onto the same cardstock and attach it to the card using foam tape
The middle panel looks crooked so I am going to have to go back and straighten that up. It is all I see when I look at this picture.

This card is the simplest of them all. Cut a few steps of patterned paper about 1/2" wide and in decreasing lengths and create a tree shape on an embossed panel. Attach your star at the top of the tree then attach the panel to the card base using foam tape.

I have embossed the actual card base on this card instead of using a panel. Three pieces of patterned paper have been matted on white cardstock and attached to the card base and then I have double matted the greeting and attached it with foam tape.
The card panel on this card is a pearlised cardstock. I have cut the baubles out using gold patterned paper and Memory Box's Snowflake ornament die. I have used glue to attach the ribbon and the baubles. The greeting is a stamp from Sullivan's Paper Xtra and is not very good quality. I have heat embossed it with gold embossing powder then mounted it on some gold cardstock and attached it to the card with foam tape. Love these baubles they are so delicate.

My Scan N Cut was used to cut these baubles. The top layer was cut from red cardstock and the bottom layer and tie piece from gold.
I have used a white cardstock panel which has been embossed, then a strip of patterned paper to set the baubles on. Some red ribbon threaded through the baubles and the tied in a knot add a bit more colour.
The greeting has been matted in the same cardstock that the card base is made from.

A dark green card base hold a piece of white cardstock that has been embossed on the top area and punched along the bottom edge. A piece of corrugated card with a ribbon tied around it has then been attached between the two. The bauble is the same as the ones I used on a previous card. (See it here)
A greeting finishes this card off.

Another quite long post so if you have made it this far Thank you for staying with it.
Till next time
Hugs
Julie
No comments:
Post a Comment
Thank you for your comment