
Good morning,
Today I am sharing a set of three masculine cards using Kaisercraft's Garage Days patterned papers.
It is my husbands birthday in April so I thought that while I was making a card for him I would make a couple of others.
You can see the video here

Lets start with this card:-


These next two cards use a white card base that I cut from a 12" x 12" piece of 240gsm cardstock.
I cut them 10 1/2" x 5 1/4" them scored and folded at 5 1/4" along the long edge.
All of the papers (excluding the Alfoil) and embellishments on this card have been distressed using my Prima distress tool and a black ink pad
The papers were cut to:-
Yellow 5" x 5"
Blue 4 3/4" x 4 3/4" 2" x 1 3/8"
Alfoil 4 3/8" x 4 3/8"
Orange 2" x 5"
White cardstock for the sentiment 1 3/4" x 1 1/8"
The two hearts were punched from the blue patterned paper using punches from EK Success.
The greeting was stamped using a wood mounted stamp that I have had for many years, I do not know the brand, and Jet Black StazOn ink.
The circle and rectangles used to embellish the card came from the paper pad.
When all of the papers had been prepared they were attached to the card base using double sided tape or glue. The circle and hearts were attached using foam tape.
Our last card for today

This is a very simple card and uses a piece of foiled card from the paper pad along with one other patterned paper.
I have cut the denim coloured paper to:-
5 1/8" x 5 1/8"
2 3/4" x 5 1/8"
1 3/8" x 1 7/8"
the foiled cardstock is cut to:-
4 7/8" x 4 7/8"
2 1/2" x 5 1/8"
and a piece of white cardstock for the greeting is cut to:-
1 1/8" x 1 5/8"
I selected two tags and a couple of square embellishments from the pad to decorate this card.
I used my Crop O Dile to add a brass eyelet to each of the tags and then treaded some white crochet cotton through the eyelet
The greeting is stamped using the same Annaleey Crafts stamp I used on the top card and StazOn Jet Black ink
Now that all of my elements for the card are ready they are attached to the white card base using double sided tape or glue. The greeting and the square embellishments are attached using foam tape
You can pop over to my YouTube channel and see these cards being made here or leave me any question you may have in the comments below.
Thanks for dropping by today
Till next time
Stay safe
Hugs
Julie
Today I am sharing a set of three masculine cards using Kaisercraft's Garage Days patterned papers.
It is my husbands birthday in April so I thought that while I was making a card for him I would make a couple of others.
You can see the video here

Lets start with this card:-
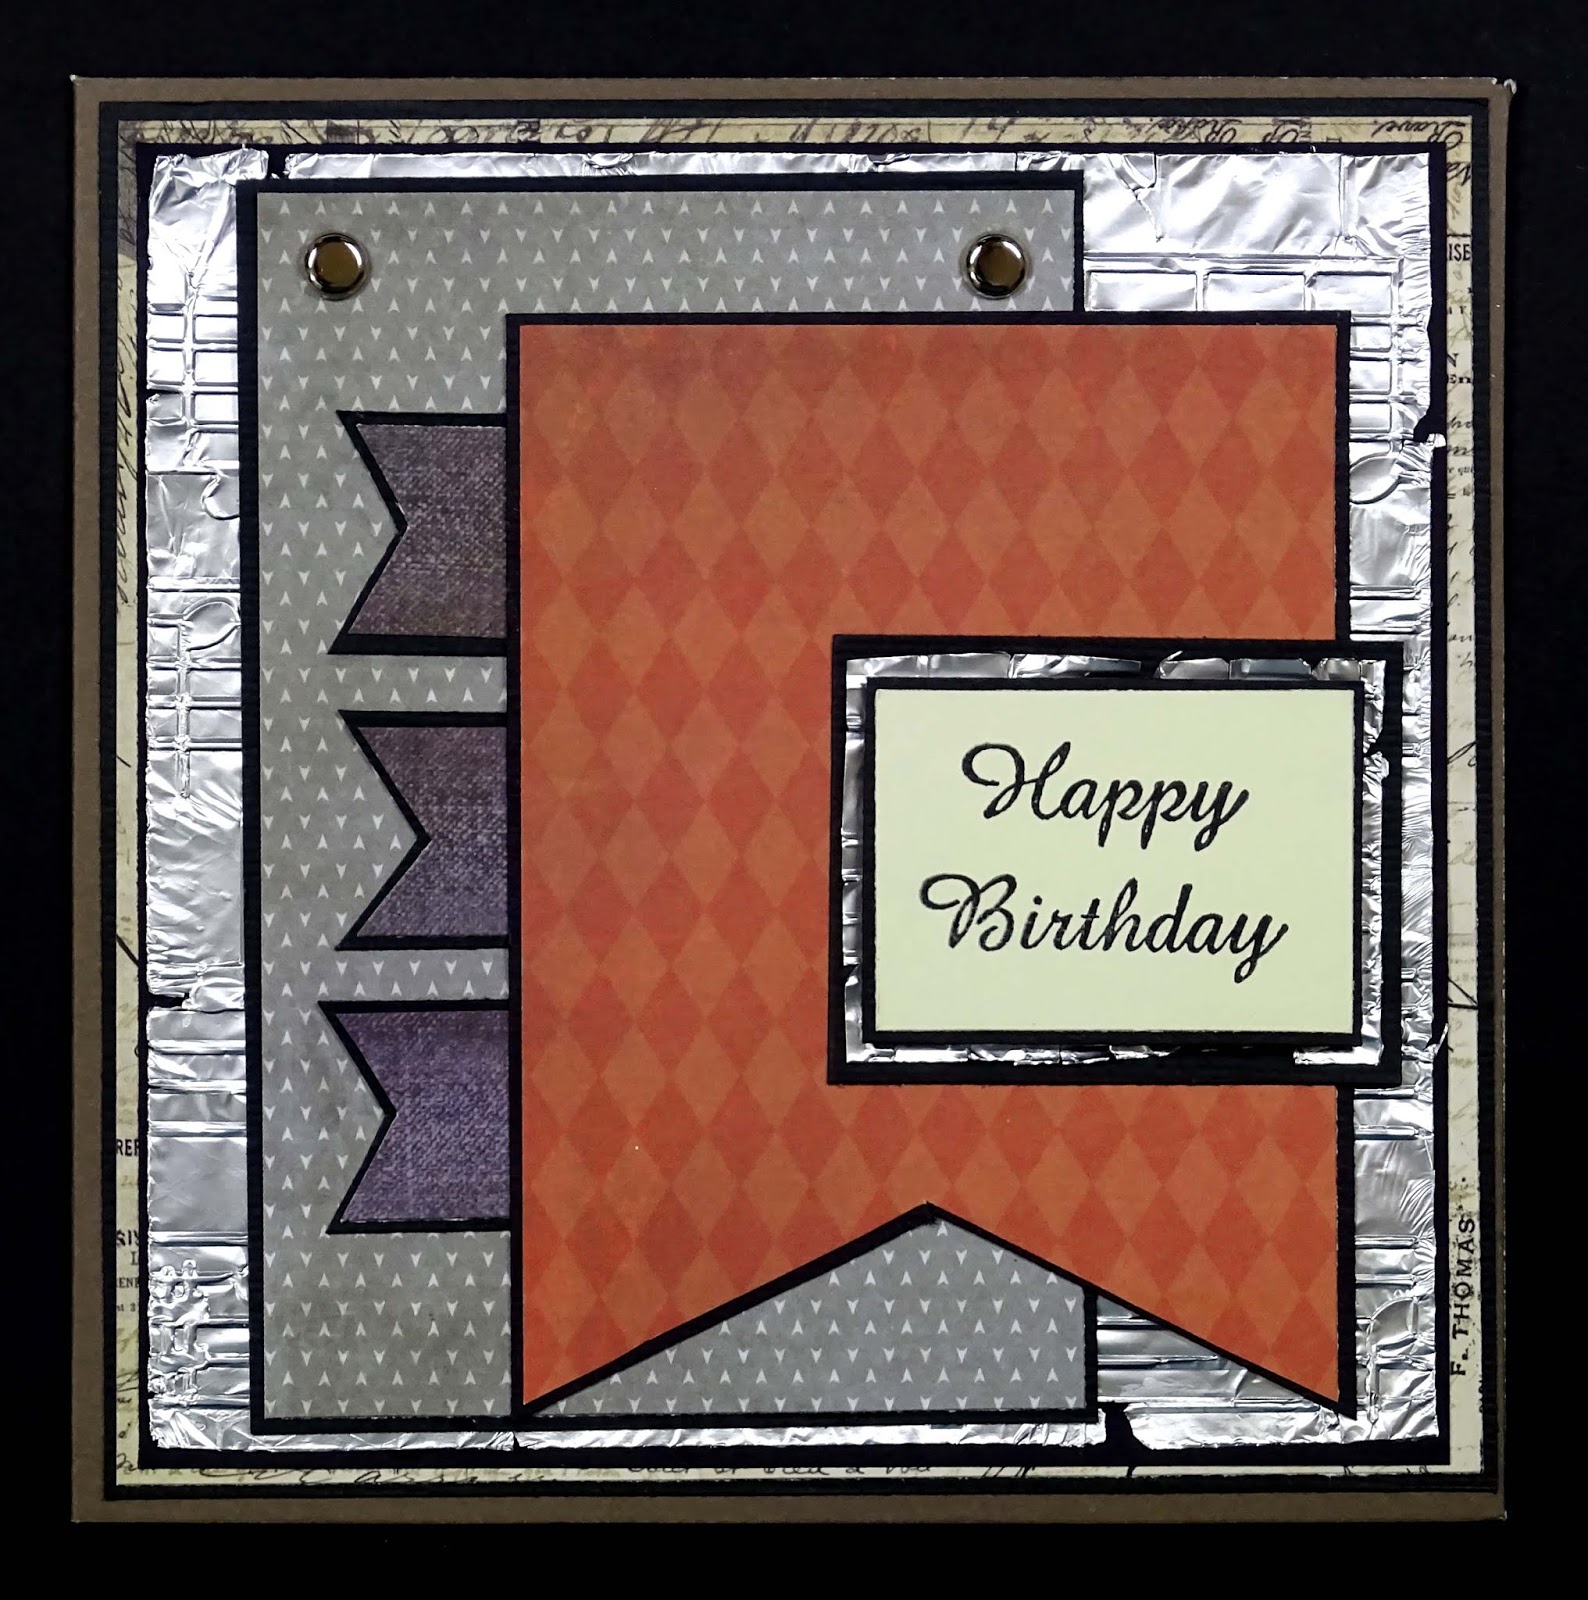
I was recently reminded of the Alfoil through an embossing folder technique so I decided to use that on a couple of the cards today.
This card base is a brown one from Kaisercraft and is 140mm square.
I cut black cardstock to layer under each of the patterned papers so I would get a nice definition between the papers. The black is cut to:-
5 1/8" x 5 1/8"
4 7/8" x 4 7/8"
3 1/8" x 4 5/8"
3 1/8" x 4 1/8", cut a fishtail in one narrow end
2 1/8" x 1 5/8"
1 3/8" x 1 7/8"
3 @ 7/8" x 1 3/8", cut a fishtail in one narrow end of each piece
The patterned paper is cut to:-
Cream 5" x 5"
Alfoil 4 3/4" x 4 3/4" & 1 1/2" x 2"
Grey 3" x 4 1/2"
Red/Orange 3" x 4", cut a fishtail in one of the narrow ends
Denim 3 @ 3/4" x 1 1/4", cut a fishtail in one of the narrow ends of each piece
The greeting is stamped on a piece of plain cream cardstock that measures 1 3/4" x 1 1/4" The stamp is from Annaleey Crafts and the ink is StazOn Jet Black
Ink the edges of each piece of patterned paper.
Each piece of patterned paper and alfoil is attached to the corresponding piece of black cardstock using double sided tape or glue.
Attach two silver brads to the top corners of the matted Grey patterned paper.
These are then layered on top of each other on the card base. The greeting is attached using foam tape.
Card number two is the one I actually made for my husband

I cut them 10 1/2" x 5 1/4" them scored and folded at 5 1/4" along the long edge.
All of the papers (excluding the Alfoil) and embellishments on this card have been distressed using my Prima distress tool and a black ink pad
The papers were cut to:-
Yellow 5" x 5"
Blue 4 3/4" x 4 3/4" 2" x 1 3/8"
Alfoil 4 3/8" x 4 3/8"
Orange 2" x 5"
White cardstock for the sentiment 1 3/4" x 1 1/8"
The two hearts were punched from the blue patterned paper using punches from EK Success.
The greeting was stamped using a wood mounted stamp that I have had for many years, I do not know the brand, and Jet Black StazOn ink.
The circle and rectangles used to embellish the card came from the paper pad.
When all of the papers had been prepared they were attached to the card base using double sided tape or glue. The circle and hearts were attached using foam tape.
Our last card for today

This is a very simple card and uses a piece of foiled card from the paper pad along with one other patterned paper.
I have cut the denim coloured paper to:-
5 1/8" x 5 1/8"
2 3/4" x 5 1/8"
1 3/8" x 1 7/8"
the foiled cardstock is cut to:-
4 7/8" x 4 7/8"
2 1/2" x 5 1/8"
and a piece of white cardstock for the greeting is cut to:-
1 1/8" x 1 5/8"
I selected two tags and a couple of square embellishments from the pad to decorate this card.
I used my Crop O Dile to add a brass eyelet to each of the tags and then treaded some white crochet cotton through the eyelet
The greeting is stamped using the same Annaleey Crafts stamp I used on the top card and StazOn Jet Black ink
Now that all of my elements for the card are ready they are attached to the white card base using double sided tape or glue. The greeting and the square embellishments are attached using foam tape
You can pop over to my YouTube channel and see these cards being made here or leave me any question you may have in the comments below.
Thanks for dropping by today
Till next time
Stay safe
Hugs
Julie
No comments:
Post a Comment
Thank you for your comment