Saturday, August 8, 2015

Not so Mini Album

Warning: Very picture heavy post

I know it has been a long time between posts but I seem to have been busy with "things" and my interest in scrapbooking and card making has been a little on the low side. I have been spending a lot of time working out what sort of planner I want to use and I have still not found the "one " for me so it is still a work in progress.

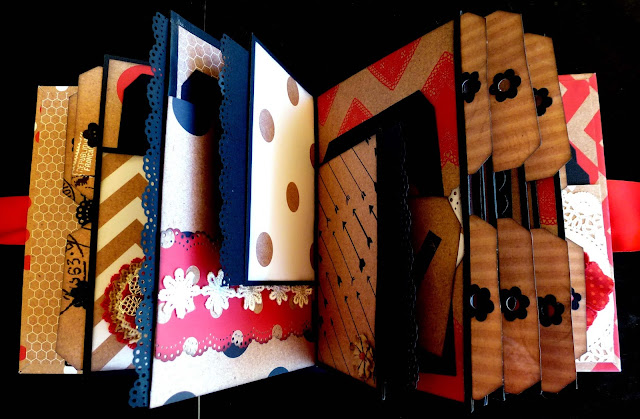
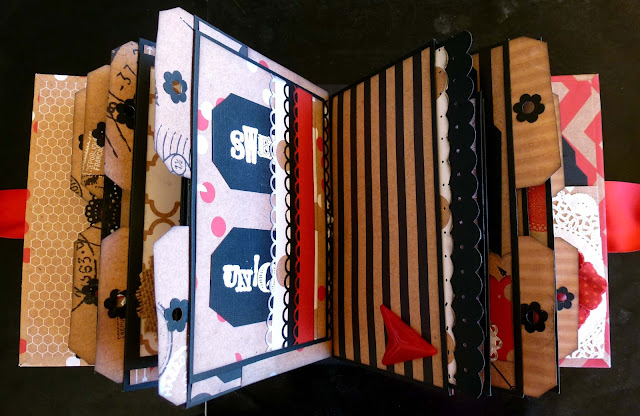
My niece had an engagement party on the 25th July which actually tuned out to be a wedding. I made this album for her using a pattern I bought from Laura Dennison. I have used the Mix and Match collection from Kaisercraft for this album because the invitations were on Kraft cardstock with black writing.






That is overload enough for this post.
Will be back in a few days with a layout I have just finished.

Till next time
Thanks for dropping by
Julie

Wednesday, May 27, 2015

Double Layouts for Holiday Album

This is the latest layout I have completed. It is the next page in my 2014 Holiday album.


This layout is based on a Kaisercraft sketch from 2011.
I have used a very old Basic Grey range of papers for this that I got out of my stash. All part of trying to use up what I have. I have distressed the edges of the patterned paper then applied some texture paste that I have coloured with acrylic paint through a stencil for a bit of dimention. I then stamped with the Kaisercraft "Stains" clear stamp and some black Momento ink.


There is a large pocket at the bottom of this page where I will keep all of my memorabillia for the day. The Yellow ticket is part of that.


Thanks for dropping by
Till next time 
Cheers
Julie

Tuesday, May 19, 2015

Four Cards

I have made a few cards.

This one is a shaker card. I have not made one of these for ages and was inspired to make one when I was watching a video by Vicki Papaioannou here on youtube

I have used Iridescent Medium with a circle stencil on the cardstock at the back of the butterflies and art ingredients Glass Beads (Crystal colour), that have been sitting on my desk for over a month now, to fill them.


I have been thinking about using a die to make a shaped card for a while now and finally got around to it. I have seen this done a number of ways but decided to try this one where the whole shape is cut out twice and the stuck together making a fold at the top of the card. I must say I prefer this to having the flat edge along the top. I made the card shape using Lifestyle Nesting Doily Circles die and the flowers using Leane Creative Multi Die Flower 006


Not sure about this card. It is a window card and when the card is open the front part of it is quite flimsy because of the size of the cutout. I think it needs to be a smaller cut out next time.
I have cut a piece of mauve cardstock with the same die (Spellbinders Classic Scalloped Rectangles Large) as I used to cut the opening in the card and stuck this to the inside of the card so it is positioned perfectly behind the opening. I then cut a smaller piece of white with next size down die and centred that on the mauve. I stamped the daffodils on a piece of watercolour card with Momento Ink. I stamped the large daffodils twice. I coloured them in using Memory Markers. I then cut the 3 separate large daffodils out and foam mounted them on the background image.


This card is a simple male card, matting all patterned papers with black, a bit of twine and a few black gems.


Thanks for dropping by my blog
till next time
Cheers
Julie

Charli's Grade Two Album

Today I am sharing some of my recent work.

Each year I make an album to hold photos and memorabilia from Charli's school year. This is the album for 2015.

I have used Kaisercraft 2 Cool for School paper range.


Page 1


Page 2


The flap at the bottom of the left hand pages lifts up to show more photos


Page 3 A narrow flap is open on the right hand page


Page 3 the pencil swivels to allow a booklet to open on the left hand page


Page 4. A large photo mat sits behind a corner mounted tab on the left hand page


Page 4. The spotty domino swivels to allow that section to open for more photos


Page 5


Page 5. Two doublesided photo mats in the left hand side pocket. A flap opens on the right hand side to give access to another photo mat.


Page 6


Page 6 The window opens on the left hand page and the narrow flap on the right hand page also opens


Page 7. A stack of 3 photo mats in pockets


Thanks for dropping by my blog
Till next time
Cheers
Julie

Wednesday, April 29, 2015

Blog Changes

As a result of the course I did recently at WEA, today I am making a few changes to my blog and trying a few new features. This will be an ongoing exercise as I work my way through the course notes. I have never shared a blog post through Pinterest before so I have done that today, surprisingly easy when you realise it can be done. I have started using Titles so the blog can be searched to find certain posts. I have added a search function and extended the About Me section.


Wednesday, March 18, 2015

Winner Stuck?! Sketches

Lucky me.  I am a winner over on Stuck?! Sketches

With this layout


I won a $20 Voucher from Scrap Much? which is a Canadian Scrapbooking store. Unfortunately the cost of postage to get my prize to me was $50 so I decided to forgo the prize. It was nice to be selected though.

I made this card for one of my students to make at her next class. I have incorporated a bit of metal on the card to give it a more masculine feel.


I have started 2 courses at WEA (a adult learning facility here in Adelaide) One is about Blogging in the hope that I will be able to upgrade my blog and the other is Mixed Media with the hope of learning some new techniques to incorporate into my scrapbooking and off the page projects. I have had one lesson on each subject and so far enjoying them both.

We went to Renmark for the weekend for the Renmark Rocks On Festival. Ray DJ'd Friday night, Saturday afternoon and Saturday night. Very hard work for him, very hectic too.
This photo is of Wendy and I on the Saturday night.


It was a great weekend but it takes so long to get over the late nights and early mornings these days...does that mean I am getting too old for all this Rock and Roll stuff???Never.

Thanks for dropping by
Till next time
Cheers
Julie

Wednesday, February 25, 2015

True Love Layout

Hi everyone

Posting my layout for the sketch challenge over at Stuck?! Sketches I really loved this sketch. I have been meaning to do a layout in this style for some time so this was the little push I needed.
The photo is of my husband and our grand-daughter and was taken at a recent family photo shoot. I think it shows the completely relaxed and loving relationship they have.

I have used an American Crafts paper pad for the patterned papers.

I applied texture paste with white acrylic paint through a stencil to the background. The title and the very small tourquise hearts have a coat of Dimensional Magic, a revived old love.


Thanks for dropping by
Till next time
Cheers
Julie

Monday, February 23, 2015

Jacks 21st Layout and Cards

A few things to share today.

A couple of cards I made for my Saturday class.

This first easel card uses a "Round the Page" punch along with various dies and embossing folders. The small hearts are made with a small punch. A few daimanties added for a little bit of sparkle


This card is a very simple card that I use if I am giving someone a voucher of gift card as a present.
Once again using a border punch and die cuts.
I have added a little bit of ribbon and a paper flower also.
An excellent card at christmas time made with christmas paper and embellishments.


 Inside the card I generally put a tag to attach the gift card to, or write my greeting on.


This double page layout uses a stencil with embossing ink on the background (feathers) then heat embossed with UTEE, a background stamp with distress ink for a bit of added background texture. All of the patterned papers have been distressed around the edges and then inked and the doily has been cut on my Cricut using the Paper Lace cartridge.


I have cut the feathers using Kaisercraft's feather die, 2 in patterned paper and one in chipboard. The chipboard has been covered with embossing ink and then heat embossed with black embossing powder then tied together with some vintage lace.


I have used Dimensional Magic on the title to give it some depth and shine.


Thanks for dropping by
Till next time
Cheers
Julie

Monday, February 9, 2015

Card and 2015 Diary

A post tonight to share what I have been making this week.

First a simple card I made as a sample for the Scrapbooking/Card Making class I run each Saturday at Camelot Studios here in Adelaide.

I have cut some strips of 2 patterned papers, put them through my Big Shot with 2 different embossing folders then inked lightly over the top to highlight the embossed pattern. A strip of plain co-ordinting paper across the card topped with a ticket I have cut on the Big Shot using the Die-Namics "Just The Ticket" die and foam tape. I printed the sentiment on my computer and added it to the ticket. A bit of faux stitching to finish off.


I have spent a bit of time working on making a planner. I have finished the actual construction now I get to decorate it. It is A5 size.

I have bound it using my Cinch and a white spiral binding wire. It has a white "leatherette" heavy cardstock back and front cover with a clear cover over the top of them both. I am not that keen on the way the spiral binding wire has the pages uneven when the book is open so I am going to try to buy some 2" binding wires to replace it. The planner is quite thick, about 3cm so is not as portable as I had first thought I would like. I might take some of the note paper out when I re-bind it as there are 100 note page in there....don't think I will make that many notes


I have created a week to an opening calendar which has room for notes at the end of each week so I can write down my "To Do" list or things I might forget. Each month has a divider at the beginning of it that I am going to decorate and add pockets to keep "things" in.
I need to decide how I am going to date the days, either stamp or just hand write and also not sure about the month tabs, may see if I can buy some already printed. The ones that are currently in there I have punched using the McGill Tab punch and written the months.


After the calendar there are 4 sections of lined paper for things like Notes, Scrapbooking ideas, Tickets for functions that I have to organise and holiday ideas for our trip to New Zealand later this year. They will have tabs too but I ran out of the white card I was using to make them. Each of these sections have a zip lock coloured plastic pocket at the beginning of it for any bits and pieces that I want to keep handy.


So as you can see there is still lots of work to do but that is the idea isn't it........

Till next time
Thanks for dropping by
Cheers
Julie


Thursday, January 29, 2015

Christmas Cards and Birthday Card

It's a whole new year and it has been a very long time since my last post.

I have to admit I did loose a bit of interest in scrapbooking, blogging etc but I have decided to get a bit more involved again and see where that takes me.

I would like to enter a few more challenges and perhaps even try out for a design team or two so it's back into "it".

I did make a couple of Christmas cards ... 2 to be exact.


I made this birthday card for Charli. She turned 7 on 24th January. I got the idea for this one off of Pinterest, a card made by Nicole Heady (www.papertreyink.com). Very bright and colourful for a little girl


Her birthday party had a Mermaid theme so the food was all water related. My job was to make this Puffer fish (another internet find). It was very colourful and very popular with the kids. Not one piece of fruit remained.


I usually make chocolate mud cupcakes for Charli's parties and when some of our friends heard I was making a pufferfish instead they were disappointed to be missing out on the cupcakes so I made a batch of those as well although they had nothing to do with a mermaid theme.


I have made one layout in the last week. I used the sketch from Stuck?! Sketches and created this layout for their challenge. You can find the details and the sketch here.


We had Charli for the day on Tuesday and her and I have started a Art Journal page each (both doing the same thing) so when it is finished I will share it with you

Till next time
Thanks for dropping by
Cheers
Julie