Today's post is to share an art journal page I finished today.
I have created this page for the ring bound journal I created using just 4 jump rings. You can see the journal in the video it is very simple and one day I will make and decorate some covers for it.
The blues/turquoise of the background are acrylic paints
Using Archival and StazOn Inks, I have stamped an assortment of images on top of the paint once it was dry
The next background layer is Modelling Paste through a couple of stencils
The seaweed is olive mulberry paper torn into strips and attached using Mat Medium
The fish were hand drawn on white cardstock and coloured using Sharpies
These were also attached to the page using Mat Medium
An Art Studio 0.4mm Black Permanent Marker was used to add all of the detail to the seaweed and the fish
Each of the fish received a very thick coat of Glossy Accents so they would have that wet look.
The border was drawn using a Viva Pearl pen in Black
The quote is from Art By Marlene's Artsy Arabia black & white sticky quotes pad.
For all of the details check out my video
Thank you for spending part of your day here with me today
The reason I chose the suitcases is because the gift my daughter gave me was a night in one of the inner city hotels here in Adelaide and I did pack a case to do that. My husband and I spent the night at the Adelaide Fringe and then went back to our lovely hotel. It was very pleasant.
These are the details I will add to the journalling tag.
Here is my process video if you would like to watch this page come together
I hope you have enjoyed the 8 week competition and if you have managed to create a layout for each of the weeks you will be in the running for one of the three great prizes up for grabs.
Good luck.
Thank you for spending part of your day here with me today
All of the papers have had the edges inked using a Kaisercraft ink cube, colour Bark.
I started by giving my Dusty Attic - Start Banner chipboard a coat of acrylic paint. The colour is Goldenrod which is a mustardy yellow. When the paint was dry I added a coat of Uniquely Creative's Gold glimmer pen.
My 8" x 6" photo was matted on a piece of 8.25" x 6.25" coordinating cardstock
I used a bread & butter plate from my dinner set to draw the faux stitched partial circles above and below the patterned papers.
I also added faux stitching to all of the patterned papers, chipboard and sticker embellishments
The title was cut from the same cardstock I used to mat my photo using my Scan N Cut. I inked the edges, attached it to the bottom section of the layout and added faux stitching.
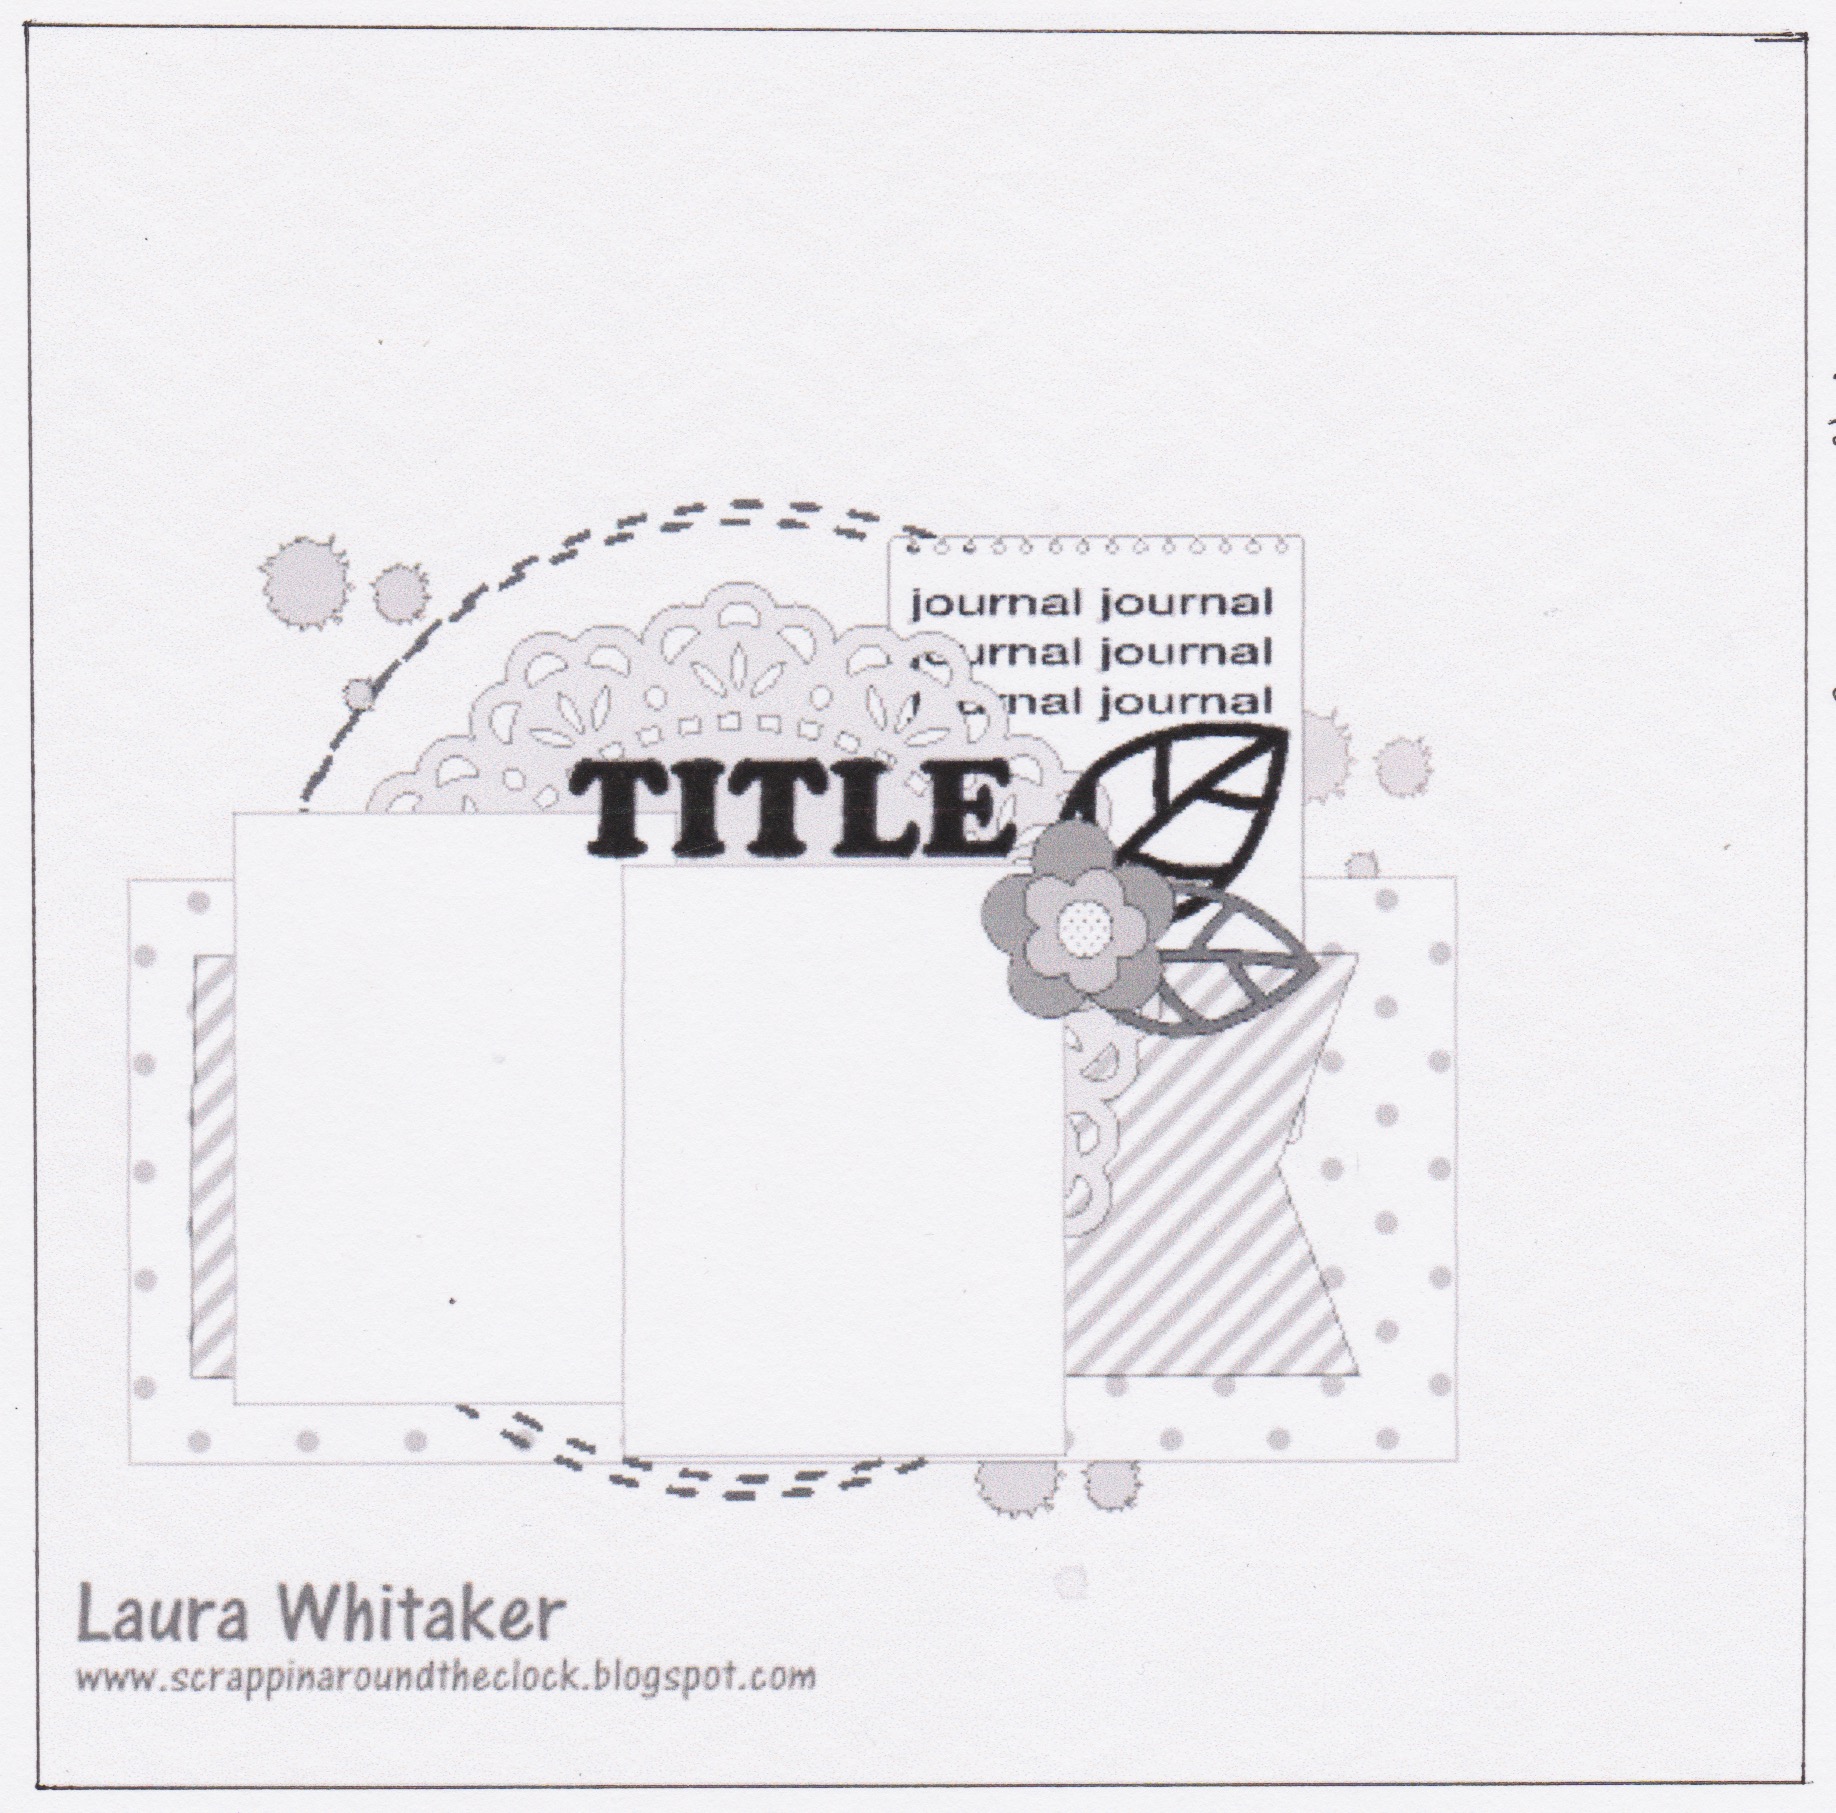
I have adjusted the sketch to accommodate my larger photo, I have added the torn paper at the top and bottom of the layout and I have also added the chipboard banner to the top of the layout. I moved the title to the bottom of the layout because it would look too cramped at the top with all of the other things I have added there. I also deleted the doily for the same reason.
Here is my process video if you would like to watch it.
Thank you for spending part of your day here with me today
I don't do vintage very often but here is my layout.
I have chosen two paper ranges from Kaisercraft to complete this layout,
Memory Lane and Always & Forever.
All of the papers on this layout have had the edges distressed with my distressing tool and then inked with a Versa Colour black ink cube.
I cut a 1" frame from the burlap look paper in the Memory Lane paper pad and topped that with a piece of white cardstock that I trimmed to 11.5".
I used Kaisercraft's 12" Doily stencil and Mont Marte Modelling Paste to create a risen doily design on the light green wood grained paper from the Memory Lane range.
I created splatters on the background using Dylusions Dirty Martini spray ink,
Glimmermists Iridescent Gold and Black Magic
Glimmermist's Cherub Pink spray was dribbled down from the top and bottom of the page, to add a bit more colour to the background.
I have layered my 5.5" x 3.5" photo on five layers of patterned paper from both ranges of paper, with each layer decreasing slightly in size.
I hand cut the chevrons from some of the burlap patterned paper that I used for the page border.
The flowers down the left hand edge of the layout were fussy cut from one of the papers in the Always & Forever paper range.
The green flowers were fussy cut from a page in the Memory Lane range.
A tag was cut using a stitched tag die, an eyelet attached and some white crochet cotton
threaded through the eyelet.
A piece of cheesecloth/muslin was added at the bottom of the photo along with a few items from the Always & Forever collectables pack.
Doodling around the edge of the layout and all of the elements that decorate the page finish this vintage layout off.
Here is the process video
Thank you for spending part of your day here with me today
This week we are in China and the inspiration for the week is food, the technique is embossing and the optional kit item is bling.
My layout uses a photo taken at a family picnic at the beach many years ago, in fact it was January 1961.
I am in the photo (extreme left) and I would have just turned 8.
I have used a sandy coloured cardstock frame for the base of the layout and a piece of 11.5" x 11.5" white cardstock as the background
I have used the half flower from Dylusion's Sunshine Girl stamp set and stamped with Gold pigment ink three time on the right hand side of the white cardstock.
There was a piece of chipboard in the optional kit that was in the shape of railway tracks. I cut these up so they were various shapes and attached them around the edge of the photo. The flowers were then added around the photo. A gemstone, from the optional kit, was added to the centre of each of the flowers.
The bright colour I have chosen to use is the bright pink cardstock. I have a 1/4" strip at the top and bottom of my layout, the photo is matted on it and the title is cut from it.
These were attached to a piece of white cardstock with the Sunshower at the top and the Rosebud Border at the bottom.
Two 1/4" strips of the bright pink were attached to the layout, one at the top and one at the bottom.
Along side of the pink, I ran a row of 1/4" double sided tape. I then rubbed Gold Fab Foil on top of this tape so the foil would attach to it giving me a foiled strip along the top and bottom of my layout.
My photo is 5" x 7" and had a white border around it. I trimmed the border to 1/8" all around then matted the photo onto more of the bright pink cardstock with a 1/8" border all around except for the bottom which is torn on a slight angle.
I tied the ribbon from the optional kit to the left hand edge of the photo.
I mounted the photo onto some craft foam before attaching it to the layout.
I have added some cheesecloth/gauze to the front panel and some turquoise spotted ribbon on top of that.
I cut a 1.5" x 5" piece of white cardstock and attached a 1.25" x 5" piece of the same patterned paper on top of it. I added some chipboard scraps to the back of this panel before adding it on top of the ribbon so it was slightly off set.
A few flowers and leaves from my stash were added using my hot glue gun so I could be sure they would stay in place. I have added some clear gems to the flower centres for that lovely sparkle
These were then folded in half and attached to each other to create a square shape. To do this you attach half of each circle to the circle next to it making sure to keep your edges square with each other and straight. (You can see how this is done in the video. It is a bit hard to explain the process)
I attached some 5/8" satin ribbon to the back of the card making it long enough to come around to the front of the card and tie a nice bow.
I used my Spellbinders Standard Circles Small dies to cut a 3", 2.5" and 2" circle from three different sections of the Bee Arty Find Paradise - Recharge paper.
I cut these circles in half.
I cut a piece of the pink section from the Bee Arty Find Paradise Recharge paper to 7/8" x 5" then matted that onto a piece of white cardstock so there is about a 1/16" white border all around the pink. I added some chipboard scraps to the back of this panel.
I then added my circle halves to the front of the card starting with the largest circle and working my way down to the smaller aligning the top circles to the right and the borrow circles to the left. There is about a 1/2" gap between the top and bottom circles.
The pink panel was attached then so it covered that 1/2" gap between the circles.
I die cut the word Celebrate from the darker patterned paper and attached it to the pink panel along with a pink paper flower and a pink flair from the optional kit
This is the video that shows how these cards came together.
Thank you for spending part of your day here with me today.
The paint on my layout is the white acrylic paint that I have sponged through Kaisercraft's Lattice stencil to the whole background
I also used Turquoise acrylic paint to colour my chipboard which came from Dusty Attics Mini Captions #1 set and some white cardstock to cut my title from.
I have fussy cut the leaves from printed PVC fabric. The PVC fabric makes it very easy to attach the fabric to the page without getting in a mess with the glue showing through.
I used a bright pink cardstock to add a torn strip to the bottom of the layout and to mat my photos.
I used Kaisercraft's Alphabet Upper Case dies to cut my title, which is the name of the island we were on when these photos were taken.
The title was underlined with a fine black pen
The lace from the optional kit was attached at the top of the top photo and the bottom of the bottom photo.
Underlining the title and a scribbly border finish this page off.
Here is the process video
Thank you for spending part of your day here with me today
I hope you will check out the competition, it is lots of fun seeing everyone's interpretations of the themes for each country.
Today I am sharing the layout I created for week 3 of the 8 week competition at Mystical Scrapbooks.
The challenge is Around the World in 8 Weeks and this week we are in Canada.
There is a colour challenge - use red and white
The technique is cutting- it can be fussy cutting, die cutting or using a cut file on your electronic cutting machine
The kit item is Maple leaves
This is my page
I have used my Scan N cut to cut Christmas Ornaments in black cardstock. I have backed this file with the red and white papers that the challenge asks for.
The red paper has gold stars on it and I have used gold mirror card for the metal sections at the top of each ornament
I have also used my Scan N Cut to cut the title from black cardstock.
The photos are matted onto the gold mirror card.
The maple leaves from the kit are attached at the bottom right of the larger photo.
I used a black Sharpie marker to draw a scribbly border around the whole page.
You can see the process video by clicking on the image below.
Thanks for spending part of your day here with me today