Showing posts with label handmade flowers. Show all posts

Sunday, July 17, 2022

Denise Boddey DT Four page album

Hi there

Today's post is about a mini album I created using Denise Boddey's
Day Dream Story Book paper range.

I have a video that I will add at the bottom of this post.


To create this album you need 4 sheets of 12" x 12" patterned paper.
The paper I have used is double sided.
If you make this album you could add as many pages as you wish

The papers I used are Dreams, Day Dream, Our Story and Princess for a Day.

For each page:-
score at 6" with the paper right way up,
flip to the left and score at 9" (this will be at the bottom of the page)

Select the paper you want for the front cover,
use glue to attach the back outside panel of this paper to the front outside of the next panel.

Continue doing this until all pages are attached.
If you prefer you could only glue around the edges of each page and create pockets between each page.

I cut a piece of patterned paper 1" x 9" to create the spine cover.

Next I used my corner rounder on the top and bottom outside edges of each page.

Run a small bead of glue along the outside edges of the pocket on each page.
You could run glue along the centre fold too if you prefer.

I used Vintage Photo Distress Ink and my distressing tool to ink around the edges 
of each page and pocket edges

I created eight tags to go into the pockets.

I used 300gsm white cardstock to create the tags, they measure 4 1/2" x 8 1/2".
The patterned paper has been cut to 4 1/4" x 8 1/4".
I inked the edges and attached the patterned paper to the front of the tag.

I added an eyelet to the top of each tag using my Crop O Dial and
added some white seam binding through the eyelet.


Using my Big Shot I die cut flowers using patterned paper and pale pink velum 
and Couture Creations CO724161 die.

I cut some leaves using Honey Bee's Lovely Layers Heart Vine and Uniquely Creative Little Leaves dies

Using Uniquely Creative Island Texture die and the same papers/velum I cut some background fillers

Other embellishments I used were lace and gauze/cheese cloth and Ali Lattice chipboard panel

You will see the embellishing in the video.

I hope you try making this little album. 
It is easy to make, a good size and can be changed and embellished in so many ways.


Have a great day
Till next time
Stay safe
Hugs
Julie


Sunday, June 5, 2022

One Page Wonder for Denise Boddey Designs

Good morning

Today I want to share a great little one sheet wonder using 


Cut your sheet into 2 pieces 6" x 12"

Score each piece at 5" and 10"
Use a corner rounder on the two corners of the 2" section

Use double side tape or glue to attach one of the 2" sections 
to the outside front of the second piece applying tape/glue to two sides and the bottom.
It is easy to see this process in the video which is below

I used my Crop-O-Dial to add an eyelet to the 2" section on the right hand end of the folder.

I threaded ribbon through the eyelet and wrapped it around the album
 a couple of times and tied a bow.


I made an assortment of embellishments for this album

I used 
Craft Barn Primrose Die
We R Memory Keepers Envelope Punch Board
Martha Stewart Score Board
Die-namics Just the Ticket die
Finniss Dies - Invitation 1 die
Denise Boddey Chipboard Arch

You can see how I used all of these things to decorate my album in my video


This is a fun, easy project and I hope you will try it out.

Thank you for spending part of your day here with me today
Until next time
Stay safe
Hugs
Julie


Sunday, March 20, 2022

DT projects for Denise Boddey Designs

Good morning

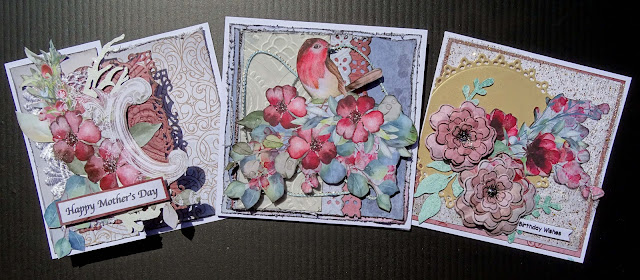
Today I am sharing three cards I made with the beautiful 


The first card is a Z fold card


I create all of my own card bases using 300gsm smooth white cardstock.

For the first card I cut a piece of cardstock 10 1/2" x 5 1/4"
I scored it at 2 5/8" and 5 1/4"
The card is folded in half on the 5 1/4" score and the fold at the 2 5/8" score is a valley fold.

All of the patterned paper on this card have had the edges distressed 
with my distressing tool and inked with a black Versacolor Ink cube.

I cut three pieces of Song Blossom
 1 @ 5" square
2 @ 2 3/8" x 5"

These were attached to the three sections you can see when your card is open.

I used my Spellbinders Decorative Labels 8 and Enchanted Florals to cut a panel.
I ran this panel through my Big Shot with Couture Creations 
Flamingos & Hedgehogs embossing folder.

I swiped my black ink cube over the front of this panel to help the design stand out a little more.

 The panel was then attached to the front for the card so it over hangs the 2 5/8" folded line.

I trimmed a piece of scalloped lace and attached that overlapping the left edge of the rectangular panel.

I have painted a piece of chipboard white and added that on top of the lace.
A layer of clear Wink of Stella added a little sparkle to my chipboard.
I am not sure of the name of this chipboard, it looks like a sea grass. I have cut it in half to use.

I have fussy cut images from Natures Romance and Song Blossom
to embellish further. These were added on top of the chipboard.

The sentiment is computer generated, it is matted it onto a piece of Enchanted Florals 
and attached it to the card front with a piece of cardboard behind it.


The second card is an easel card


The card base is the same size as the previous card and scored at the same measurements.

I have also cut a 5 1/4" square piece of the same cardstock.

Fold your card in half at the 5 1/4" score and a mountain fold at the 2 5/8" score line.

Flatten the front of the card base, and with your card sitting right was up,
apply glue to the right hand half of the the front section.

Lay the 5 1/4" square of cardstock directly on top of the cardbase, 
being sure to line up all of the edges.

Now we have our cardbase ready to decorate.

All of the edges of the patterned papers on this card have been distressed
in the same way as the first card.

I cut two 5" squares from Garden Letters and two pieces 2 3/8" x 5" from Natures Romance

One of the 5" squares was attached to the front of the card 
and the other was attached to the inside back panel.

The two smaller pieces were attached to the inside folded section of the card.

I also cut another piece of the Garden letters 4 3/4" square.
I used the reverse side of the paper and attached it to the front of the card

I used a Martha Stewart punch to punch along 
one of the longer sides of a 3 1/2" x 4 3/4" piece of Enchanted Florals 

I cut a piece of the Natures Romance 3" x 4 3/4" 
and punched along one of the longer edges with the same punch.

 I layered these on top of each other lining the left hand edges up with each other 
with the punched edge on the right.

These were then attached to the front of the card.

I used the Couture Creation's Flamingos & Hedgehogs embossing folder 
to emboss a 2 1/4" x 4 3/4" piece of velum and attached that on top of the previous layers,
once again lining up the left hand edges.

A piece of blue and gold braid was attached on top of the panel so it curled around the panel randomly

My main embellishment was fussy cut from Song Blossom and attached to the front of the card with cardboard behind it

I added a light coat of Glossy Accents to he flowers in the image to give it a little shine.


The sentiment is from Uniquely Creative and is matted on a piece of the Enchanted Florals paper.

This was attached to the inside back of the card with a piece of cardboard behind it, this is what holds the card open for display

I added a few drops of Nuvo Drops - Morning Dew 
randomly on the fussy cut image to finish this card off.

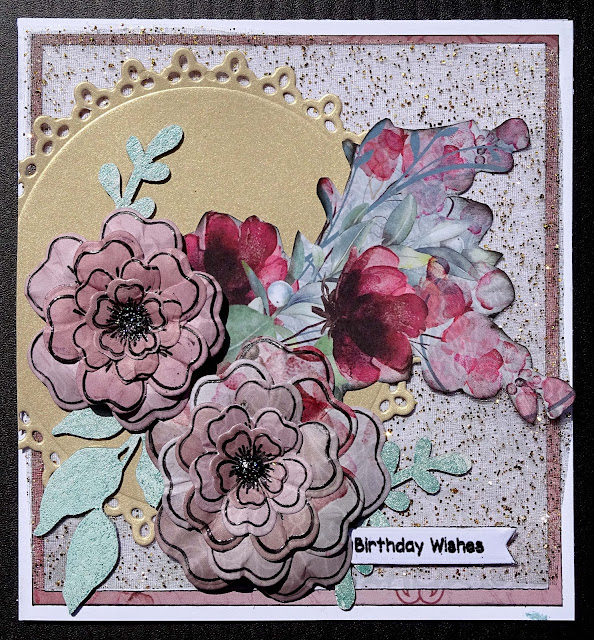
Card 3

This is a 5 1/4" square card


I cut my cardbase 10 1/2" x 5 1/4", scored and folded at 5 1/4" on the long side.

The patterned papers on this card have the edges inked with a black Versa Color ink cube.

The base layer for this card is a 5" piece of Enchanted Florals.

The next layer is a 4 3/4" piece of Natures Romance

I have cut a piece of tulle that has gold particles in it to 5" square and attached that next.

Lifestyles Nesting Doily Circles die and pearlised gold cardstock 
were used to create a doily for my next layer.

I have painted some chipboard leaves from Botanicals and Delicate Branch
with pearlescent water colours.

Before assembling them I used my flower shaping tools to give them some dimension.

I have fussy cut a section from Song Blossom to be the foundation for my embellishment cluster.

The flowers and leaves were added next.
The flowers are mounted on cardboard.

The heat embossed sentiment was added next.

Finally I added Nuvo Glitter Drops - Midnight Sky
to the centre of each of the flowers.

Here is my process video. I hope you enjoy watching it


Thank you for spending part of your day here with me today
Till next time
Stay safe
Hugs
Julie


Saturday, March 5, 2022

Five hand made flowers using dies

Good morning

Today I have a quick post to share with you a video I have posted
 showing how I used five assorted dies to create five flowers. 

This is the second video I have posted showing how to create beautiful flowers using dies.
You can find the first one here.

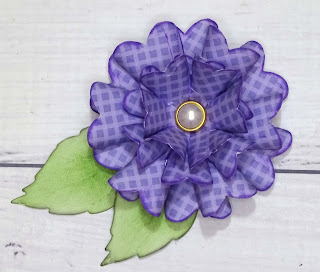
These are the flowers I created in today's video


I hope you enjoy my video.

If you do I would love it if you would click the like button 
and subscribe to my channel if you have not already


Thank you for spending part of your day here with me today
Until next time
Stay safe
Hugs
Julie


Tuesday, March 1, 2022

Mystical Scrapbooks March Challenge

Hi there.

Today I am sharing the layout I created for the March challenge over at Mystical Scrapbooks.

The theme over there this month is mood boards and there are two of them to choose from
 or maybe even create a layout for both of them.

This is the moodboard this layout was created for.


This is my layout


The background for this layout started life completely different to how it links now.

I gave my white cardstock a coat of white Gesso.

Originally I used Distress Inks and plastic packaging to colour where the red is now. 
I used Barn Door but when it dried it was more pink than bright red.

Not happy with the colour I used a sponge to dab red acrylic paint over the top of the ink.
I then splattered white acrylic paint over the red.

The flower frame is a cut file from Page Evans

I stamped a text stamp with StayzOn Jet Black ink all over the cut file.

I used Distress Ink Mustard Seed and a wet brush to colour the cut file and then
Carved Pumpkin and a fine brush to add a little detail to the centre of the flowers.

I punched a few circles from white cardstock, stamped them with the same stamp and ink
to fill the holes in the centre of the flowers.

I used Art Glitter glue to attach the cut file to the page 
so it sat over the painted section of the background.

I am using a 6" x 4" photo, I filed around the edge of the photo with 
an emery board before matting it onto some orange cardstock.

I also added some cardboard to the back of the mat.
This assembly was then attached to the layout.

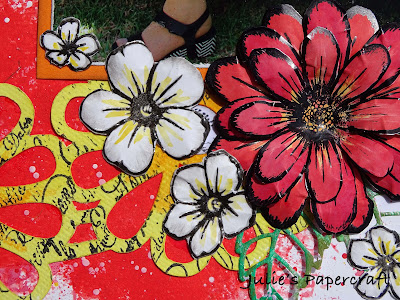
I used Heartfelt Creations Daisy Patch Flowers to stamp and heat emboss three layers of the flower.
I used Mustard Seed and Barn Door Distress Inks to colour the flower.

I also stamped and heat embossed Picket Fence - Flowers for the Picking.

I used my flower shaping tools to shape all of the flowers.

All of the flowers were attached to the layout with liquid glue.


I trimmed my white background down to 11 1/2" square and matted it 
onto a 12" piece of black cardstock to give it a nice dark border

The title was die cut from black cardstock using my 
Kaisercraft DD700 Alphabet Upper Case dies
and attached using my t-ruler and liquid glue.

I used my fountain pen to draw a double scribbly border around the page and the flower centres

I have a process video you might like to watch


Thank you for spending part of your day here with me today.

Till next time
Stay safe
Hugs
Julie


Sunday, February 20, 2022

Making flowers using dies

Good morning

Today I am sharing a video showing how I create five flowers using an assortment of dies.

The shaping techniques I use on these flowers can be used on any fussy or die cut flowers.

You will find links to most of the products I use to make these flowers in the video description box.

These are my flowers


Hope you enjoy watching my video.


Thank you for sharing part of your day here with me today

Till next time
Stay safe
Hugs
Julie


Sunday, February 6, 2022

Denise Boddey DT album flip through

 Good morning

Today I want to share a mini album I created using Denise Boddey Designs Elegance patterned papers.

The album started life as an accordion album.
I altered the album by adding a spine and assorted flaps, pockets and a hand made envelope.

You can see that video here

All of the papers have had the edges distressed using my distressing tool 
and then inked with a VersaColor black ink cube.

Each page has a top opening pocket with a photo mat.

I have also used some velum, made some flowers using Craft Barn Stamp/Die set 
and created the tags for the album using Uniquely Creatives Tags Tops & Tails.

Lace from my stash helps to decorate the front of the album.

Here are some photos

Album Closed

Album Open


Closeup of Front Cover


Front Cover


Page 1


Page 2


Page 3


Page 4


Page 5


Page 6


Page 7


Page 8


Back Cover


The papers I have used are:-

Grace


Style


Chic


After the Rain


Refined


and the chipboard is


Delicate Branch


Here is my process video. I hope you enjoy it.


Thank you for spending part of your day here with me today


Till next time

Stay Safe

Hugs

Julie


Friday, January 7, 2022

Cards using Prima's Nature Garden 6" paper pad

Good morning

Today I am sharing a couple of cards I made using Prima's Nature Garden paper collection.
This is a very old collection and I don't think it is still available.

My aim with these cards is to use items from my stash

Both of the cards are 4" x 5 7/8" and cut from 240 gsm smooth white cardstock


Let's start with the first card


I have used two sheets of the same patterned paper for this card.
I have cut a piece 3 7/8" x 5 3/4" for the background,
a piece 2" x 4" and a piece 1" x 3" to make the fishtail pennants.

I also cut white cardstock to mat the pennants.
These measure 2 1/8" x 4 1/8" and 1 1/8" x 3 1/8"

I have inked around the edges of all of the patterned paper and cardstock 
with a Versa Color Cocoa ink cube.

The background patterned paper is attached to the card-base using double sided tape.
A layer of craft foam was attached to the back of the pennants 
before they were attached to the card front. The thinner pennant overlaps the wider one.

A strip of white lace was attached under the thinner pennant at the same time 
it was attached to the card front. I used Art Glitter glue to do this.

I used my Tim Holtz Tattered Florals die to create the flower on this card.
Here is the showing how I created this flower.


A piece of cheese cloth and a black & white Baker's Twine bow 
were added under the flower. It was attached using hot glue.

The sentiment is chipboard that has had a coat of white gesso.
I then coloured it with the Cocoa ink, this did not stand out enough 
so after I had attached it to the card I swiped over it with my black ink cube.


For the inside I cut a piece of the same patterned paper 3 7/8" x 5 3/4", inked the edges with Cocoa ink and used double sided tape to attach it to the inside right panel of the card.

I stamped happy birthday using Scrapbook.com's Happy birthday to You stamp
with Versafine's Onyx Black Ink onto white cardstock. 
I then used my heat tool and Clear Embossing powder to heat emboss the sentiment

I trimmed the cardstock down, inked the edges and attached it in the centre of the patterned paper.

I had a flower that was left over from a previous project, it was cut using Cheery Lin's Chrysanthemum Strip die and white cardstock. I attached the flower
 and added a little Nuvo Vintage Drops in Peachy Keen to the centre just to finish it off

The second card


All of the papers and cardstock on this card have had their edges inked with a black Versa Color ink cube.

I chose two patterned papers from the pad for this card.
I cut one 3 3/4" x 5 5/8" and the other 2" x 5 5/8"

A piece of white cardstock was cut to 2 1/4" x 5 5/8" to mat the smaller piece of patterned paper.

I added some scrap chipboard to the back of this panel.

After I had attached the large piece of patterned paper to the front of the card base I used some Art Glitter glue to attach half a paper doily so the edge of it lined up with the right hand edge of the card front.

The patterned paper panel was then attached so that it slightly overlapped the edge of the paper doily

A strip of lace was attached to the centre of the panel using double sided tape.

To embellish the front of the card I stamped all of the flowers and leaves in 
Heartfelt Creations - Botanical Rose stamp set onto smooth white cardstock

To colour the flowers I used Distress Inks in Victorian Velvet and Bundled Sage and 
Distress Oxide inks in Speckled Egg and Tattered Rose

I smudged my inks onto an acrylic block and then used my water brush to 
add the colour to the stamped images.

I then fussy cut them using my spring assisted scissors

I added Nuvo Jewel Drops in Sea Breeze to the centre of each flower

I had an oval chipboard frame from Imaginarium Chipboard.
I gave it a coat of gesso and them coloured it with the 

These were all attached to the card front using hot glue

The sentiment is from Uniquely Creative's Ocean Breeze Mini Cut a Part sheet.


For the inside I cut two strips of the same patterned paper I used
 as the background panel on the card front to 1" x 5 5/8", 
I attache one strip to each side of the back inside panel.

You will find my process video below


Thank you for spending part of your day here with me today

Till next time
Stay safe
Hugs
Julie